Steinway Pianos, Part 2

My Steinway

The serial number in my Steinway upright piano (13175) dates it to 1866. In fact, the metal case found in this piano was patented on June 5th of that very year (according to the engraving on the plate). The patent reads:

Patent 55,385, William Steinway, dated June 5, 1866, Improvement in Piano-Fortes. This patent claims as new “The use in piano-fortes of a metal case cast in one solid piece, consisting of the plate a, braces b, rafters or brace-frame c, and a connecting piece or flange running round on three sides of the case and supporting the regulating apparatus, leaving one side open for the insertion of the sounding-board with its bars and bridges.”

Does this mean that the Steinway piano which has come to me was one of the first upright pianos with a cast iron frame? Wow! It’s certainly one of the heaviest of the 20+ pianos my sons and I have moved!

Another thing I recently learned is that Steinway began building pianos with 88 keys in 1868. I was curious, so I went back to my workshop immediately and counted—sure enough, my piano had only 85 keys, which was common in the 19th Century.

Steinway published their first illustrated catalog in 1865, just one year before my piano was built.

What I Did with It

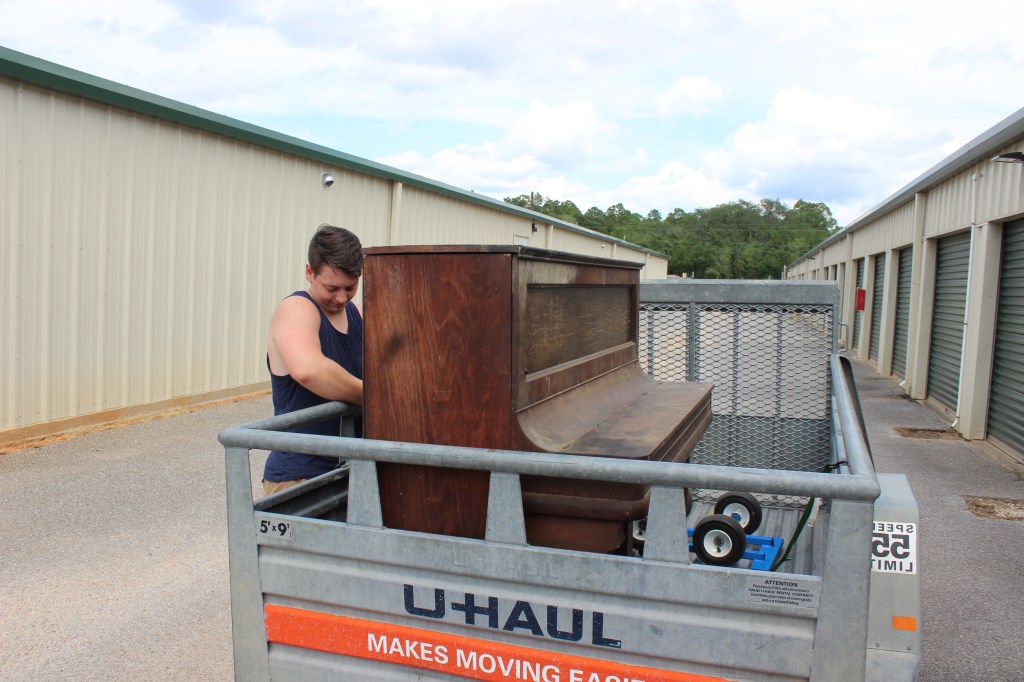
When I had accumulated twelve pianos, I decided twelve was enough. I had more empty cases than I had room for, and enough action pieces to keep me going for years to come. But then someone approached me, saying, “I have an old Steinway. Someone started a restoration on it, but never finished, and now it’s too far gone. Would you be interested?” Would I be interested? Who can so no to a Steinway? A few days later my son and I showed up with a trailer, and we gladly took that rugged old piano off his hands. Incidentally, this man is now my choir director, and I enjoy keeping him apprized of what’s going on with his contribution.

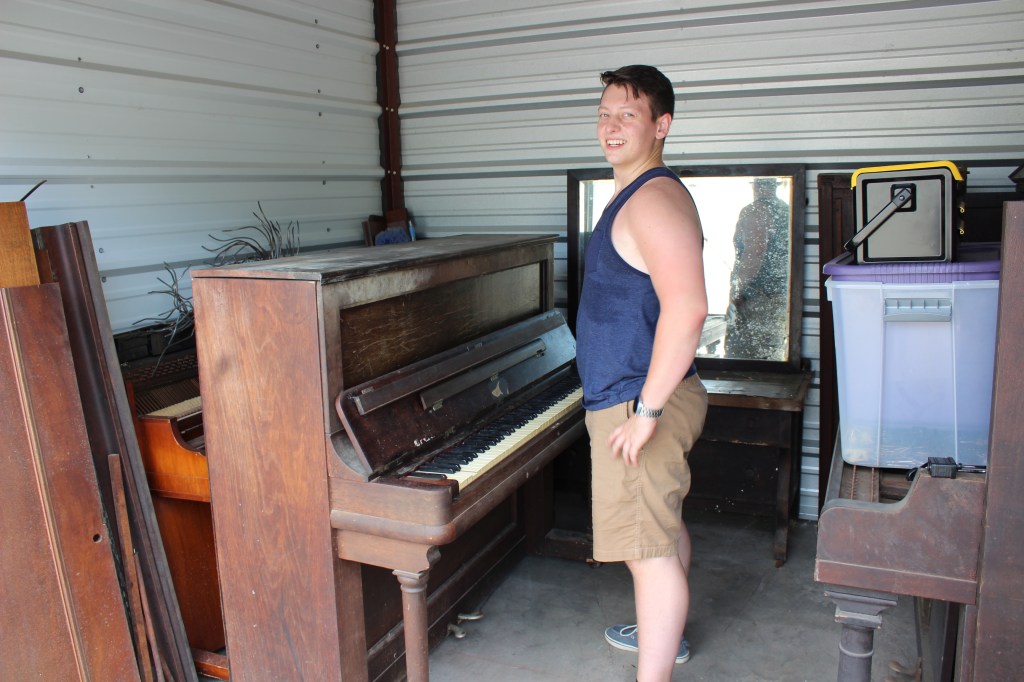
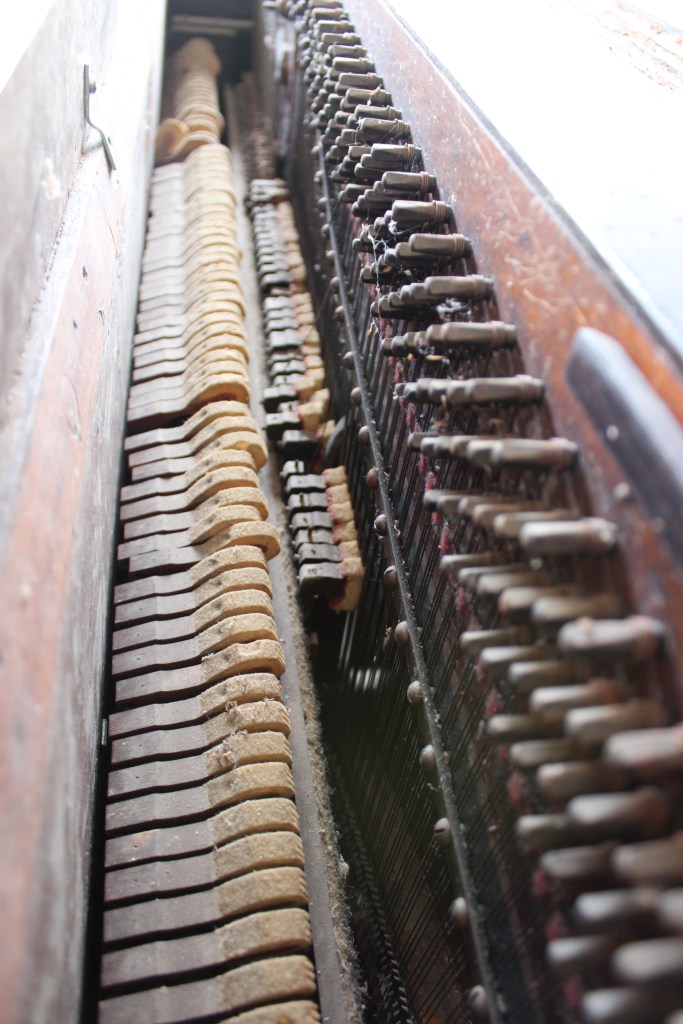
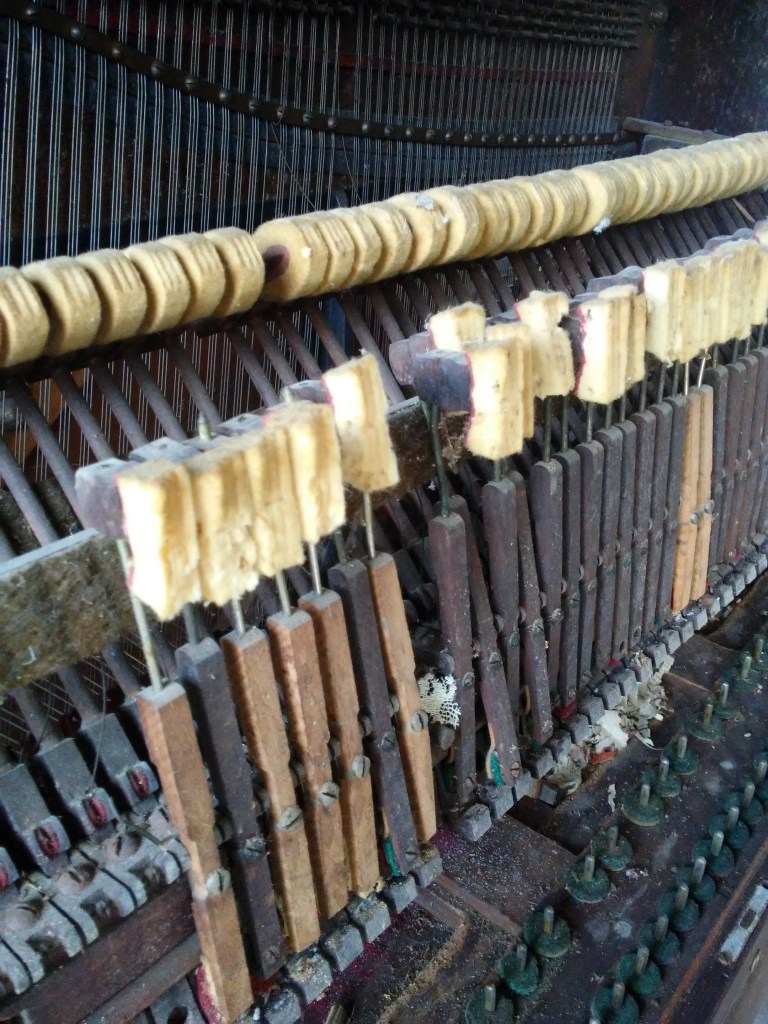
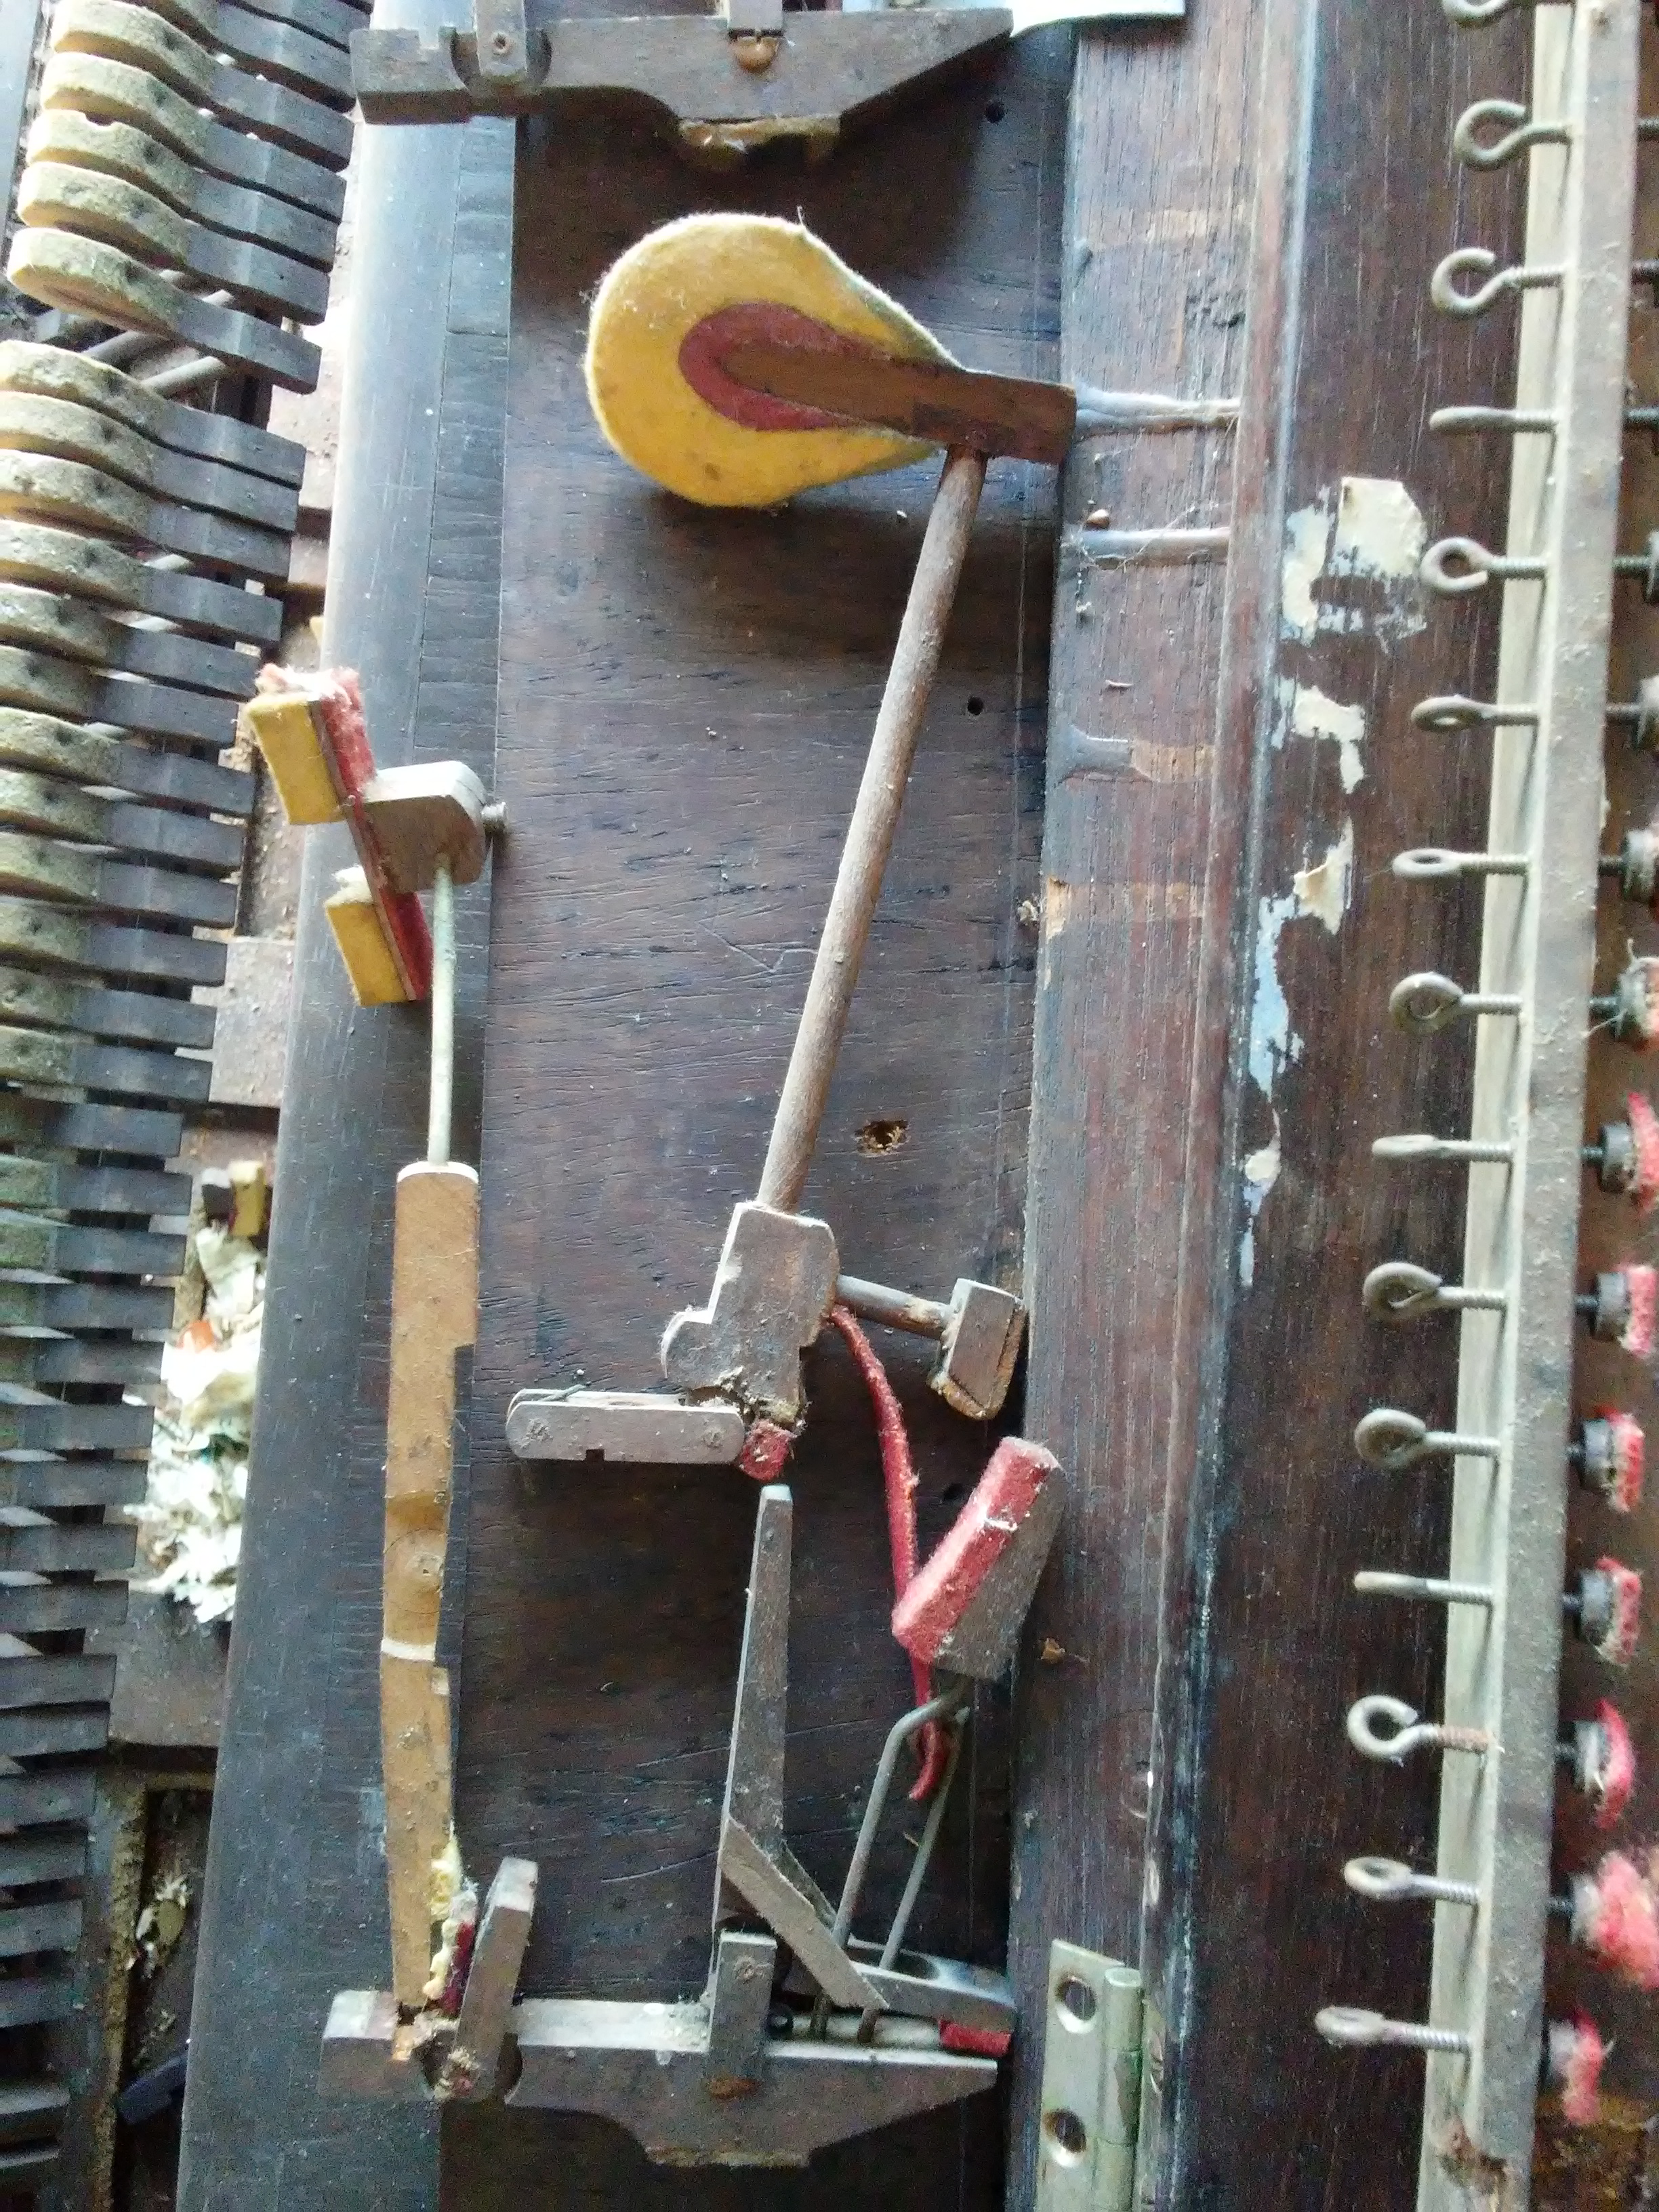
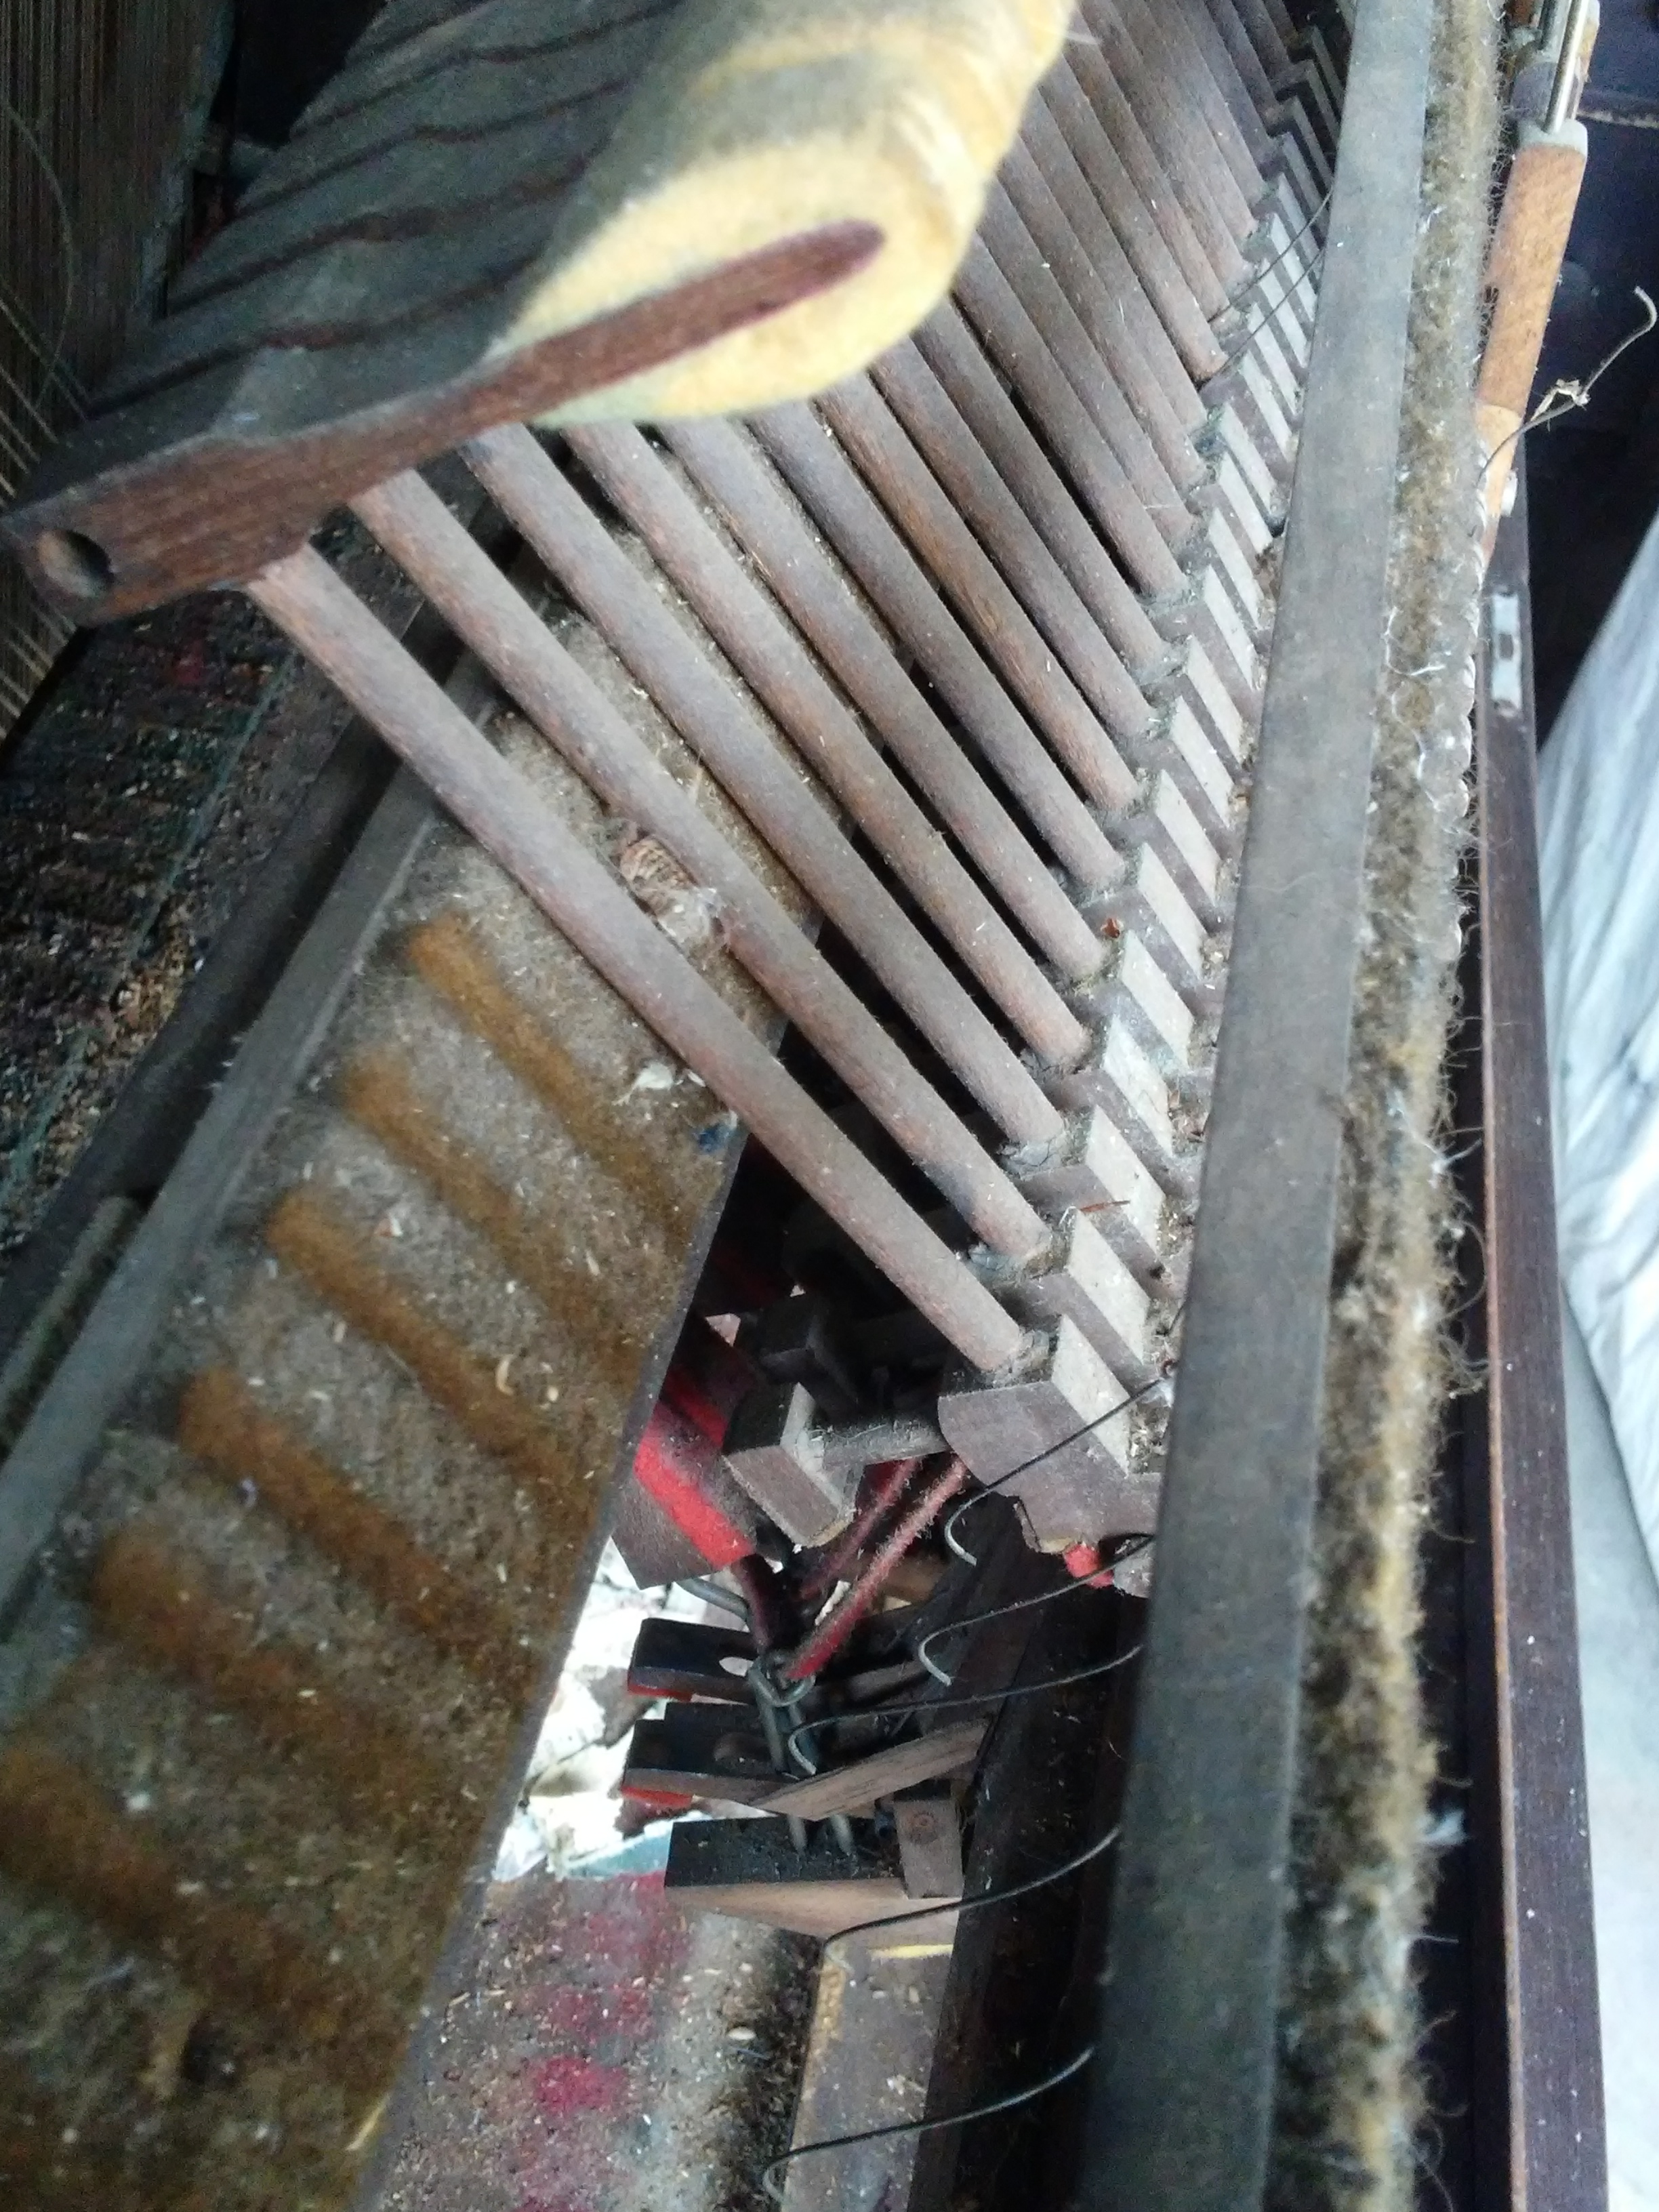
When he said it was too far gone for restoration, he wasn’t kidding. The finish was very badly damaged and dried out; the veneer was peeling in several places; the action pieces were filthy dirty, and several were dry-rotted and broken; and the name had been removed from the fallboard when someone was preparing it to be stripped and refinished. Immediately I went online to see if I could find a replacement for the fallboard label. Indeed I found it. . .and paid $50 for it. Not long after that, I had cause to praise God for leading me to look for the label on that exact day; for the very next day Steinway revoked all rights to distributors to sell the labels. They didn’t want to the run the risk of people buying the labels and placing them on pianos not built by Steinway. I get that.

The label I purchased is still carefully preserved in the packaging, as I’ve still not gotten around to refinishing the fallboard. But when I do, it will become a wall-mounted shelf, and will be available for sale.

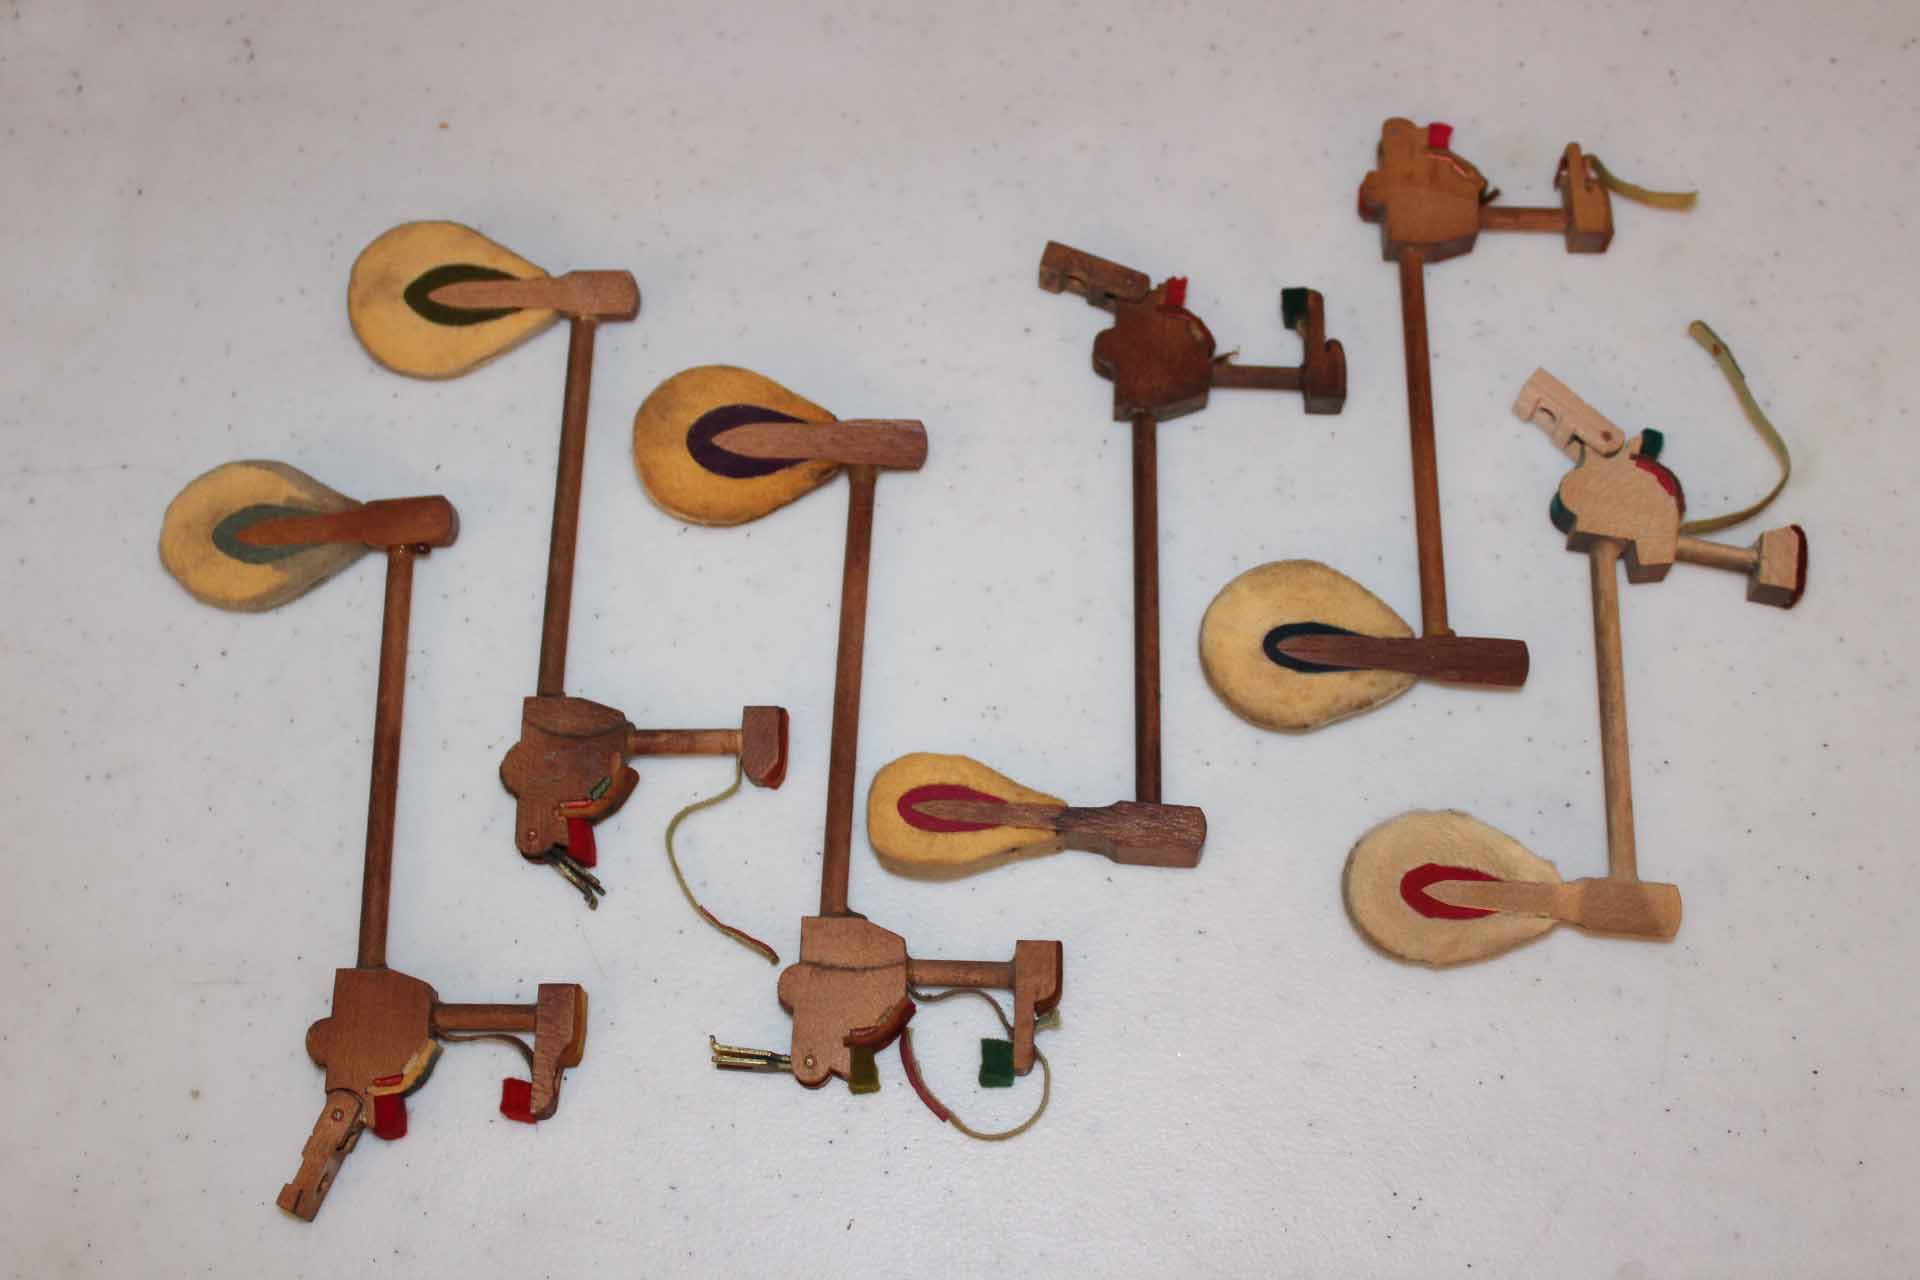
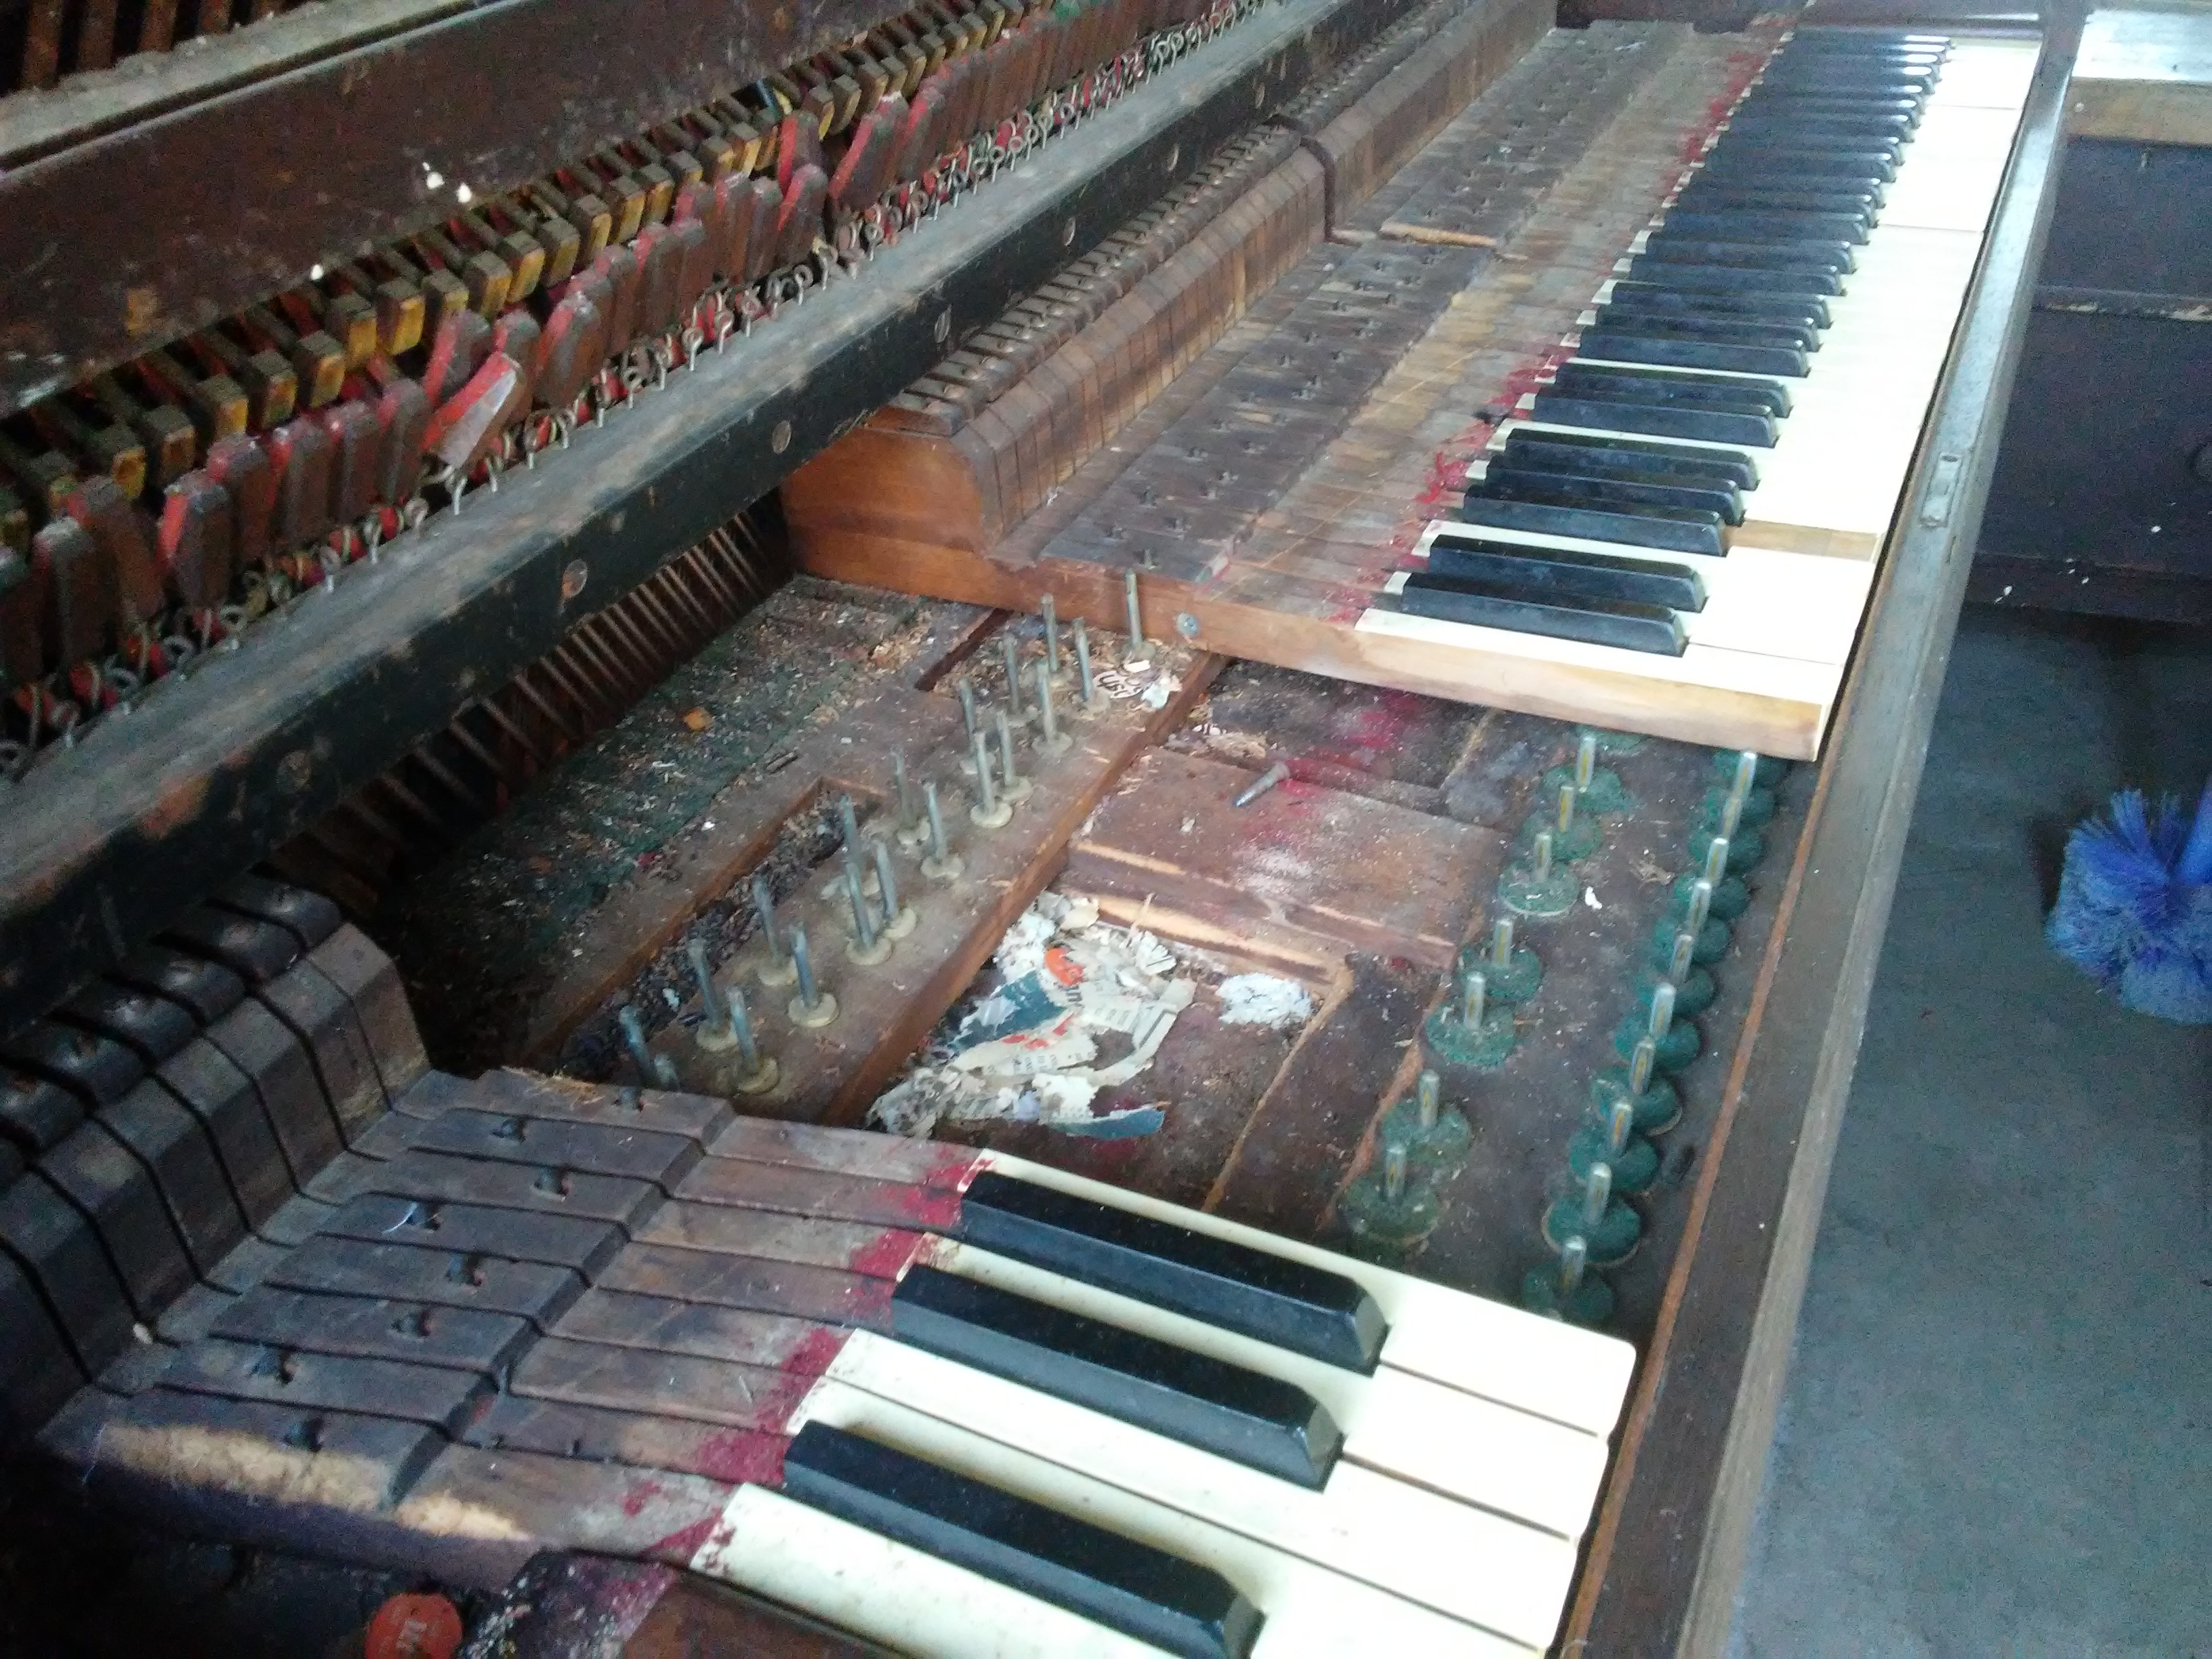
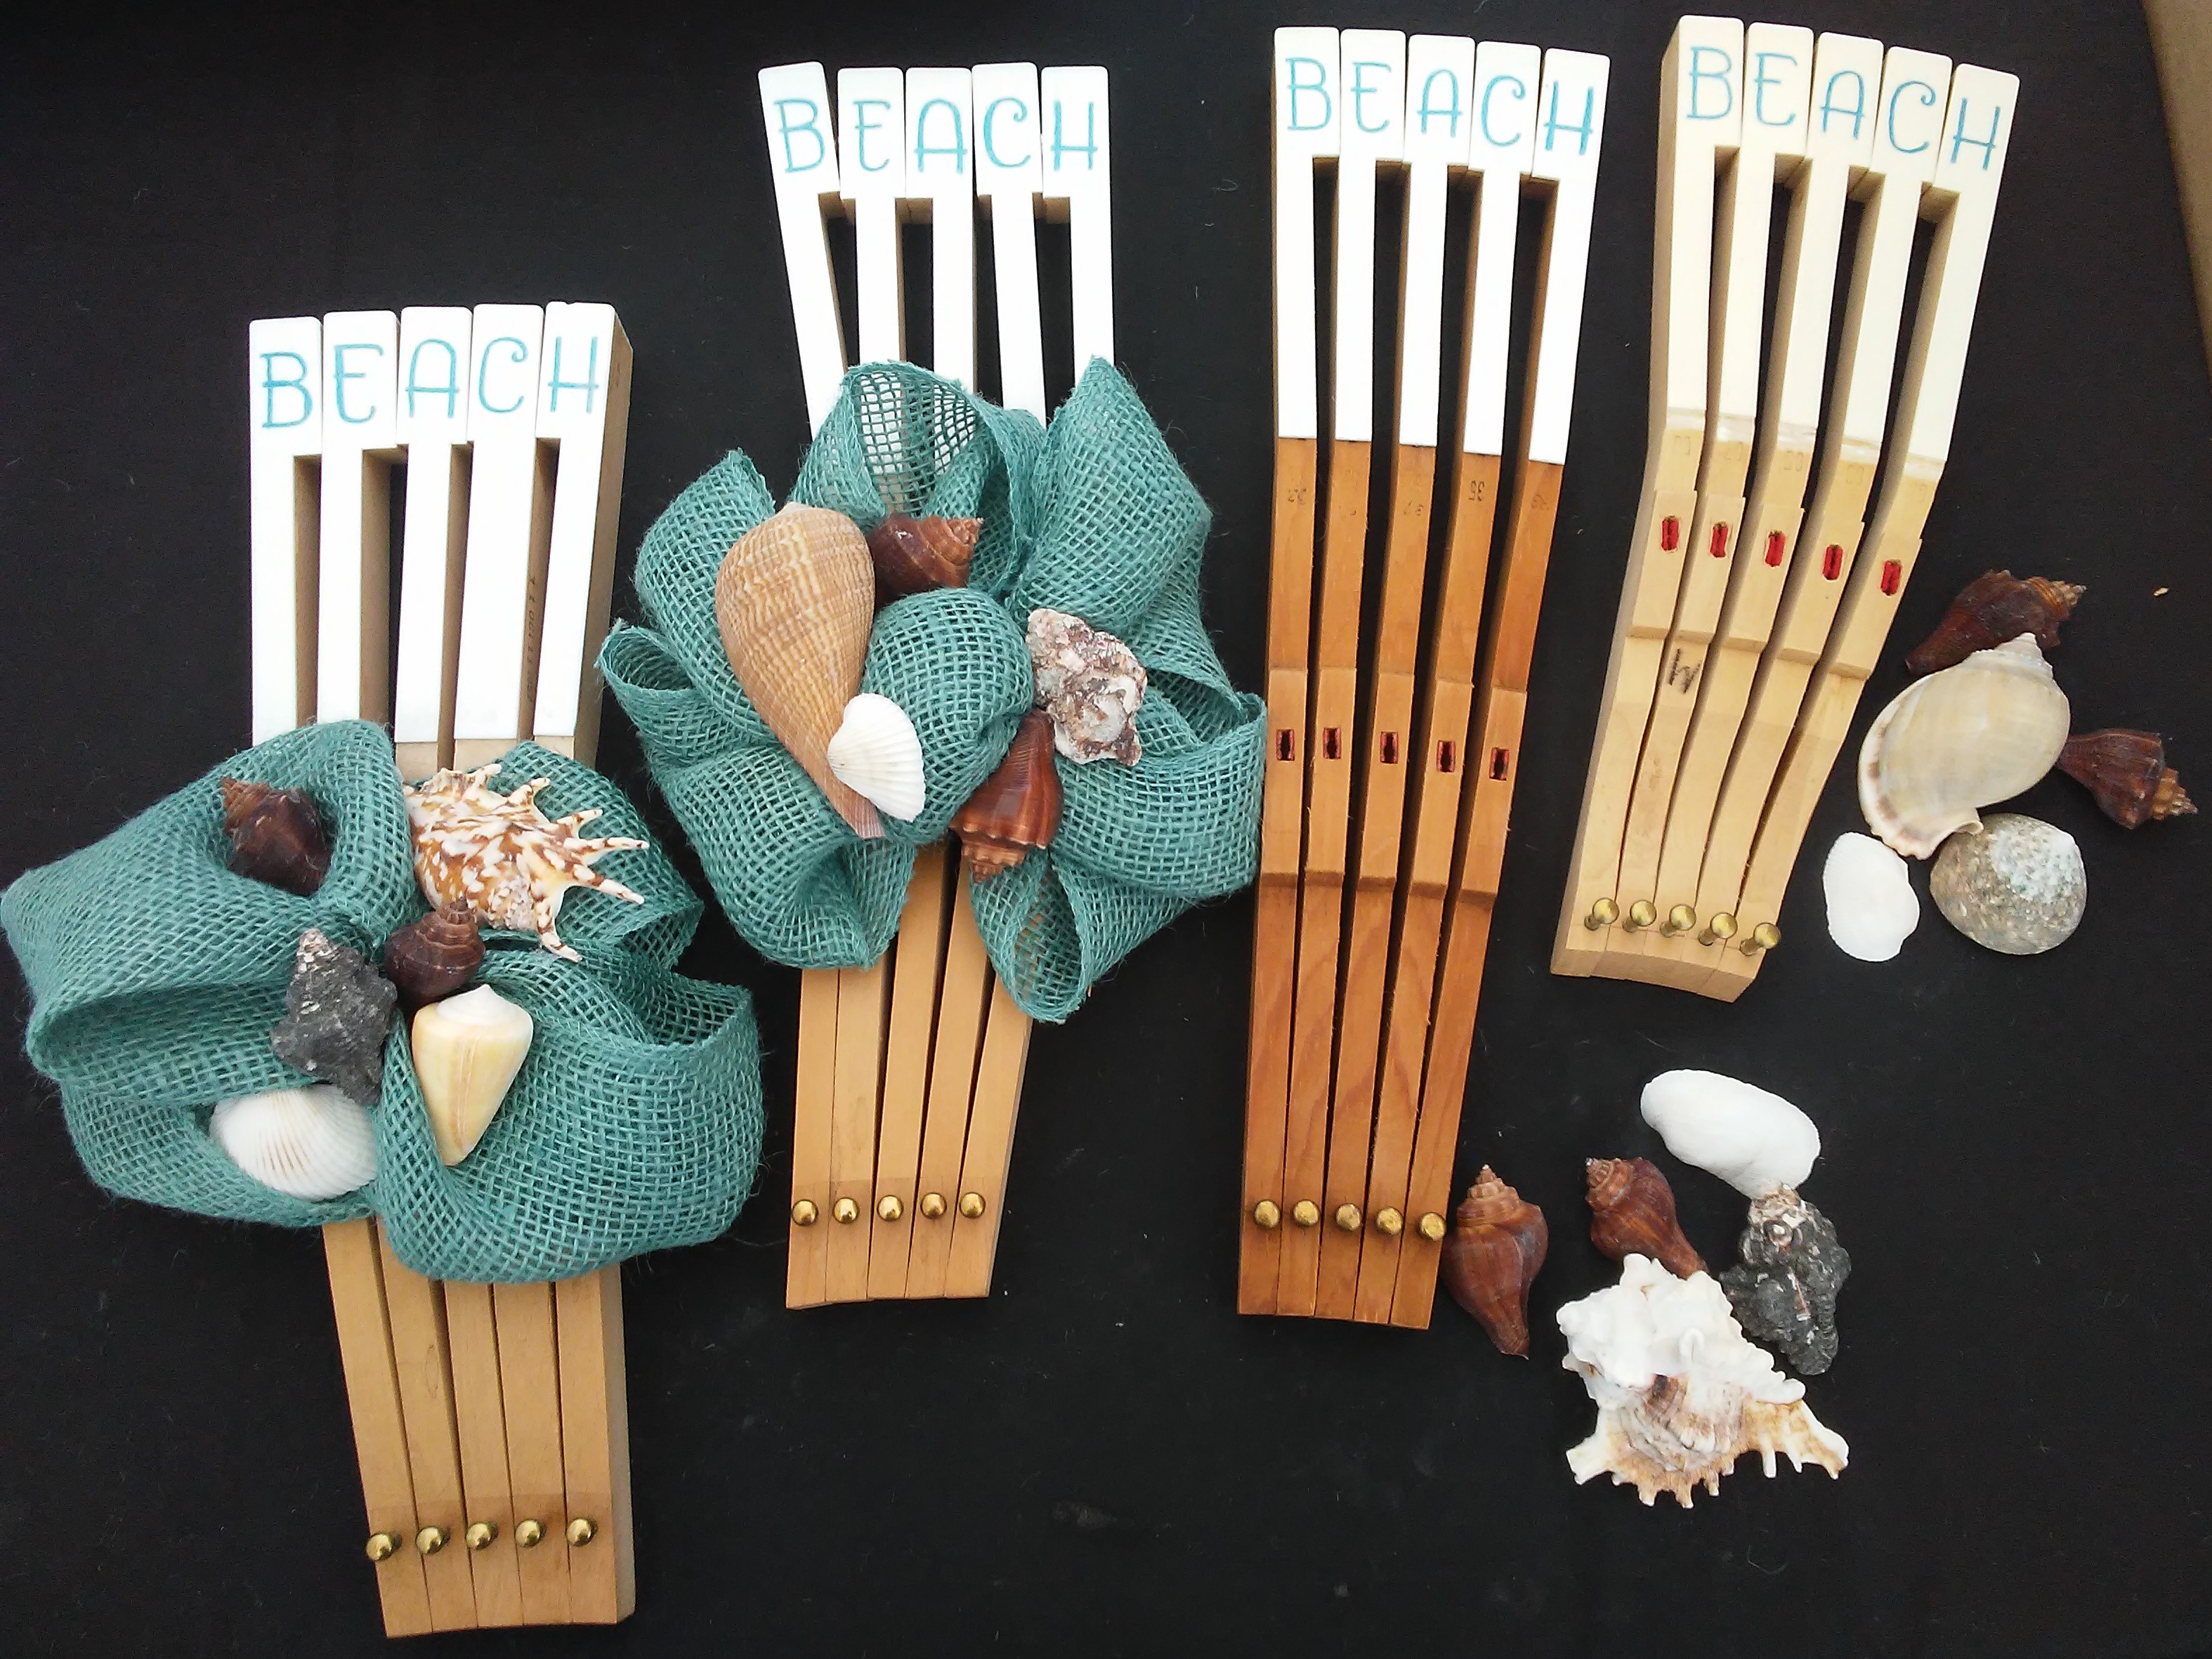
The keys were in pretty good shape. The wooden parts were original to the piano, but the ivory had all been replaced at some point. I have long since removed the action and keys and used them to make gifts for many of my customers. A few finished art pieces remain available for sale, and I still have some raw piano pieces waiting to be turned into their own forms of art.

Also, I’ve reserved the case, with the intention of turning it into a desk. Because of the engraving and the beautiful craftsmanship of the iron plate, I’ve left it inside the piano. The strings remain intact as well. The case is rather heavy, even without the moveable working parts, but it will receive a new set of casters, which will enable it to roll easily without marking the floor. In fact, I’ve borrowed a piano tilt from the same man who gave me the Steinway, to use in easily laying the piano down to do the repair underneath, then pick it up again. When I’m ready to begin the build, I’ll let you know, so that those of you who are interested may follow the process. But first, I want to practice on a lesser known model, since piano restoration and furniture building are new to me.

Other Events in 1866

My study of the history of the Steinway company piqued my curiosity about other events. Particularly, I wanted to know what was going on in the United States and in the world during the year when my Steinway was built. Here are some of the things I discovered:

In the United States

  • March 13 — The United States Congress (Republican majority) overwhelmingly passed the Civil Rights Act of 1866, initiating protection of the rights of African-Americans; President Andrew Johnson (D) vetoed the bill on March 27, and Congress overrode his veto on April 9.
  • April 10 — The American Society for the Prevention of Cruelty to Animals (ASPCA) was founded in New York City by Henry Bergh.
  • May 16 — The U.S. Congress approved the minting of the nickel as a five-cent coin, and subsequently discontinuing the half-dime.
  • July 24 — Tennessee became the first U.S. State to be readmitted to the Union following the American Civil War.
  • July 25 — Ulysses S. Grant became the first man to hold the rank of General of the Army (now called five-star general).
  • Also in 1866, the Minneapolis Milling Company (now known as General Mills) built its own mills. The history of General Mills is a compelling read.

In the World

  • May 10 — A London bank collapsed, precipitating The Panic of 1866.
  • June 14 — Austria and certain German states declared war on Prussia.
  • June 20 — Italy declared war on Austria.
  • August 23 — The Treaty of Prague ended the Austro-Prussian War.
  • October 12 — The Treaty of Vienna ended the war between Austria and Italy; Venetia was annexed by Italy.
  • Also in 1866, Alfred Nobel invented dynamite in Germany. (With regret for creating an instrument of destruction, he later established the Nobel Peace Prize.)
  • Sweden initiated a series of progressive reforms for women’s rights with recommendations from the Girls’ School Committee of 1866.

In Music

  • March–December — Peter Ilyich Tchaikovsky wrote his Symphony No. 1, “Winter Daydreams.”
  • May 30 — Bedrich Smetana’s opera The Bartered Bride debuted at the Provisional Theatre in Prague.
  • November 3 — German composer Paul Lincke was born. He is considered the father of the Berlin operetta.
  • Also in 1866, Theodore Thomas conducted the New York Philharmonic Orchestra in the American premiere performance of the Prelude to Act 1 of Wagner’s Tristan und Isolde.
  • The first Steinway Hall opened in New York, with a seating capacity of 2000 in the main auditorium.

Bibliography

americanhistory.si.edu

steinway.co.uk

pianobuyer.com

steinway.com

steinwaypianos.com

Steinway Pianos, Part 1

“Today’s Steinway: We still make them like we used to… only better.” So states their official U.S. website. Steinway & Sons has been crafting superior pianos since 1853.

The Founder

Heinrich Engelhard Steinweg was born February 15, 1797, in Wolfshagen, Germany. He served in the German Army from 1812 to 1822, then left the service and began work as a carpenter. While apprenticed to an organ maker, he discovered his love for music. He began making instruments of his own—first guitars and zithers, then gradually escalating to building pianos. In 1836, in the town of Seesen, Germany, he built his first grand piano in his kitchen, and gave it to his bride, Juliane, as a wedding gift. That same year Steinweg moved out of the kitchen and into a shop, where he built nearly 500 more pianos over the next decade—an average of one piano per week. Juliane bore him nine children, and when the family immigrated to the United States in 1850, two of his sons, C. F. Theodor and Wilhelm, remained in Germany to keep the piano shop in operation.

Soon after arriving in the U. S., the Steinweg family americanized their name to Steinway. At first Henry and his sons worked for other companies in the piano business, then on March 5, 1853, they opened Steinway & Sons.

In 1865, tragedy struck the Steinway family when two of the sons, Charles and Henry Jr., as well as the factory foreman Theodore Vogel, all died. In the same year, Albert enlisted in the Union Army (Civil War). With the loss of so much leadership in so short a time, C. F. Theodor sold his share of the German-based company and moved to New York to help keep his father’s company going. Henry Steinway, Sr., died February 7, 1871, just shy of his 74th birthday.

A few of the earliest pianos Henry made in Germany are still in existence. His first piano, nick-named “The Kitchen Piano,” still exists in its original condition. Depending on the source, you may read that it’s on display at the Musical Instrument Museum of Scottsdale, Arizona, at the Steinway & Sons factory in NY, or at the New York Metropolitan Museum of Art. I don’t think they’re inaccurate. Rather, I’m inclined to believe that the piano has been moved from time to time, and that it has indeed been at all these locations. Although I’m not sure of the date of publication for the various articles I read, I think perhaps today it is at Steinway & Sons. There is a Steinway piano located at the New York Metropolitan Museum of Art. Built in 1868, this one is called the “Plain Grand Style 2,” although when you look at the photo, you’ll see that there’s nothing plain about this model! This was Steinway’s first piano built with 88 keys, and incidentally, the natural keys are black and the sharps are white. It is the prototype for the Steinway Grand Model D.

Early Growth and Continued Production

In just one year Steinway & Sons outgrew their first building and moved to 82 Walker Street. In 1860, just six years later, they constructed what is still today the world’s largest piano factory between 52nd and 53rd Streets, on what is now Park Avenue.

In the late nineteenth century, it was common for piano manufacturers to open their own concert hall in order to showcase the unique voice of their instruments. The first Steinway Hall opened in New York in 1866, with a seating capacity of 2,500, and was the premiere concert hall until the opening of Carnegie Hall in 1891. Another Steinway Hall opened in London, England, in 1875; and in 1880, Steinway & Sons returned to their roots when they expanded the business to Hamburg, Germany. This plant was operated by Henry’s fourth son, William (Wilhelm). A second Steinway Hall in NY was built in 1925, when the first one was closed and the showroom relocated to West 57th Street.

Following the death of the founder in 1871, Steinway & Sons remained under family ownership for another 99 years. Henry Z. Steinway, great-grandson of the founder, was the last family member to participate in the making of Steinway pianos. Until his death in 2008 at the age of 93, he signed every custom-made limited edition piano.

The end of the family ownership was marked by a merger with CBS, Inc., in 1972, although Henry Z. remained president. Then in 1985, a group of Boston businessmen purchased the company and formed Steinway Musical Properties, Inc. This corporation merged with the Selmer Company in 1995, but both companies continued to operate independent of one another until Steinway Musical Properties, Inc. was taken public. John Paulson, of Paulson & Company, bought Steinway and privatized it again in 2013. The new showroom and music hall opened in 2015, at 1133 Avenue of the Americas (Sixth Avenue), and the manufacturing plant remains in operation at #1 Steinway Place, Long Island City, NY.

Key to Success

The reason Steinway & Sons has stayed at the top echelon in the piano manufacturing industry is because they continually look for ways to improve the process. I recently took a virtual tour of the Steinway grand production house and was impressed by the number of times that the tour guide said that such-and-such a process only came into use a few years ago, or maybe a decade ago. This tells me that although they already produce one of the finest quality pianos, they never tire of looking for ways to improve. From forming the body of the piano, to outfitting its interior, to applying the finish, to fine-tuning the sound, to packaging the completed piano for shipment, the manufacturing of every individual piano is performed by a symbiosis of man and machine. The few steps done by machine ensure uniformity and precision in the workmanship, while the many steps done by the skilled hands of artisans provide each instrument with its own unique voice while still maintaining that characteristic Steinway look, feel, and sound.

Steinway Contributions to the Industry

Steinway & Sons is responsible for bringing to the industry many qualities and construction techniques that we now think of as standard:

  1. Overstrung grand piano (1859). This means they crossed the bass strings over the treble strings, the way we see them in pianos today. This allowed for longer strings, thus providing a deeper, richer tone.
  2. Iron plate (1866). We’re all familiar with that heavy plate inside the piano. (Some people call it a harp, or mistake it for the soundboard.) The iron plate replaced the wooden one and is able to hold significantly more tension and will not warp over time, as the old wooden plates did.
  3. Accelerated Action (1931). This improved the reaction time of the action pieces when the pianist struck the keys. Steinway pianos have a characteristic double action, which gives them a faster response time than any other piano in existence.
  4. Diaphragmatic soundboard (1936). Since the soundboard is constructed of many thin sheets of spruce, approximately 6 inches wide, glued side-to-side and cut on the diagonal, the addition of ribs on the back of the soundboard give it better durability and stability while still allowing it to vibrate freely with the sound.
  5. Hexagrip pin block (1963). The pinblock is located at the top of the soundboard and houses the tuning pins (220 of them on average) for the strings of the piano. Steinway strengthened the pin block by laminating seven layers of hardwood maple in a staggered grain formation. This innovation improves the overall quality of the sound and allows the piano to hold its tune longer.

The Making of a Steinway

There are more than 12,000 individual parts to a piano, more than half of which are in the action. (Based upon my experience in taking pianos apart, I estimate this number to be representative of all pianos, and not exclusive to the Steinway.) I recently took a virtual tour of the Steinway factory in NY, and I’ll have to say that as one who disassembles pianos, I was fascinated by the reverse process. It gave me a greater appreciation for some of the pieces for which I haven’t yet found a use, such as the bridge and its hitch pins. But, believe me, I will—especially after watching the fine craftsmanship that went into making them. Too much time and effort went into the construction of the various components of these (and other) pianos for me to simply throw away any part of them.

I now invite you to take the same virtual factory tour. This 42-minute tour will walk you through the entire process of the making of a modern-day Steinway grand piano. It truly is an amazing work of art!

Bibliography

Ashley, Larry E. pub. Pierce Piano Atlas. 70th Anniversary Edition. Larry E. Ashley Publishing: Albuquerque, NM, 2017.

americanhistory.si.edu/

britannica.com

steinway.co.uk

steinway.com

steinwaypianos.com

metmuseum.org

Photo courtesy of Luxurious Magazine

From the Studio: Just Beachy

Beach WIP (8)

Allow me to share with you the latest creation from the Encore studio, tell you why and how it came into being, and why it has two names.

Last year I had the pleasure of participating in a holiday craft show in Destin, Florida, where I met Carolyn Williams, the owner of Sand Dollar Cottage, an art gallery/gift shop in Navarre. She and several other artists were also vendors at the craft show, and we visited each other’s booths. Carolyn fell in love with my work and invited me to place some of my pieces in her gallery in Navarre. So in January I did just that!

Carolyn does an excellent job of organizing the pieces in her shop according to color, theme, etc., and not necessarily by artist. As it would happen, however, most of my things are all in one place because they are unique, being made of piano parts, and having nothing to do with beachy themes and muted colors. In short, they are their own theme.

So as time has allowed, I’ve been brainstorming, trying to come up with ways to combine piano art with beach art, to appeal to the musician who visits and/or lives at the beach. This was my first creation, but it will by no means be the last, as other ideas are simmering as well….

I went to work, collecting the keys that I would use to make the fans. I practiced my lettering, chose the pen that I would use to write on the keys, then went shopping for ribbon and shells. I thought about going to the beach to pick up shells myself, but I’ve been there, and I know it would have taken me a long time to collect the number of shells I would have needed, and time is money.

This slideshow requires JavaScript.

The next step was to figure out how to securely connect the keys to each other and mount them to the wall. I glued them together, but as very little of their surfaces actually touch each other, I reinforced the connections with mending plates at the top and wood plates toward the bottom.

Since I gave away my bow maker, I made these bows by hand, sewing them together with floral wire. Then I used a heavier wire to fasten them to the keys, tying off the wire in the back, and tucking it in between two of the keys. Using a hot glue gun, I secured the ribbon to the keys in front, so that it would not hang down from the weight of the shells, and I hot glued the shells in place on the ribbon. I also hot glued two round felts from the piano to the bottom of the keys in back, as bumpers to hold it off the wall.

The wood plate in fact serves multiple purposes: it reinforces stability, hides the floral wire, and displays the artist statement. After trimming the board to size and sanding the edges smooth, I applied wood glue where the board would go, then drilled five pilot holes along both the top and bottom, to attach it to each key using short screws from out of the piano. I also used a piano screw to attach the mounting hook.

Finally, I edited the story of my art to fit on the board, printed it out on labels, trimmed them down to size, and applied them to the board. With that, the project was done!

Actually, I skipped a step in process—naming it. I had been working on the piece while at the Blues & BarBQ Festival at St. Joseph’s Church in Pensacola. In fact, that was where I worked on making the bows, attaching them to the keys, and gluing down the shells. I showed one of them to a lady whom I had met at the show, and she purchased it on the spot. I was thrilled that she liked it, but I said, “I don’t know what to call it yet, or how much I want to ask for it.”

She replied, “Well, you’d better think about it. I’m going to walk around some more, and I’ll be back to get your answer.”

So I put up photos on Instagram with a plea for help in naming this piece. I like to give my works musical names whenever possible. I had been listening to Blues music for the past day and a half at the festival, and had come to realize how important that genre is to this region. It is in no way limited to Louisiana, but colors the cultures of southern Mississippi, southern Alabama, and western Florida as well. And so I thought, “Beach Blues…” to reflect the region for which this piece was made in the first place. When the lady returned, I had a name and a price. She was honored by the name, but she said my price was too low, so I raised it at her insistence.

A little while later I saw that I had received a response to my plea for help with the name. A friend from Virginia had suggested “Ocean Sounds,” and I liked that equally well. Reading the name brought to mind soothing piano music with an overture of crashing waves, and I knew it would do the same for my customers. I decided to use both names. The piece will be called “Beach Blues” when sold locally here in the Florida area, but it will be called “Ocean Sounds” when sold online or in Virginia. (Yes, I am going back to my beloved Virginia later this year to do two shows!)

In honor of my friend who gave me the name “Ocean Sounds,” I would like to share a video of piano music with ocean sounds. I hope you enjoy it.

The creation of “Ocean Sounds,” or “Beach Blues,” whatever you prefer to call it, is somewhat symbolic of my assimilation with the place in which God has put my family and me. It was not easy making the transition from Virginia to Florida. Yes, I was born here in this state, but Virginia is my family’s birthplace, and the place that I call home. Yet I have learned to be content here. This is where God brought us, and this is where God wants us. It’s a good place to be—in the center of God’s will. Today that place, the center of God’s will for my husband and me, is Florida. Someday He may move us somewhere else. But until then I will listen to the Beach Blues—not forsaking the memory of the Ocean Sounds, but choosing to live in the present with contentment.

May you, too, find contentment in the place, and with the people, where God has placed you. God bless!


Thank you for joining me on this tour of the studio. I look forward to seeing you on the next one. Until then, I invite you to check out photos of my other work in the gallery. Enjoy the rest of your day!

From the Studio: Andante Key Clock

With more and more customers asking for a clock, I knew it was time to build one. To be honest, I don’t remember where the idea for this design originated, or how I decided to incorporate plexiglass, but I will say that the end result has been worth the risks of stepping out of my comfort zone. And believe me, I stepped out with both feet on this one.

This first clock would be very large, and it would be for me, for two reasons. First of all, my kitchen needed a clock. We have a vaulted ceiling that extends high above the kitchen cabinets. When the house was staged for sale, there was a large clock in that space. I made up my mind that if the clock did not convey with the house, I wanted to replace it. Well, the clock did not convey, so I was going to replace it with a key clock.

This clock would have sentimental value, for I was building it with keys from a piano I used to play at my church. It had suffered smoke and water damage in a fire when our sanctuary burned down. In fact, when the piano first came to me, the sooty white keys were as black as the sharps, though with some TLC, I was able to get them white again. The piano from the sanctuary was reduced to charcoal, but this one was in a classroom. So while it was ruined as an instrument of music, I was overjoyed to discover that many of its pieces were redeemable for art.

This slideshow requires JavaScript.

So I measured the space on the wall where the clock would go, cleaned up twelve of the keys, laid them out in a spiral on the kitchen floor to the dimensions of the space on the wall, and took a picture of the arrangement. I studied the keys to determine how and where to attach them to the plexiglass so I would know what size circle I needed to purchase. Then I shopped around both locally and online to find the best source for the plexiglass. I found it on eBay, already cut into circles. I also found clock mechanisms on eBay that could be attached to the front of the plexiglass so that I would not have to take the entire clock down off the wall to change the time or the batteries. That was my favorite feature of the clock.

Before beginning to build the first clock, I prayed and asked God for wisdom to know how to do it right. Yes, the Lord cares about everything in our lives, no matter how great or small those things may seem. Then I watched several YouTube videos regarding how to drill holes into plexiglass without cracking or scratching the surface. When I believed I was armed with enough knowledge, I set out to make key clock number one. As recommended in one of the videos, I bought a titanium step drill bit to use for the task and prepared my worktable by laying down two pieces of scrap 2x4s so my drill bit could extend beyond the plexiglass without hitting the table. Using a 24″ ruler and a compass, I marked lines on the protective cover on one side of the plexiglass, to indicate where the keys would be positioned around the face of the clock. Next, I measured and marked where I would place the screws in the keys, and finally, where the holes would go in the plexiglass.

Now came the crucial moment, the moment when it was time to drill the first hole in the plexiglass. The tutorial had warned that plexiglass heats up fairly quickly, and that you have to use your drill on high speed to prevent cracking. So no going slowly because you’re scared. It’s all or nothing. He also recommended leaving the protective covering on both sides of the plexiglass. If there is none, then cover the area to be drilled with masking tape before drilling. This also helps to prevent scratches and cracks. Apply firm pressure and feel the steps as your drill bit sinks into the material until you reach the desired depth. One… two… three… That’s it. My first hole is done! Only 23 more to go! I tested them with the screws (also taken from out of the piano). Some of them didn’t quite sit right, so I had to widen the holes a bit, but before long all the holes were drilled, and it was time to remove the protective covering. No cracks! Praise the Lord!

The next step was to drill pilot holes in the keys to prevent the wood from splitting when the screws were added. I could not use the step bit for that, so I used my regular drill bits and went up three sizes, effectively drilling 24 holes three times, for a total of 72 holes. Then came the task of attaching the keys to the plexiglass. I was using both “ivory” (not genuine in this case) and ebony keys in a chromatic arrangement, but since I was working from the back of the clock, I had to think backwards, not easy for this brain of mine. I messed up a couple times and had to remove some keys and start over, but eventually I got them on correctly. Another victory—all the keys were attached, and still no cracks in the plexiglass! Again, I praised and thanked the Lord.

The mounting hardware went on with one of the screws that holds the key at the twelve o’clock position. With that done, the only thing left was to put the clock mechanism on. I had not thought to mark the center (something I do nowadays), so I assembled the clockworks and laid it down in the center of the assembled face, then watched the second hand go around, making minor adjustments to its position as needed until it was centered. I marked the place with a Sharpie, then set it aside while I attached the mounting foam. This particular model came with a foam shell that attached with adhesive to the surface, and the clock slid into it. A 4″ round black face hid the foam pouch nicely, and it looked beautiful in the center of the keys.

Oh, yes. I learned the hard way to wear latex gloves throughout the process to keep fingerprints off the plexiglass. Dust is another matter. I did my best, but it is inevitable that some dust will get on the plastic. I wiped it carefully with a lint-free cloth, then hung the clock on the wall. This was no small task, especially since I had to use an 8′ ladder, and I’m afraid of heights. But it’s up there, and it’s going to stay up there indefinitely.

The key clocks I make for sale are not nearly so large, although they are not small by any means either. For my customers, I cut the extensions off the keys to produce a clock that is 21″ in diameter. The assembly process is the same, but I make the clocks in a variety of designs, both chromatic and symmetrical. Among the symmetrical patterns, sometimes I place the black keys (ebonies or sharps, whatever you want to call them) at 12, 3, 6, and 9, and sometimes I place the white keys (or ivories) in those positions. As with all of my creations, no two clocks look exactly alike. The keys will vary, depending on which piano they came from. The clock parts will vary, depending on my supplier. And the design will vary, depending on the whim of the day. I have also made some to order. In fact, one of my favorites was a clock made for a beach house. For this one I used distressed keys, old ivories that were still somewhat whitish but broken, and painted black keys that had turned gray after a good soaking in the sink. 

Most of my piano art creations have a name that has something to do with music. For a while, I simply called this one “Key Clock,” but it too begged for a musical name. So I stared at the movement as it went around the face of the clock one evening and thought for a while, waiting for a name to come to me—Andante, “moderately slow tempo.” If you look at the metronome, andante doesn’t appear to be all that slow. But then again, neither does time, especially when you’re having fun. And I have fun making art from old pianos. Even so, time is steady, andante, as it marches along, never going backward, always pressing forward.

To date I have made six Andante Key Clocks, with four more ready for assembly. And so far I have not cracked any plexiglass. I still thank the Lord for success every time I finish drilling 24 holes in a new sheet, and I’ll do it every time.

Thank you for joining me on this tour of the studio. I look forward to seeing you on the next one. Until then, I invite you to check out photos of my other work in the gallery. Enjoy the rest of your day!

Acrosonic by Baldwin

Curbside Piano (01)

Do not disregard the Acrosonic piano as one of inferior quality, or a knock-off brand. According to Living Pianos, “Acrosonic is the biggest selling brand name in the piano industry of all time.” The name Acrosonic, coined from the Greek words akros (“supreme”) and sonus (“tone”), was trademarked and used by Baldwin specifically for their spinet and console pianos. Spinets and consoles are the shortest of the upright pianos, with the spinets measuring just 36-40 inches tall, and the consoles standing at 40-43 inches. This compact design was made possible by placing the action under the keys. Many people esteem the Acrosonic as the finest spinet piano ever built.

Spinet and console pianos are quite useful in small rooms, where an instrument is desired, but space is at a premium. The Acrosonic pianos by Baldwin were both compact and elegant, being offered in a variety of different cabinet styles and finishes, from Louis XV to Danish mid-century modern. They also were, and still remain quite affordable, being valued at between $1000–$3000, depending on their condition; and there are several currently available on eBay, with prices ranging from $0.99 to $3,800. I even found one within 200 miles from home, so that I could spare the shipping charges and go pick it up. The price was right, and the piano was very lovely. It was tempting. But it still works, so I could not justify purchasing it to take it apart and make art from it, and I already have a piano in my home to play. So I resisted the temptation and left it to go to another home.

D. H. Baldwin

Dwight Hamilton Baldwin was a respected music teacher and church musician in Cincinnati in 1857. Over the next eight years, he transitioned out of teaching and into a position as a purchasing agent for Chickering & Sons with his own company, Baldwin Piano Company. He had a stock of pianos, but lost all but one in a fire in 1866. By 1871, he had moved his firm to 142 W. 4th Street in Cincinnati, and he remained there until 1955.

With the help of Baldwin’s shrewd bookkeeper, Lucien Wulsin, Baldwin became the largest piano and organ dealer in the western states, eventually opening additional stores in Louisville, Kentucky, and Indianapolis, Indiana. For several years, his primary focus was retail, dealing with the resale of Chickering and Steinway pianos. But in 1887, when Steinway decided not to renew their contract with Baldwin, he shifted his focus to the production of his own line of pianos. While he did make pianos with the name Baldwin on them, he produced instruments under other names as well, often to honor people whom he knew. For instance, he built reed organs under the names Hamilton and Monarch; he also built upright pianos under the names of Ellington, Valley Gem, Howard, and of course, Acrosonic, among others.

Because of the superior quality of his pianos, Baldwin enjoyed the sponsorship of several celebrities, including Liberace and The Lawrence Welk Show, who used Baldwin pianos exclusively. Baldwin’s success lasted into the 1990’s. During that decade the company was sold to Gibson Guitar Company; and thanks to Gibson, Baldwin pianos are still being produced.

My Acrosonic

The Acrosonic that came to me came because I do taxes. One of my tax clients saw it on the curb in their neighborhood and sent me a text with the address. I drove over there and took all the parts that I could remove—which was most of them—then left the heaviest pieces for the sanitation engineers to collect. So I didn’t keep the entire piano out of the landfill this time, but there wasn’t much waste. Since it was sitting on the street, it was easy for me to lay the piano down to remove the pedals and other pieces underneath, then stand it back up again, a testimony to the lightweight nature of this model, that I could do all that by myself.

By tracing the serial number, 512480, I found the piano to have been built in 1954. On the cast iron plate, below the serial number, is a stamp that reads in part: “Patented Full Blow Acrosonic Action Built Exclusively by Baldwin.” The words “Built by Baldwin” are also imprinted in the iron plate, and they appear on the fallboard as well. The keys were not genuine ivory, as the use of ivory had been discontinued by the 1950’s, but they were in very good condition. The cabinet, however, could have been cared for a little better. There was a ring from where someone had set down a cold beverage glass, and several scratches and nicks in the finish. Overall, however, I was thrilled to come across this piano, and even happier that everything I took off of it (barely) fit inside my Nissan Maxima.

Today I would like to offer you a special treat: a video demonstration of what an Acrosonic sounds like. It really does have a nice sound, as I think you will agree.

Not only am I impressed with the sound of this tiny instrument, but I’m impressed with how similar in style this particular model looks to my piano. The color is different, but that is just a matter of a paint job. The dealer pointed out the purpose of the style was to mimic the square grand. When he said that, I looked at it again and thought, “He’s right.” It does resemble a square grand, though understated. It’s just one more example of how great things can come in small packages.


Bibliography

Pierce, W. Robert. Pierce Piano Atlas. 12th Edition. Larry E. Ashley Publishing: Albuquerque, NM, 2008

antiquepianoshop.com

bluebookofpianos.com

ebay.com

livingpianos.com

From the Studio: Coming Home to You


Christmas was approaching, and we put our names in the hat for the gift exchange. I drew my brother-in-law’s name, but had no idea what to get for him. He is a cross-country truck driver, home only on the weekends. I’m an artist, specializing in things made from piano parts. I decided to make something for him from the materials at hand that he could carry with him in the truck.

First, I went to social media and downloaded a nice photo of my sister, and cropped it to 5×7. Then I went out to the garage, to my supply of piano wood, and taking the footboard from the 1915 Kohler & Campbell upright piano, cut two pieces from it, trimmed to approximately 6×8, and sanded the edges nice and smooth.

The veneer was loose on one side of the wood, so I removed it completely on that side, then stained the cut edges of the wood and the exposed wood where the veneer had been removed, and set it aside to dry while I worked on the photos.

The original photo I kept pretty much as it was, with the exception that I applied a sepia filter to it in Photoshop. Then I copied and reversed it on the vertical axis, forming a mirror image of the original. I then made the reversed image transparent (like a watermark) and added over the top of it the words, “Happiness is having someone to come home to.” I ordered the prints through Sam’s Club and picked them up an hour later.

Back home, I used a spray adhesive to apply the photos to the inside panels of the wood, then let them sit several hours to dry. The next day I attached the two pieces of wood with two store-bought hinges and applied two coats of a clear polyurethane varnish to all surfaces, allowing time to dry between coats. Finally, I let it rest a few more days to cure.

When Christmas came, I was a bit apprehensive, wondering if Richard would like his gift. I didn’t need to worry—he loved it!

I can make one for you as well. Simply send me a photo and payment, and I will do the rest. The finished product may look slightly different from what you see in the photos here, depending on which piano gives you its wood, but the end result will be a unique and beautiful keepsake—made from the wood of an old piano—that you and your loved one will treasure for years to come.

Happiness is coming home to you!

Behning & Sons Piano Company

The Behning Piano Company, established in 1861 in New York, survived for nearly 100 years, and has a colorful history. I’ve decided to show its history in a time line format, as the ownership/management underwent several changes over the years.

  • 1861 ~ Henry Behning establishes Behning Piano Company in New York City on East 128th Street
  • 1864 ~ Behning partners with Mr. Albrecht Klix, building pianos under the name of Behning & Klix
  • 1873 ~ Behning terminates partnership with Klix and continues building pianos under his own name
  • c.1875 ~ Behning partners with Mr. Diehl
  • 1878 ~ Behning terminates partnership with Mr. Diehl
  • 1881 ~ Behning partners with son Henry, and name changes to Behning & Son
  • 1920 ~ both sons, Henry and Gustave, take over the company and expand to East 133rd Street and Alexander; name changes to Behning & Sons
  • 1931 ~ Gustave runs the company on his own and moves it to West 51st Street
  • 1932 ~ Kohler & Campbell acquire the company
  • 1956 ~ production under Kohler & Campbell ceases

Pianos and The Great Depression

When you think of old pianos, do you think of ornate carvings? The fancy pianos are the ones made in the early 1900s and before. Behning & Sons certainly made some of the finest, most ornate pianos I have ever seen, according to photos I’ve come across on the Internet. The Behning & Sons piano that was given to me was marked with Serial #48409, indicating that it was manufactured in 1922, when the two sons were running the company. I don’t recall much about what this piano looked like, except that it was plain. This one came into existence right on the heels of the Great Depression. People did not have money for extravagance. Their lives had been stripped of frills and “extras.” They had no use for ornate things; now they wanted more practical items in their homes. This is why piano makers, including Behning & Sons, started producing the plain, boxy style cabinets for their upright pianos. Shorter pianos also became more popular because they took up less visual space in the room, as rooms were smaller than before. Grands and baby grands were still being produced, and the styles of their cases were also simplified.

Quality Pianos

Piano manufacturers also learned how to make “economy” pianos so that people could still enjoy music on a tighter budget. Sometimes the result meant a sacrifice in quality, but often it was more a sacrifice in aesthetics, with still a pleasing sound from the instrument. Behning & Sons did not sacrifice quality. In fact, they were known for producing high-quality, expensive pianos, and enjoyed a great deal of success. They even made the Wendland player piano during the years between 1910 and 1930. Perhaps it was their self-imposed standard of high quality that made it hard for them to survive the Great Depression, for not too long after that period, the younger son, Gustave, being left alone with the company, was compelled to sell it to Kohler & Campbell, who kept the name alive for nearly another quarter of a century. (I thought this was interesting, since I’ve also come across a 1915 Kohler & Campbell piano.)

My photos of this piano are not impressive, but are mostly “for the record.” Usually I take the entire piano away when I acquire one, but this was one of the rare occasions when I got to disassemble it on-site and take only what I could carry. With the seats all folded down in the minivan (not the van in the photo), we were able to take everything but what was firmly attached to the cast iron plate. In other words, I did not keep the strings or the soundboard, nor the side boards or back boards, but I kept everything else. I got good photos of the markings on the plate because I knew I would never see it again, and those markings are how I identify the piano.

Also in the photos you will see the son of the dear folks who gave me the piano, my son who helps me with most of the moves, and our indispensable Dolly.

If you own a Behning & Sons piano, you can be proud of the fine-quality, American-made musical instrument that graces your home, and I hope you will care for it and play it often.


Bibliography

Pierce, W. Robert. Pierce Piano Atlas. 12th Edition. Larry E. Ashley Publishing: Albuquerque, NM, 2008

antiquepianoshop.com

rayspiano.com


From the Studio: Piano Headboard

headboard made from an old piano
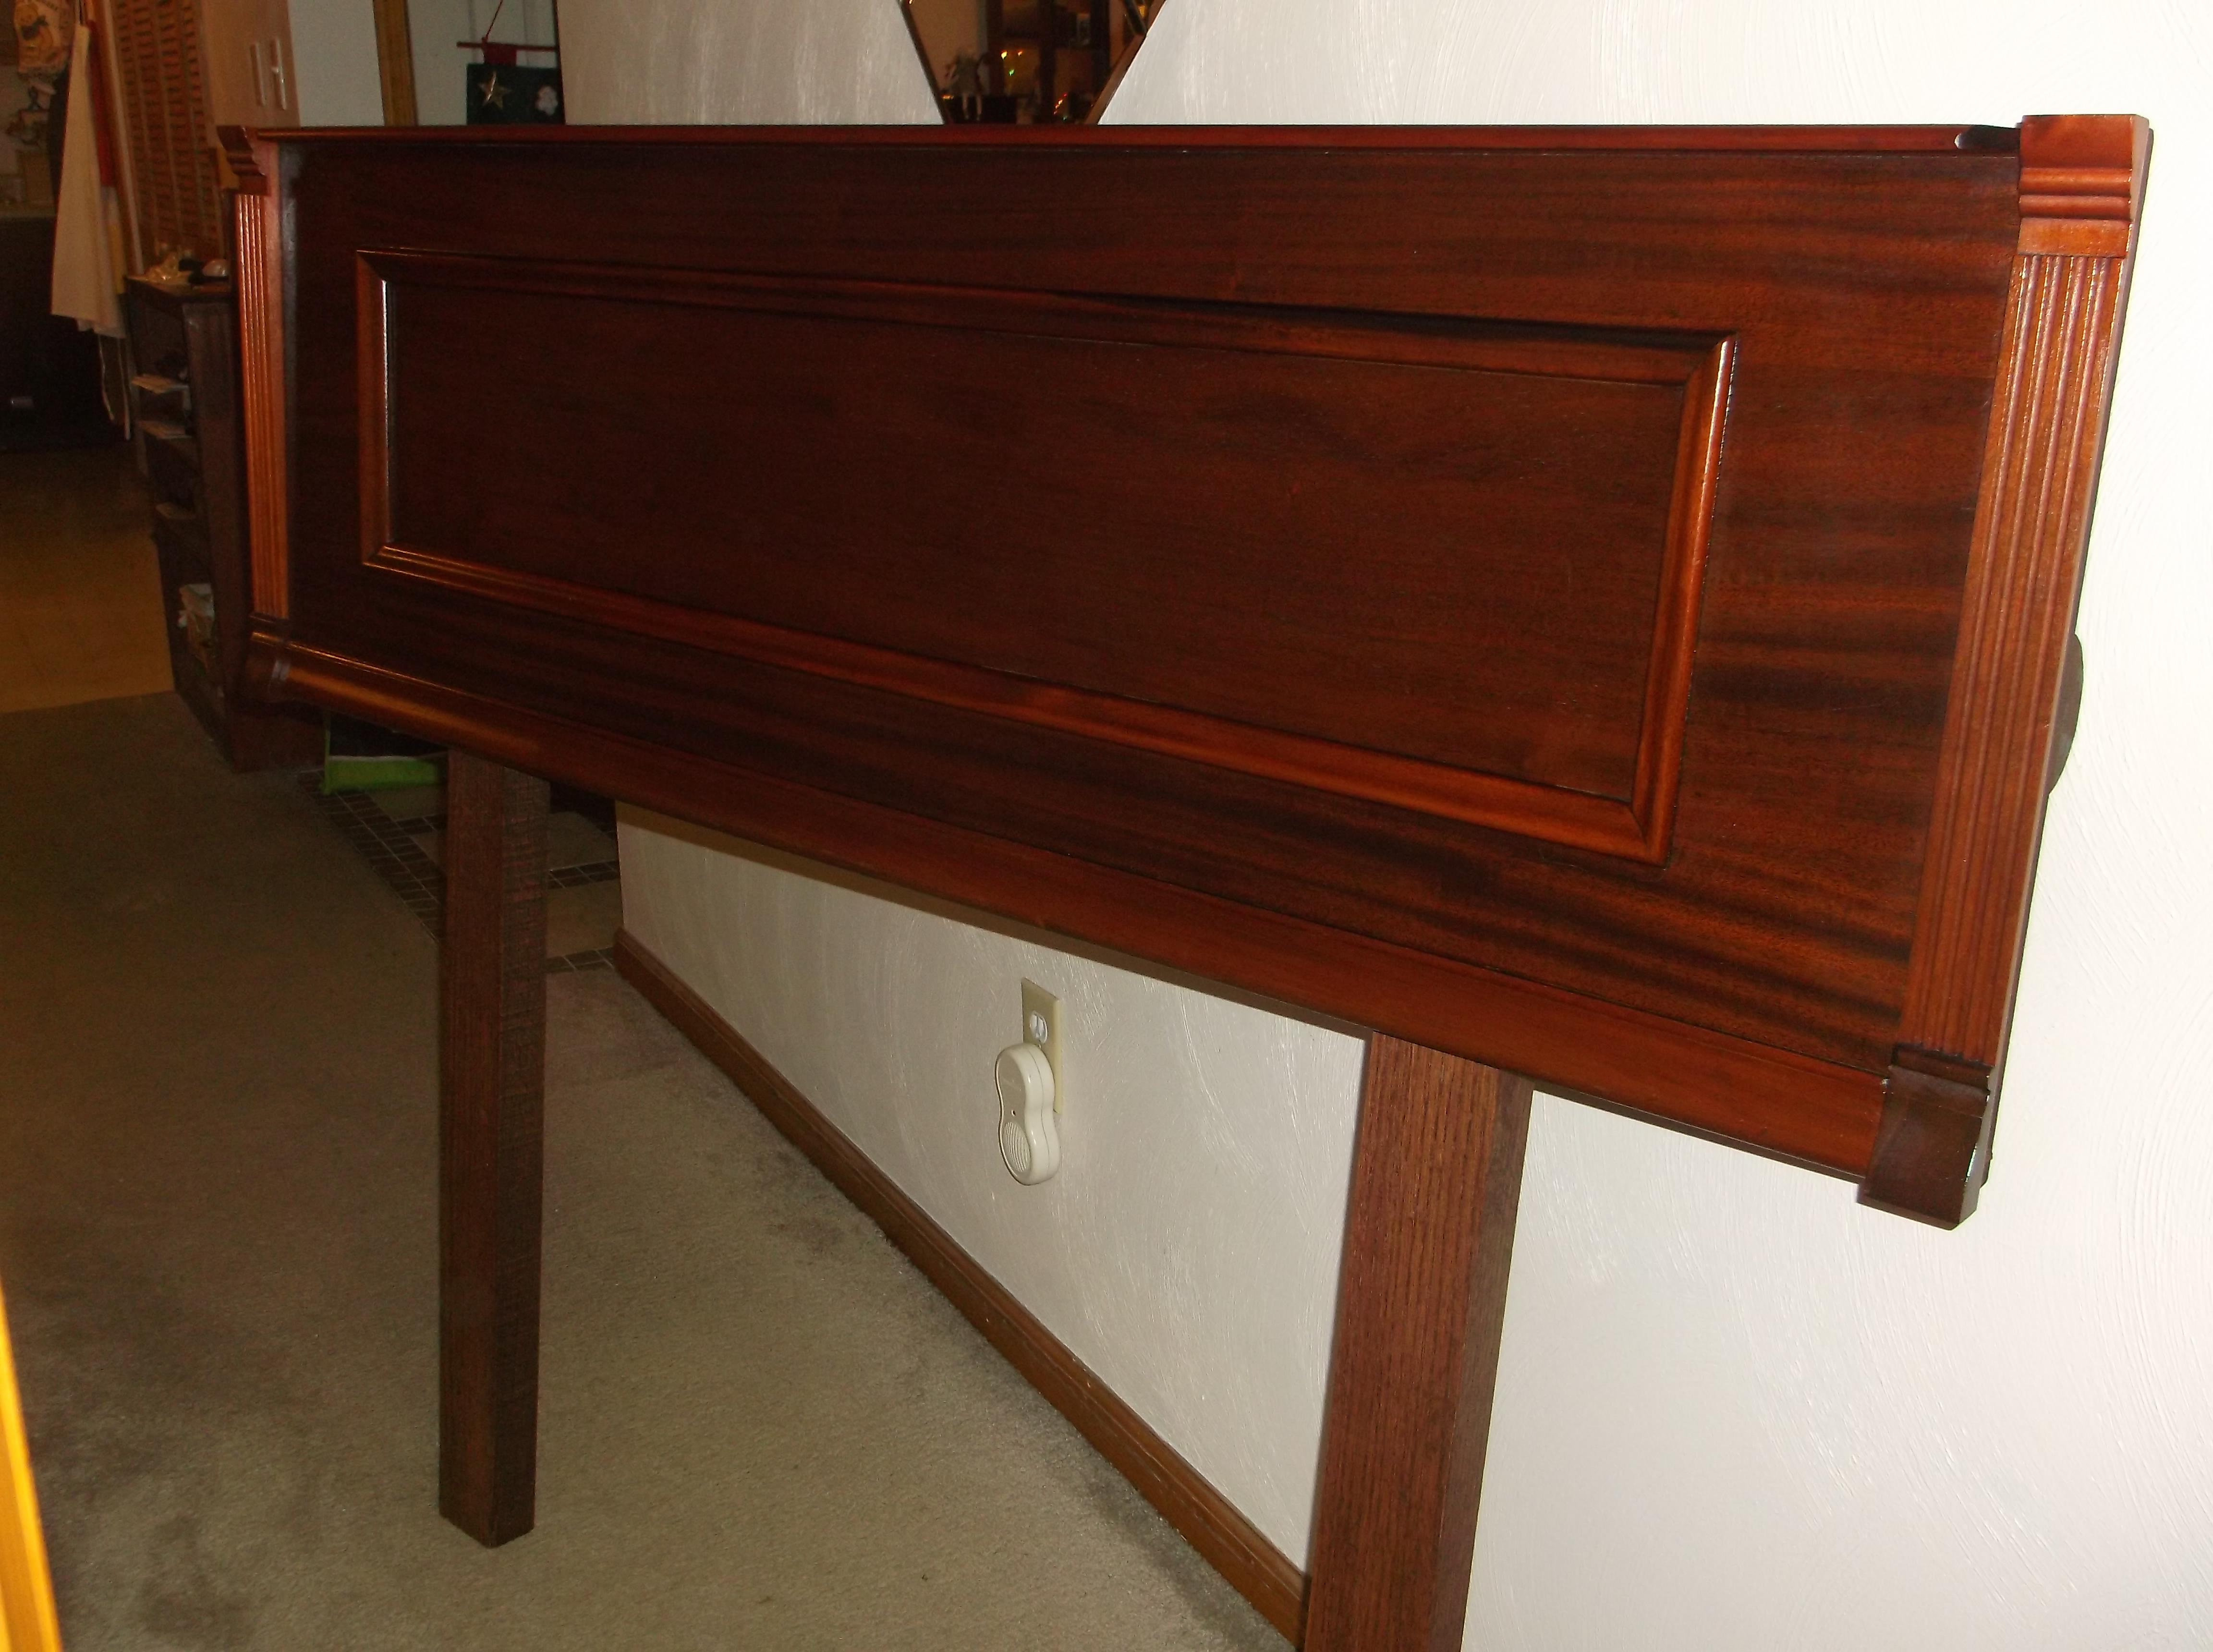
It’s always exciting when someone asks for a custom order. Such was the case with the headboard. I had made a mirrored coat rack from the music shelf of the Lyon & Healy piano and took it with me to a craft fair. A lady saw it, and it gave her an idea for something special she could do for her mother, who was a retired piano teacher. Her mother lived with her in her home, and she slept in a hospital bed to aid in her comfort. But the bed did not have a headboard. So the lady visiting my craft fair booth wondered if I could make a headboard from a piano music shelf. I told her I would try.

At home I looked at the other pieces I had from other pianos. Most of them were in poor condition, and I was inexperienced at that sort of restoration. So I began to shop around, mostly looking at the local listings on Craigslist. Pretty soon I found a piano near me at a price that I could afford, and I purchased it. So it was that I came across this beautiful Royal Cabinet Grand. Incidentally, this is also when I learned that the tallest of the upriRoyal Cabinet Grand (1)ght pianos are actually grand pianos built vertically—hence the term “upright grand.” I call this one a cabinet grand because that is the name so designated on the piano.

My sons helped me get it home, and I went to work right away to build the headboard.

The first question to determine was how long the headboard should be. It was going to be longer than the bed was wide, no question about it. I removed the music shelf and the side pedestals from the piano, laid them out on the floor of my studio, then took pictures of them to send to my customer to show her what I had found. I also wanted her opinion as to whether to include the pedestals as part of the headboard. They would add visual interest, but they would also add width to an already too-wide headboard. She liked the look, however, so the pedestals stayed.

piano music shelf to become a headboard

As with the coat rack I had built from the other piano, I flipped the music shelf upside down so the actual shelf would be up top.

On the piano, the music shelf had been hinged near the center, and the pedestal had been attached to the cabinet. In order to attach the pedestals to the shelf, I used key extensions on the back, which were secured with screws (from the piano action) and wood glue.

The headboard was not going to be attached to the bed, but was only going to lean against the wall behind it. Since the headboard had a gorgeous red mahogany finish, I went to the local hardware store to purchase a length of mahogany 2×4 wood to make the legs. They would be hidden by the bed, but just the same, I wanted them to suit the headboard. With a coat of stain for the legs and the key extensions on the back, everything was beginning to look quite nice. I attached the legs with antiqued brackets, and moved on to the finishing touches.

The next step was to conceal all the minor scratches and flaws. Then taking some green felt that I had removed from the piano and cleaned, I applied it to the places where the headboard would rest against the wall, to prevent any marks on the same. We bought a set of sliders to go under the legs, and the headboard was finished and ready for delivery.

This slideshow requires JavaScript.

It was a happy day when I got to meet the lady who would enjoy this piano headboard. I put it in her room, and listened with delight to some of her stories of her glory days as a pianist and teacher. My friends, that’s what piano art is all about.

A Brief Reign for the Royal Piano Company


The Royal Piano Company did not exist a long time, and information regarding their organization and operation is hard to find. But in their short span on the industrial scene, they produced some of the finest musical instruments America has ever seen. Royal was established around 1895 and manufactured fine quality pianos for about half a century, producing a full line of uprights, player pianos, and baby grands. They also built pump organs in the early years of the company’s existence.

Royal was originally a division of the Krell Piano Company, and it was bought out by Werner Industries of Cincinnati shortly before 1920. The Starr Piano Company purchased the Royal brand in 1927, and thus kept the Royal name alive during the Great Depression.

The last Royal piano was built in 1949. Today they are rare, but if you happen upon one, you will find it to be an example of quality workmanship.

The One I Acquired

Royal Cabinet Grand (1)

The Royal Cabinet Grand that came into my possession was not a gift, but was actually the only piano to date for which I have put down money (apart from moving expenses). I had been commissioned to make a headboard for a retired piano teacher who was confined to a hospital bed in her room. The former teacher’s daughter saw a coat rack that I had made from the music shelf of the Lyon & Healy, and she thought a headboard would be perfect for her mother, who had devoted her life to teaching others how to play the piano. How could I say no? I had several large pieces at hand, but none worthy of such an assignment. So I searched eBay, Craigslist, and other local listings until I found the perfect piano. It wasn’t free, but it was affordable.

Since I purchased the piano with a particular project in mind—the headboard, the majority of my photos of this piano are focused on the music shelf. Evidently, I didn’t even think to take a photo of the serial number, which is something I ordinarily do with every piano. Or if I did, I didn’t file the photo correctly. Unfortunately, that number is long gone by now, so I’ll never be able to determine exactly when this piano was made.

But there is a silver lining, for maybe someday, in a bin in the garage, I’ll find the cast iron plate that bears the Royal name. For I noticed in one of the photos that I removed the plate before letting Bobby haul the frame to the scrap yard. And in my search for information about the Royal Piano Company, I found a similar plate on a estate sale website that sold for over $200. Wouldn’t that be nice…. ☺

It has been noted that Royal pianos are known for their fine craftsmanship. I can definitely attest to this. At this point, I don’t remember which hammers, whippens, or stickers in my bins came out of the Royal Cabinet Grand, but I do remember the wood case, that it was both beautiful and solid. When we were preparing to move, some of my pieces got rained on, and I was horrified to learn (when the pieces swelled) that two of the pianos were partially built with press board! I was shocked! Most of them were not, however, and the Royal is most certainly made of solid wood. I don’t know for sure what kind of wood it is, but it is a hardwood. My saw and drill can attest to that (and my tired arm). Yet the most impressive thing to me—especially after taking apart thirteen pianos thus far—is not the fact that the cabinet is solid, or that it is made of hardwood, but the thickness of the wood, especially on the sides of the cabinet. On every piano, the side arm (the part that often resembles a grand piano in its shape) is nearly two inches thick, but the side board (the board that covers the length of the piano) is usually less than one inch thick, though it may have some trim along the edge to give the appearance of extra thickness. On the Royal Cabinet Grand, the entire side board was as thick as the side arm—just under two inches. And the cabinet’s finish was a gorgeous red mahogany.


The wood of the side board was too thick to use in large pieces, but too nice not to use at all. So I cut the wood into blocks measuring 6″ x 7.5″ and made game boards out of them, using tuning pins as the playing pieces. The concept was fairly easy to devise, but the implementation turned out to be difficult with hand tools. I made five games last year. They were imperfect at best, but my husband was impressed enough to purchase a drill press and power sander for me so that my next batch of board games will come out a lot nicer. Isn’t he sweet! Royal Cabinet Grand (1)

Of the thirteen pianos I’ve disassembled so far, the Royal Cabinet Grand is the only one to give me good quality wood that I can use to make these board games. Hopefully I’ll come across more pianos built with this level of quality in the near future.

If you happen to have a Royal piano, by all means keep it and treasure it. Tune it. Play it. Enjoy it. Pass it down to your children and their children after them. Don’t let it go the Piano Lady to be cut up and made into headboards, games, and art—not unless it absolutely must be thrown away. In that case, do call me first (if you live within 200 miles of Pensacola, FL). But please know that I no longer purchase pianos. I will, however, thank you for your donation by making you a souvenir piece of art from your piano.


Bibliography

Pierce, W. Robert. Pierce Piano Atlas. 12th Edition. Larry E. Ashley Publishing: Albuquerque, NM, 2008

antiquepianoshop.com

coolpianostuff.com

sweeneypiano.com

The Premier Estate Sale Marketplace


From the Studio: Bach Yard Chickens

Raising backyard chickens has really taken wing in the US. Sorry. Was that a bad pun? Okay. I’ll stick to piano art and leave the comedy for the comedians. 😉

But I wasn’t trying to jump on the bandwagon when I created “Bach Yard Chickens.” I simply saw the hammer butts and thought they looked like chickens. Period. End of story. The little girl, as hard as she was for me to paint, seemed a little easier than painting a barn. Not only that, but for each of my creations, I try to come up with a music-themed title. So… “Bach Yard Chickens” or “Old MacDonald”? Which one would you have chosen? I thought so. Me too!

Bach-Yard Chickens 10
Bach Yard Chickens (2015)

The painting above was my first ever “Bach Yard Chickens,” completed in 2015. It was done on a 16×20 stretched canvas, unframed. I used uncooked quinoa for the “seed,” and all five “chickens” came from the same piano. In fact, they came from the 1906 Lyon & Healy, my first piano. (At the time, it was my only piano.)

Spreading My Wings

I had been really nervous about creating this particular piece because I had never painted a person before. I was working off a photograph, and the girl didn’t turn out exactly like the image in the photo. But I figured it was okay; she was good enough. And I guess she was, for this painting was the first item to sell in the craft fair that year, which was very encouraging to me. In fact, it sold within fifteen minutes of the show’s opening.

So why did it take me another four years to work up enough courage to make Bach Yard Chickens #2? I honestly couldn’t tell you. But the second one is done, and it’s pictured here.

acrylic painting of girl feeding chickens
Bach Yard Chickens (2019)

This one has some obvious differences. One variation you may not notice in the photos is the size, for this one is an 11×14. I decided to try a smaller size because the piano parts themselves are so small by comparison to the canvas. I also have two more 11×14 paintings nearly finished. However, I do prefer the larger size, and will make the future paintings in the original 16×20 format.

Another difference is that the “chickens” now come from different upright pianos, to represent the reality that in a brood of backyard chickens, they will not all look exactly alike.

The Process

Hammer Key Chains (20)
Various hammers from upright pianos

Here are some representatives of the hammers I’ve taken off the pianos. When I remove them, they are dirty. I have to scrub them clean with a wire brush, then separate the various parts. Each individual piece has a name, but for the sake of simplicity, I’ll call the entire “chicken” part the hammer butt. It has a flange attached at the chicken’s “eye,” made of either wood or metal. I have a special tool that helps me to quickly and safely remove the flange, which I save for later use in another project.

You may also notice a string coming off some of the chickens. That’s called the bridle strap. Sometimes I can pull it off, but other times I have to cut it off with a box cutter.

For the next step, I take the hammer to the garage, where my power tools are set up. One of my table saws is equipped with jig saw blades. I use this one to remove the hammer shank (long stick) from the hammer (where the felt is) and hammer butt (a.k.a. chicken). The hammer shank goes into a storage container for some future use which I haven’t figured out yet. The hammer is set aside to be used as a key chain or as a head for a Conductor or Instrumentalist.

Finally, with a little sanding, the butt is ready to be used as a chicken. This process takes about 45 minutes to an hour for 5 chickens, not counting the time it takes to remove the hammer from the piano. That stage can vary greatly, I’ve come to learn, depending on the manufacture of the piano. The new flange removal tool has shortened the time by a good 15 minutes. Before I got that tool, I used any sharp tool I could find, such as an ice pick, to push the pin partway through, then I would pull out the rest of the way with pliers. This was tedious and made my hands hurt after a while. I’m very thankful for the new tool!

Art for Arts’ Sake

One of my favorite things about Bach Yard Chickens is getting to paint the background. I love what I do with old pianos, but above all, I love that God gave me the ability to paint. I don’t have much training in that area, but I do long to develop what talent is there by practicing. I want my work to be more than a craft—I want it to be an art.

Thank you for joining me on this tour of the studio. I look forward to seeing you on the next one. Until then, I invite you to check out photos of my other work in the gallery. Enjoy the rest of your day!