
O worship the LORD in the beauty of holiness….
Psalm 96:9a
Photo taken at Rainbow Falls, Gorges State Park, near Cashiers, North Carolina, 2012
Encore! Old Pianos with a New Song
Giving new purpose to old pianos

O worship the LORD in the beauty of holiness….
Psalm 96:9a
Photo taken at Rainbow Falls, Gorges State Park, near Cashiers, North Carolina, 2012

For God so loved the world, that He gave His only begotten Son, that whosoever believeth in Him should not perish, but have everlasting life.
John 3:16
This is what Christmas is all about—God’s greatest gift of love to us. We don’t deserve salvation, but it is available nevertheless to all who will receive it.
One of my favorite things about Christmas is the church cantata—a production with music and drama that focuses on some critical life lesson we can learn during this special season. For many years I was privileged to take part in the cantata, most often as either a singer in the choir or as the pianist. But even though those days are gone for me, I still enjoy getting to watch all the hard work others have put into the program each year.
Here is one I’d like to share with you. So this evening, why don’t you cast this production to your television in lieu of your regular program. You will laugh, cry, and consider just what the greatest gift truly is.
Photo taken in the Great Marsh, Virginia Beach, Virginia, 2010
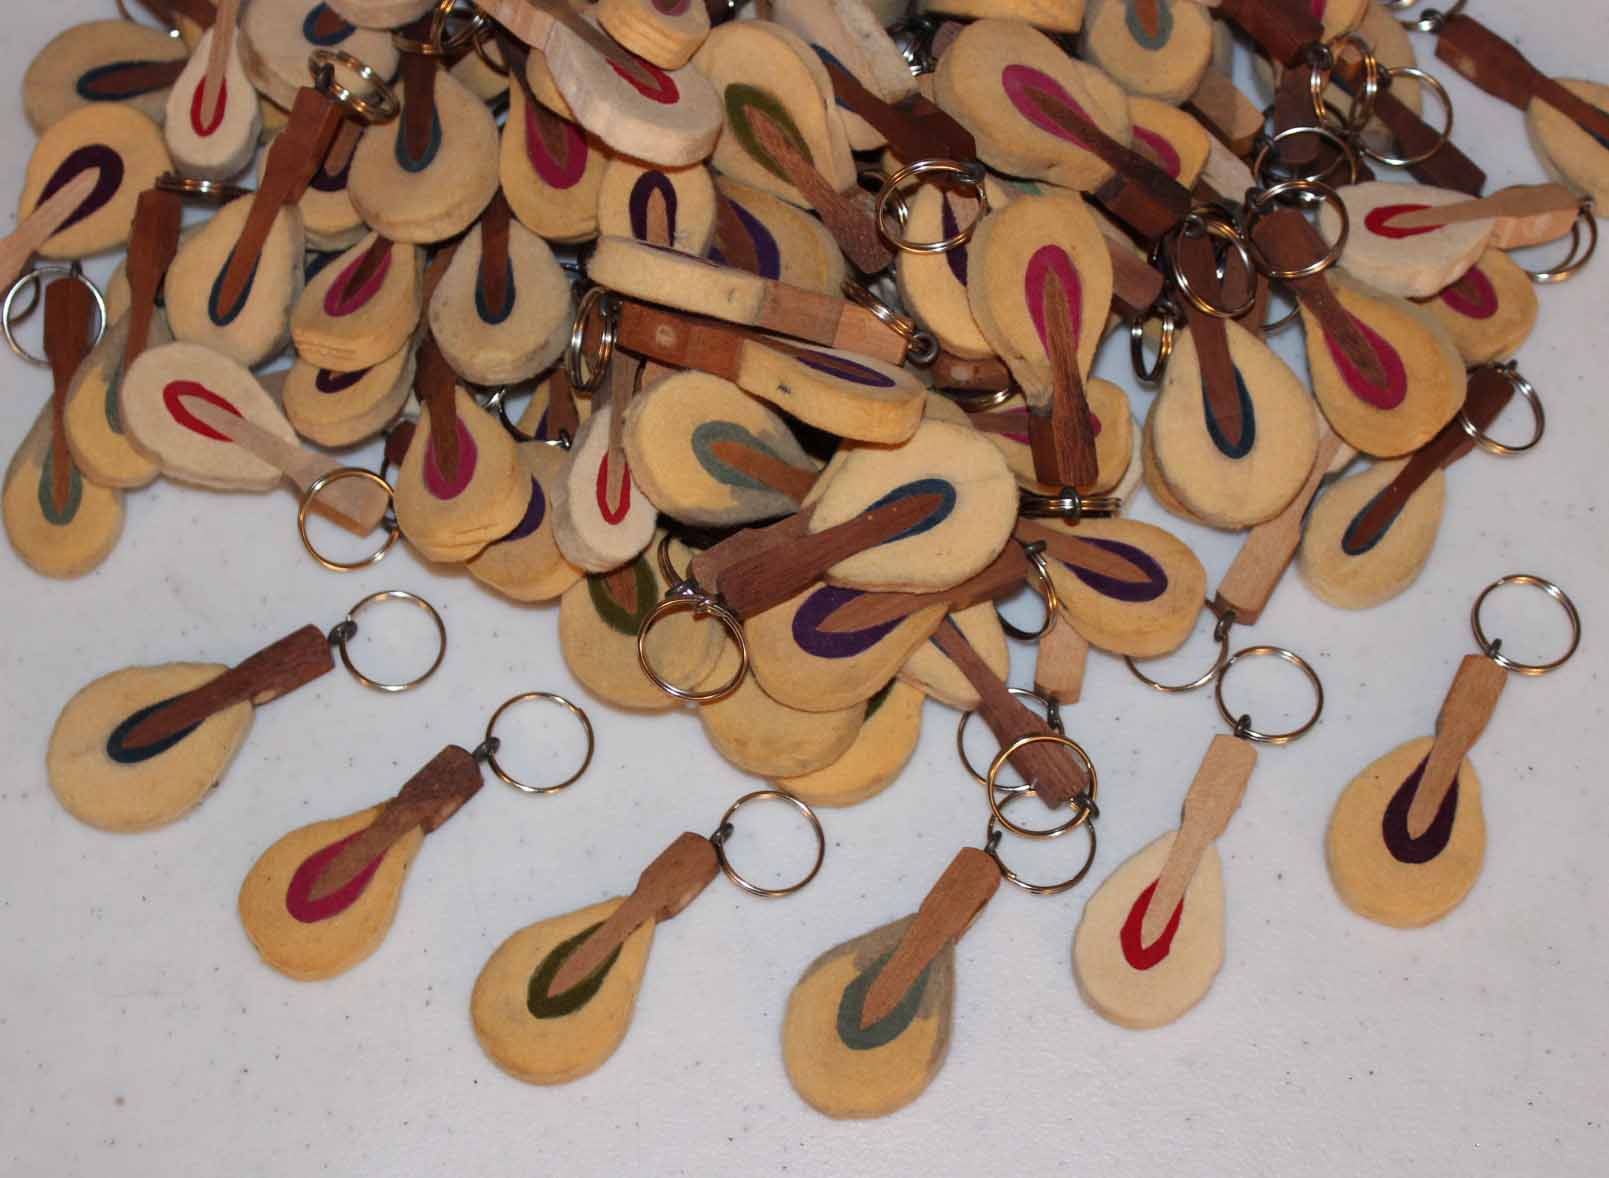
Most of my piano art creations have a music-themed name given to them. The key chains are one notable exception, for I have never called them anything but what they are. And that’s okay.
Welcome back to the Studio Tour. Today I’m going to share with you how to make key chains from piano hammers and ebony keys. The key chains are my most popular item, and I also use them as gifts for college graduates, personalizing them with their name and the year. In fact, personalization has become quite popular this year, with most online buyers requesting that a name or initials be written on the hammer. I have considered offering personalization at craft fairs. Perhaps this fall I will make it so.
The first set of key chains I made were constructed of piano hammers, an eyelet screw that also came out of the piano (technically called a letoff regulating screw), and a key ring. I bought a package of 100 key rings on eBay and set out to make 100 piano hammer key chains.
The process is tedious but fun, at least for me. I’ll share my process with you, and then you decide if you would also like to make piano hammer key chains.

")
")
")
")
")
")
")
")
")
So, what do you think? Are you ready to make a batch of piano hammer key chains? If not, feel free to shop in my store for one that I made for you.


")


There is another design I created, one that does not use the regulating screw. Instead, I drilled a hole through the hammer near the top, using a step drill bit with long tapers. This design came about when I tried making my second batch of 100 key chains, but the first five regulating screws broke when I had them screwed almost all the way into the hammer. I concluded that those screws were too degraded with rust to be useful. They didn’t appear rusty, but they had obviously been weakened by time and the elements.
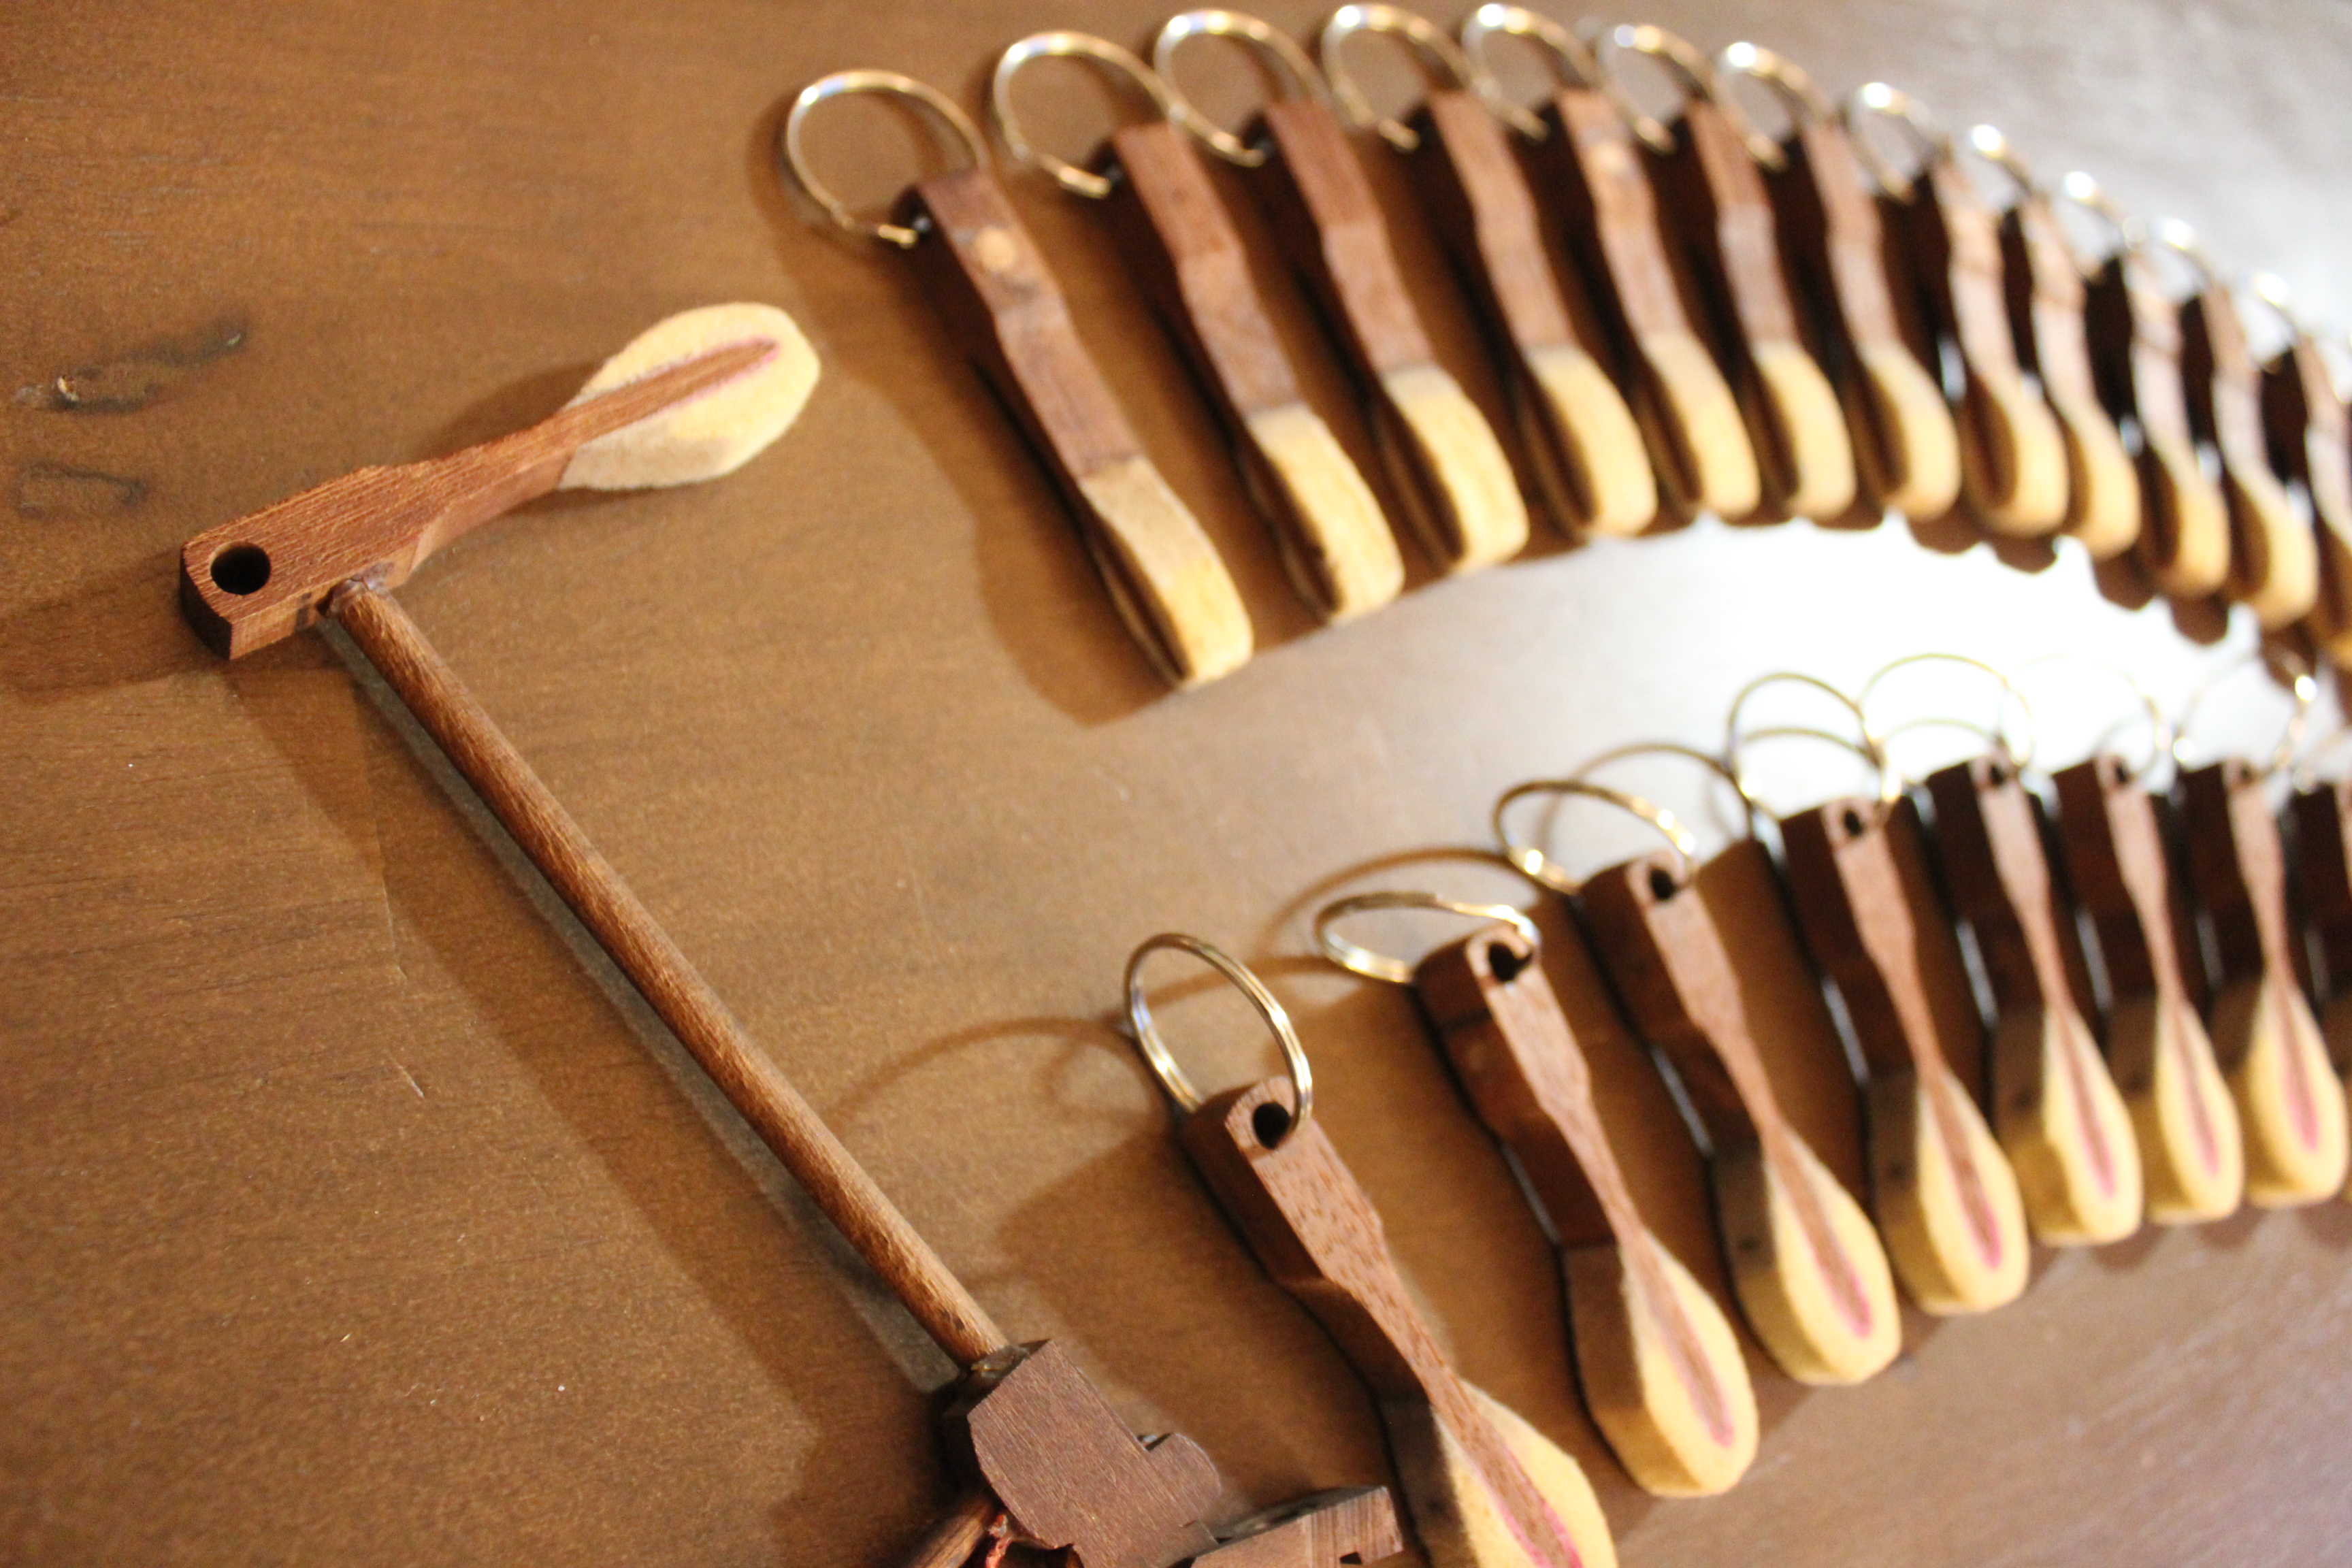
In one of the pianos, an 1866 Steinway upright, I discovered some 25 hammers that already had a hole drilled into them. It served no purpose that I could detect, but appeared to be part of the design. I took advantage of that pre-made hole to make more key chains. The hole goes from front to back rather than from side to side. This is inconvenient for the purpose of displaying the key chains on the peg hooks; but the design does enable the hammer to lie flat against your keys when you add actual keys to the ring.
However, I do prefer to use the regulating screw in the construction of my key chains, so I went back to eBay and purchased some brand new ones. That way I would know for sure that they were strong enough for the task. It increases my cost a little, but it also improves the quality of my product.
")
")
Next came ebony key chains. To date, I have not used regulating screws to make the ebony key chains, but only drill holes through the ebony and add the key ring. It sounds simple, but though there are fewer steps involved in making key chains from the ebonies, these steps can require more effort.
The ebonies are attached to key extensions, long pieces of wood (usually 12″-14″), by means of a special glue used specifically in the construction of pianos. The glue does degrade over time, and sometimes the ebonies pop off easily. Other times I soak them in a warm soapy sink bath, and am able to twist them apart. And sometimes I am powerless to separate them from the extension. Those ebonies are set aside for a different purpose.
I decided not to paint and buff the ebonies that show age, for the natural wear and tear of use has its own charm. I simply wash them, dry them, and polish them with a lint-free cloth and a touch of linseed oil.
Drilling the hole in the ebonies also takes more effort than drilling a hole in the hammer because ebony is a very hard wood. Yes, I have come across a few pianos that did not use genuine ebony for the sharps, but painted a softer, cheaper wood. Another technique is to cover the wood with black plastic. These are also cheaper and hold up better to use when the piano is being played. I save these sharps for other projects, and only use genuine ebony sharps to make my key chains.
Genuine ebony does not need to be painted because it is naturally brown-black in color. I have found some that were painted, and have removed the paint to allow the natural beauty of the wood to show through. They are quite stunning when they have been polished with the linseed oil, and the grains of the wood are visible!
Recently I made a new batch of key chains to sell at the Sand Dollar Cottage, a gift shop/art gallery in Navarre that carries some of my piano art. This was the first time I ventured to write on the felt parts of the hammers, and it turned out successfully. Again, I sealed the surface before writing, and most of the pen colors came out nice and crisp. I made some “ebony” key chains for this purpose as well. These are not genuine ebony, but are actually made of plastic, as they came off an old electronic organ rather than a piano. These key chains will be available very soon at the Sand Dollar Cottage.
")
")
")
")
If you happen to be in the area, do stop in and take a look around. The Sand Dollar Cottage is a co-op of about 50 local artists. Here you can find beautiful art, home décor, and souvenirs to take home to friends and family. Christmas ornaments are also sold year-round because folks tell me that they collect Christmas ornaments everywhere they go. The Sand Dollar Cottage is conveniently located in the Sand Dollar Plaza on Highway 87, northbound, just off Highway 98.
Thank you for joining me on this tour of the studio. I look forward to seeing you on the next one. Until then, I invite you to check out photos of my other work in the gallery. Enjoy the rest of your day!
This week’s challenge comes from Tourmaline and is called Color Your World. The color for this week is asparagus. As a vegetable, this just happens to be a favorite with my family, especially when drizzled with butter and baked with garlic and mozzarella. And as a color, asparagus also shows up quite often, especially in the felts of the keys.

Piano hammers serve many useful purposes in my arts and crafts. These particular hammers have been made into refrigerator magnets.


Hammers also may become “heads” for my conductors and musicians…
…or “flowers” in a Piano Bouquet. This set was yellowed using a color wash, to resemble the variety of rhododendron known as the yellow hammer.

Thanks again to Cee Neuner for her amazing directory, “For the Love of Challenges.” For the record, Cee’s directory lists not only photo challenges, but also writing and music challenges as well, and they are grouped by category. It’s very well organized.
This week’s challenge comes from Tourmaline and is called Color Your World. The color for this week is aquamarine.
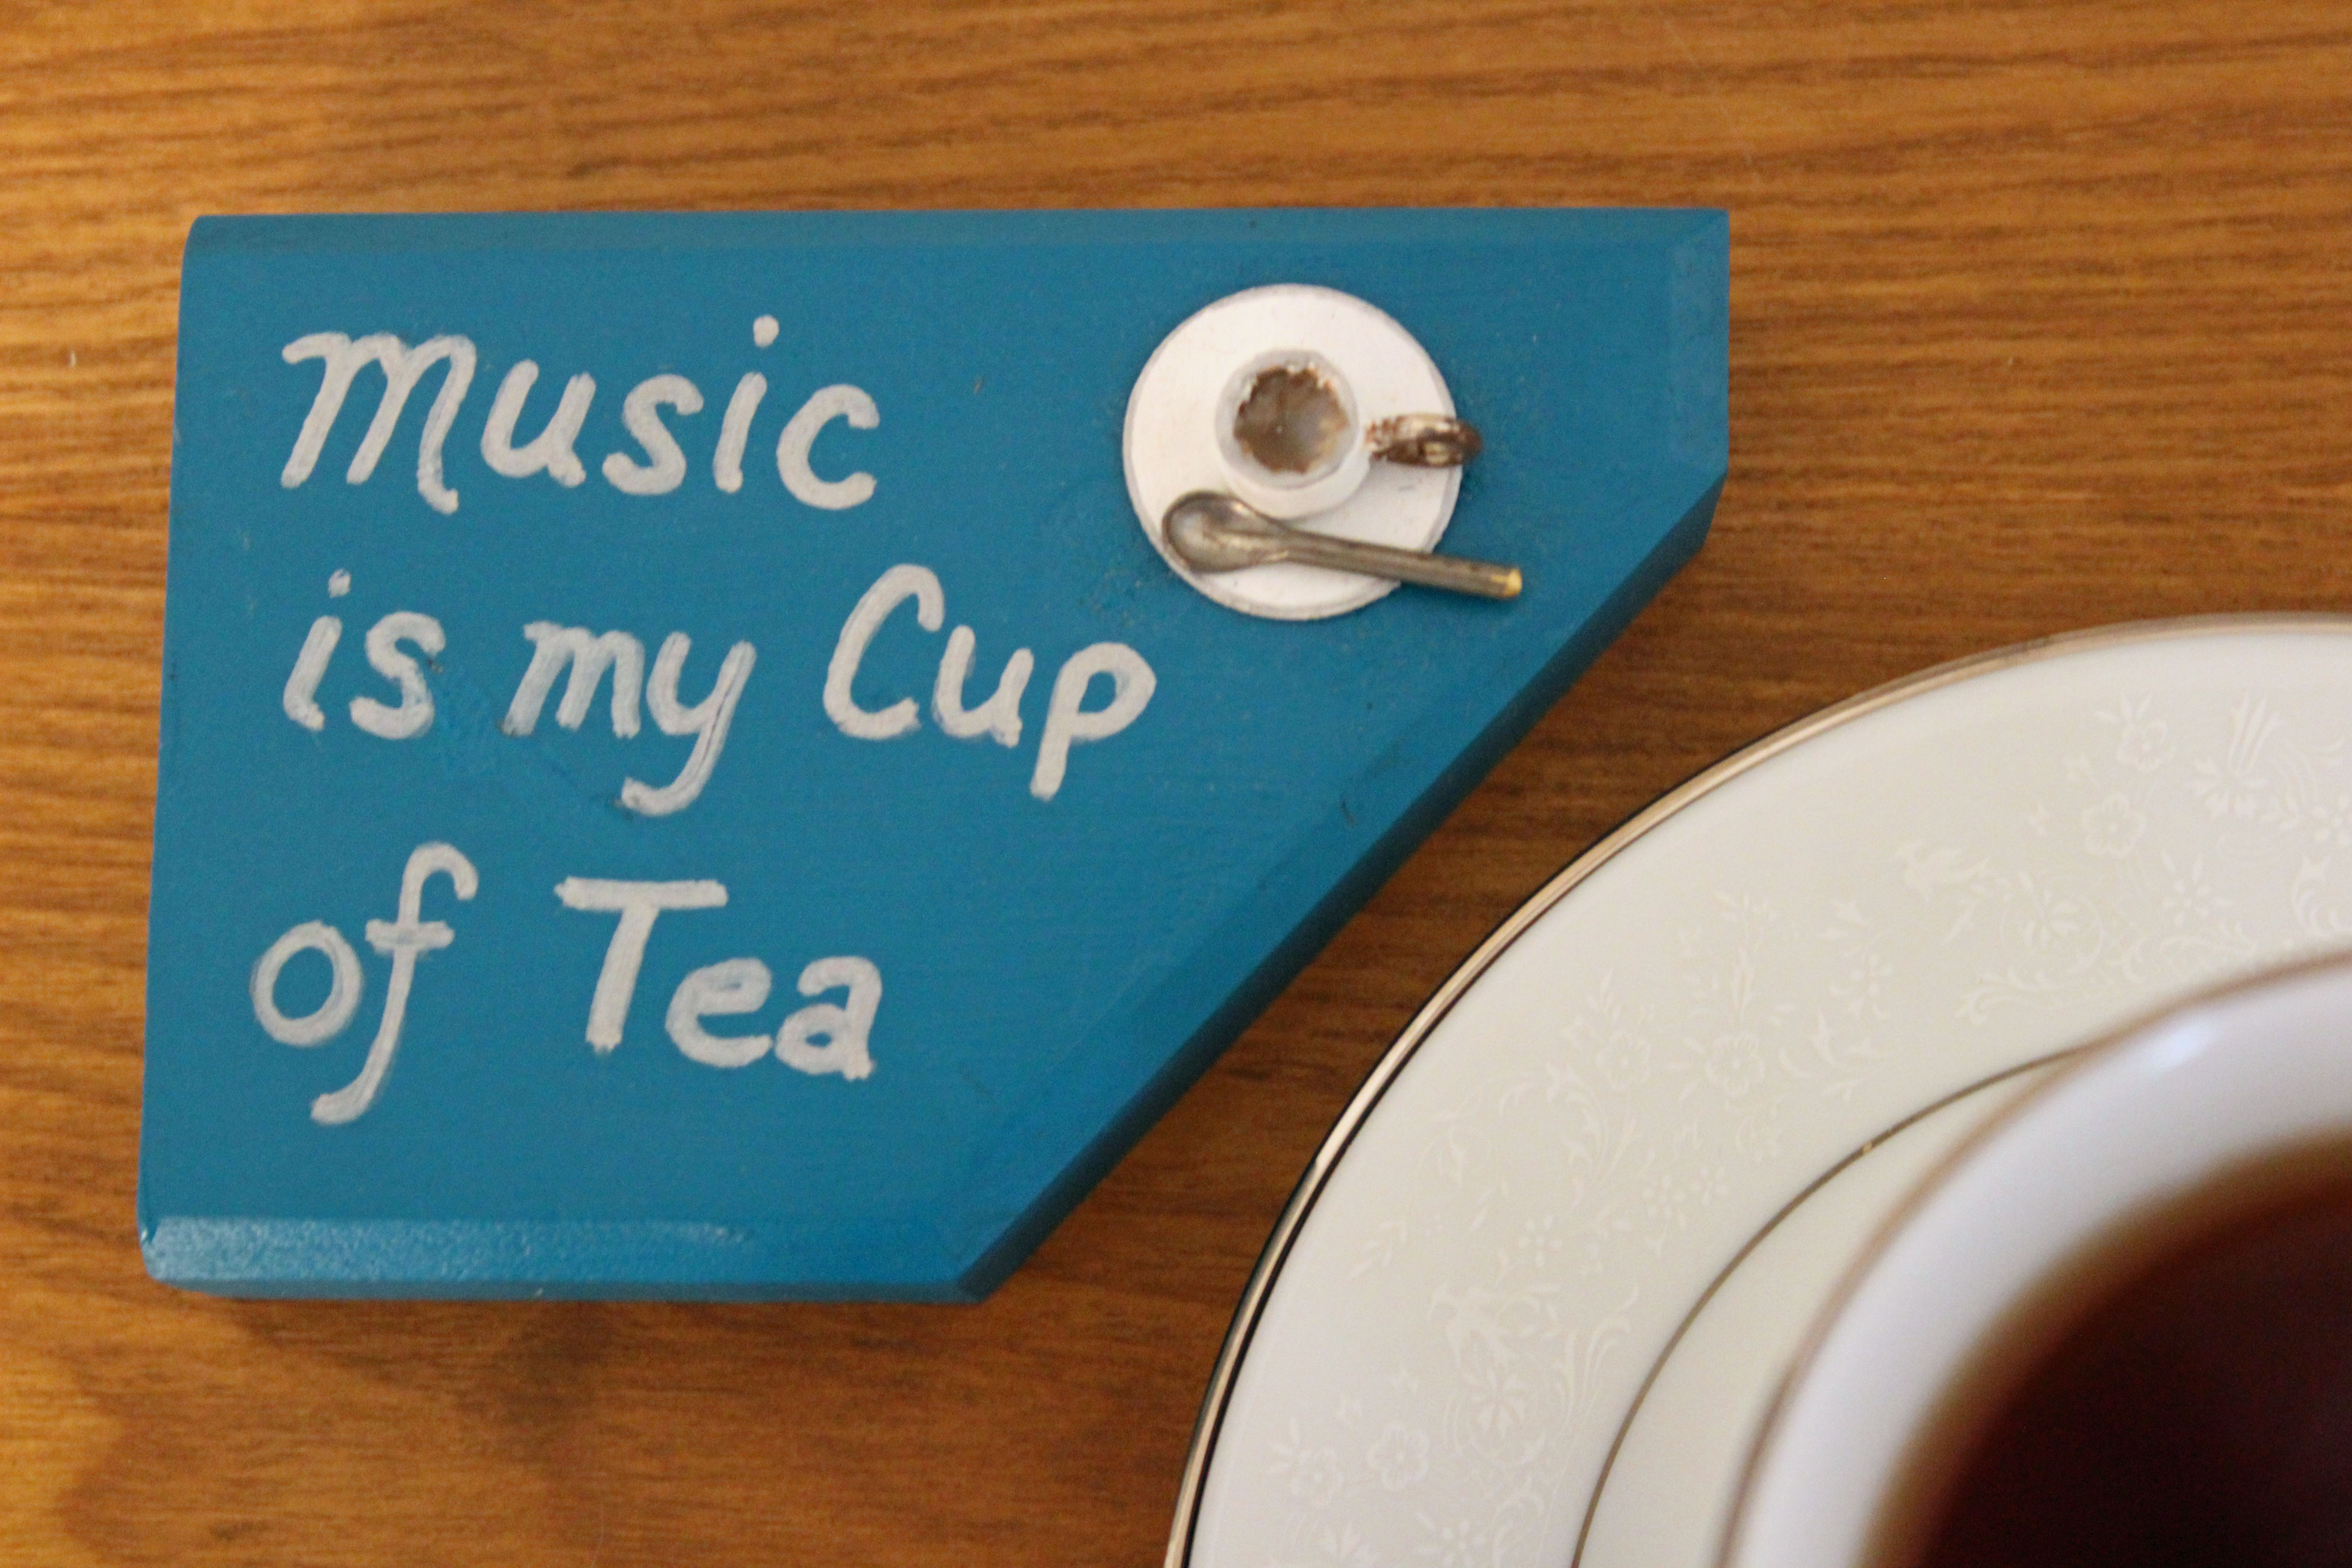
The image above is called “Cup of Music,” and is made entirely from piano parts: washer, bushing, regulating (eyelet) screw, and damper spoon, all mounted on a block of wood from inside the piano.
Below is a piece that goes by two names. To most of the world it is “Ocean Sounds,” but in Florida it is called “Beach Blues.” This is a special hometown name that bears significance to the folks who live here.

Thanks again to Cee Neuner for her amazing directory, “For the Love of Challenges.” For the record, Cee’s directory lists not only photo challenges, but also writing and music challenges as well, and they are grouped by category. It’s very well organized.
This week’s challenge comes from LifeLessons – a blog by Judy Dykstra-Brown, and is called All Lined Up. The challenge was posted on Monday, May 27. I don’t know how long it will run, but feel free to jump in with your own contribution whenever, for all you have to do is share a link to your post in the comments section of her post, at the link above.
Click the photos to enlarge and read the captions.
")

")

")

")
")
 (5)")

Some of this week’s photos are of completed projects, while others are of “raw materials,” but in every case, they are All Lined Up.
Thanks again to Cee Neuner for her amazing directory, “For the Love of Challenges.” For the record, Cee’s directory lists not only photo challenges, but also writing and music challenges as well, and they are grouped by category. It’s very well organized.
Allow me to share with you the latest creation from the Encore studio, tell you why and how it came into being, and why it has two names.
Last year I had the pleasure of participating in a holiday craft show in Destin, Florida, where I met Carolyn Williams, the owner of Sand Dollar Cottage, an art gallery/gift shop in Navarre. She and several other artists were also vendors at the craft show, and we visited each other’s booths. Carolyn fell in love with my work and invited me to place some of my pieces in her gallery in Navarre. So in January I did just that!
Carolyn does an excellent job of organizing the pieces in her shop according to color, theme, etc., and not necessarily by artist. As it would happen, however, most of my things are all in one place because they are unique, being made of piano parts, and having nothing to do with beachy themes and muted colors. In short, they are their own theme.
")
")
")
")
")
")
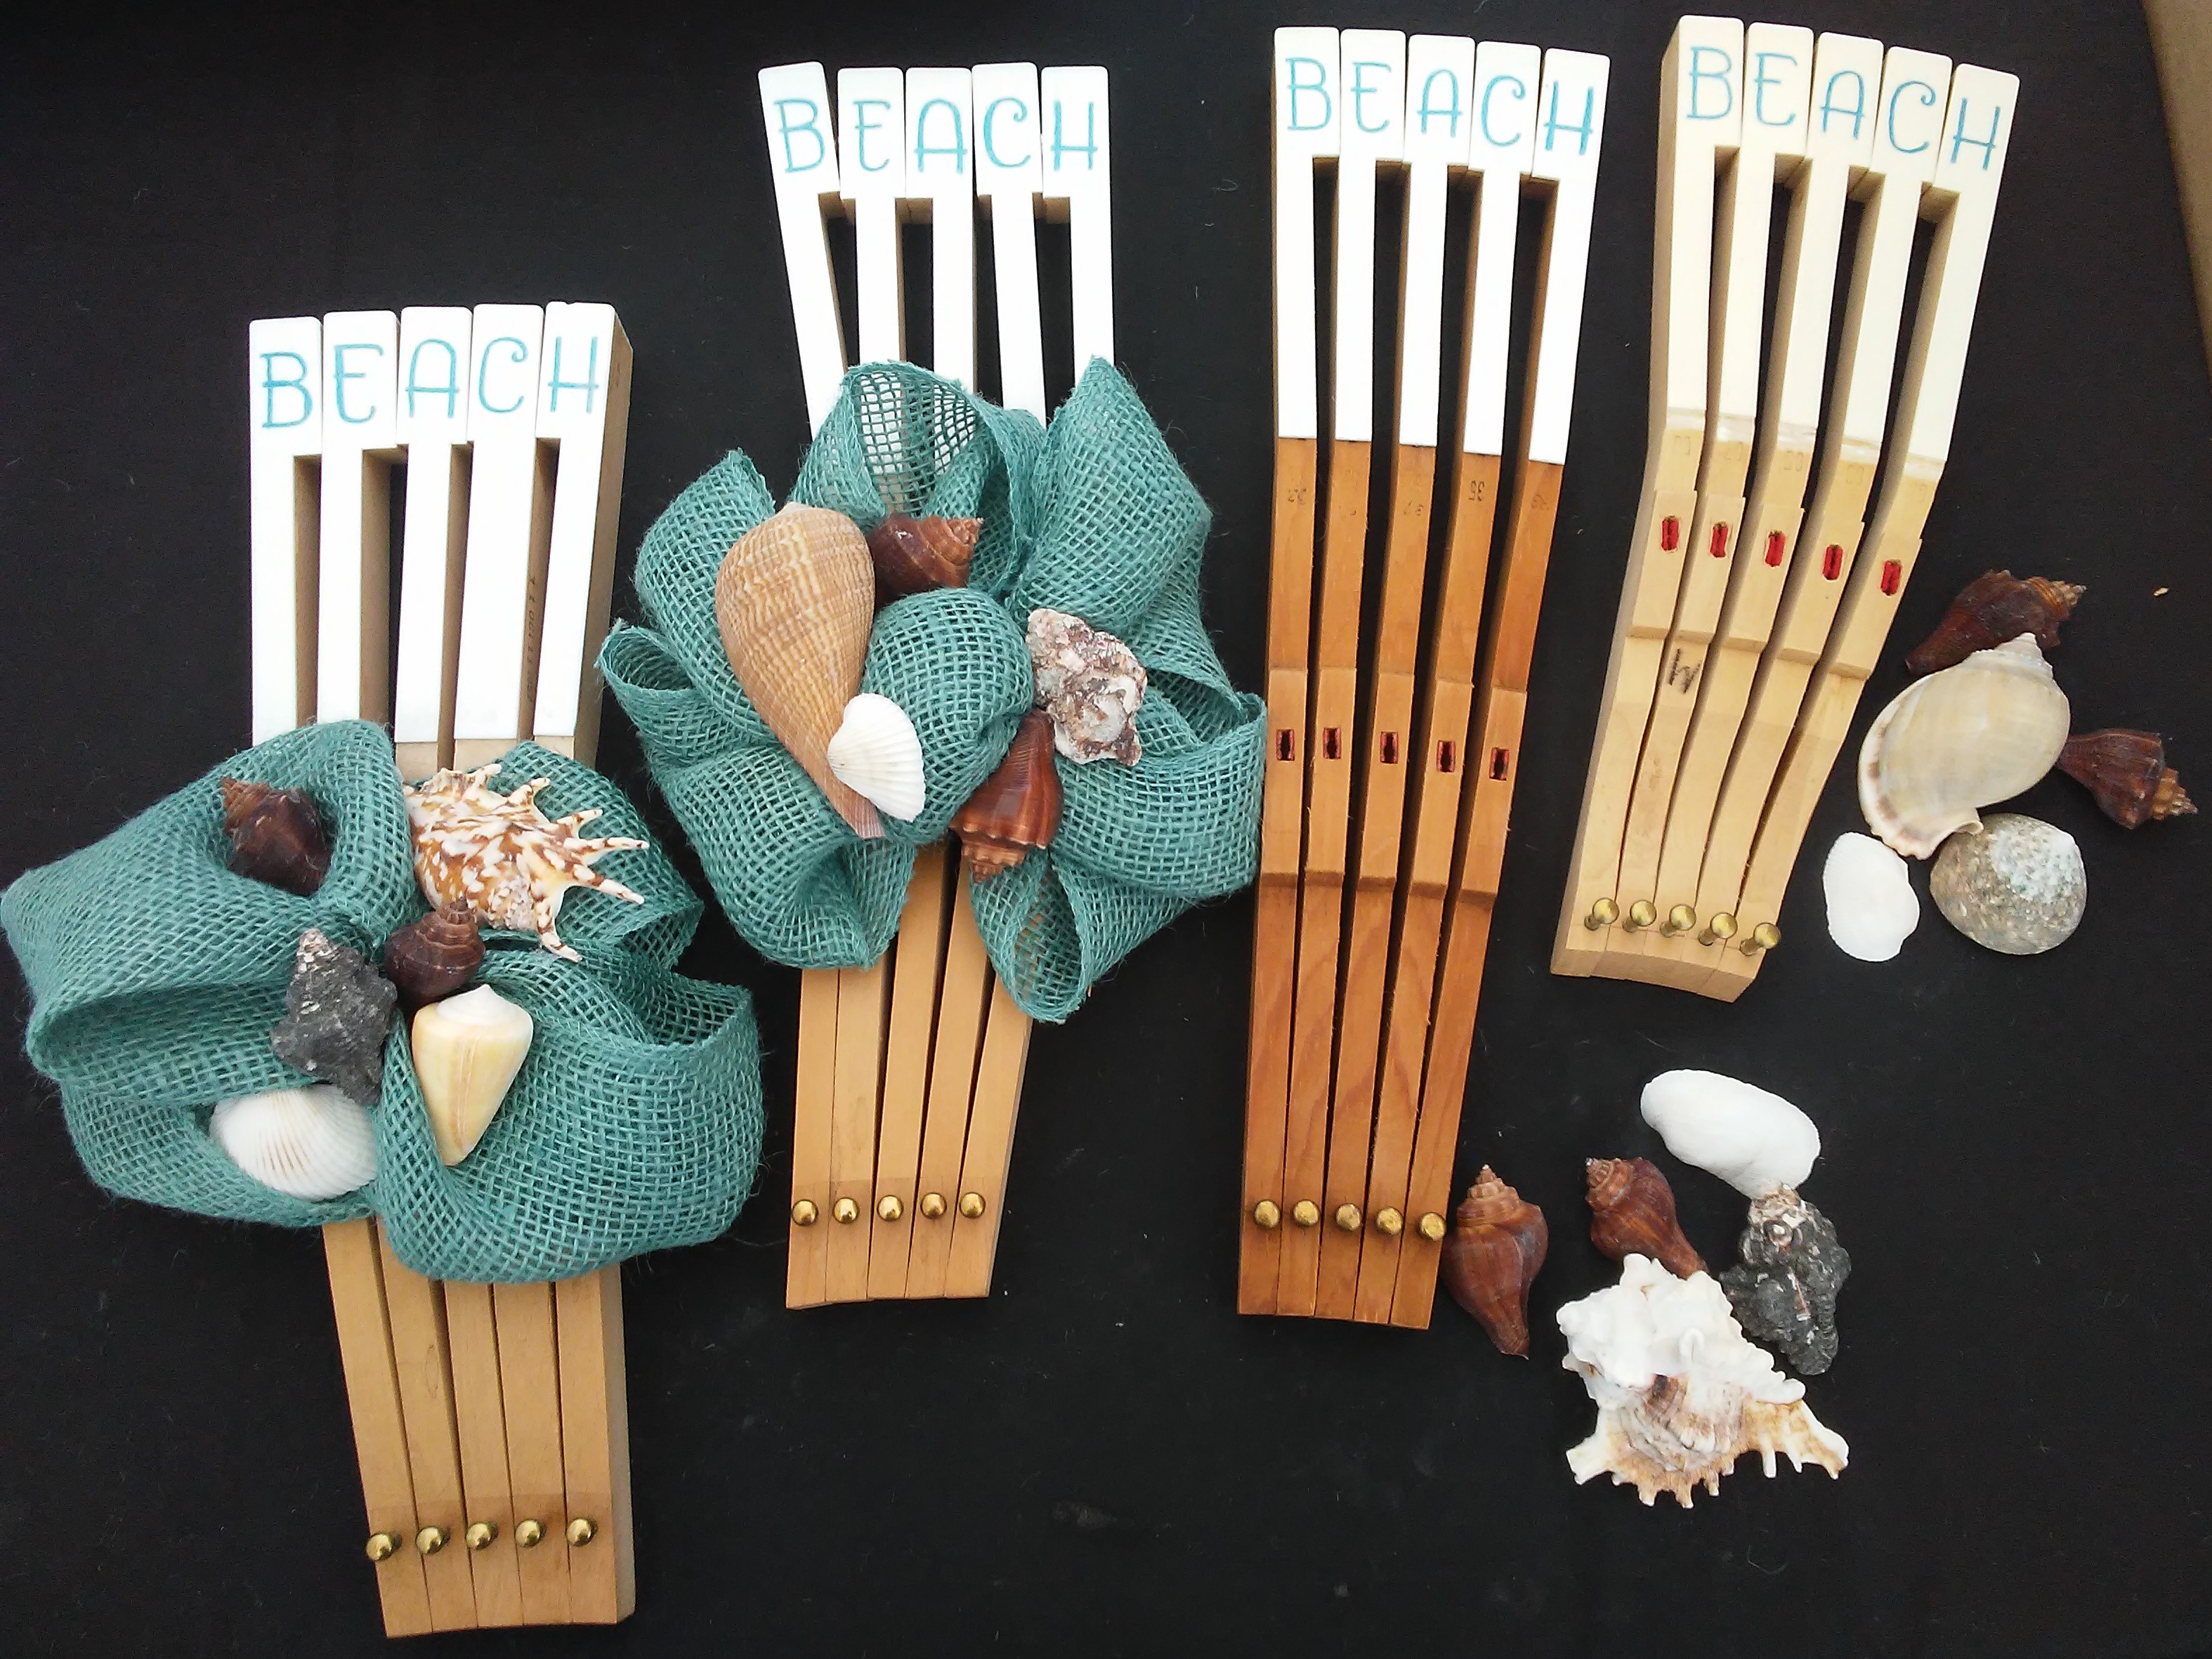
So as time has allowed, I’ve been brainstorming, trying to come up with ways to combine piano art with beach art, to appeal to the musician who visits and/or lives at the beach. This was my first creation, but it will by no means be the last, as other ideas are simmering as well….
I went to work, collecting the keys that I would use to make the fans. I practiced my lettering, chose the pen that I would use to write on the keys, then went shopping for ribbon and shells. I thought about going to the beach to pick up shells myself, but I’ve been there, and I know it would have taken me a long time to collect the number of shells I would have needed, and time is money.
The next step was to figure out how to securely connect the keys to each other and mount them to the wall. I glued them together, but as very little of their surfaces actually touch each other, I reinforced the connections with mending plates at the top and wood plates toward the bottom.
Since I gave away my bow maker, I made these bows by hand, sewing them together with floral wire. Then I used a heavier wire to fasten them to the keys, tying off the wire in the back, and tucking it in between two of the keys. Using a hot glue gun, I secured the ribbon to the keys in front, so that it would not hang down from the weight of the shells, and I hot glued the shells in place on the ribbon. I also hot glued two round felts from the piano to the bottom of the keys in back, as bumpers to hold it off the wall.
The wood plate in fact serves multiple purposes: it reinforces stability, hides the floral wire, and displays the artist statement. After trimming the board to size and sanding the edges smooth, I applied wood glue where the board would go, then drilled five pilot holes along both the top and bottom, to attach it to each key using short screws from out of the piano. I also used a piano screw to attach the mounting hook.
Finally, I edited the story of my art to fit on the board, printed it out on labels, trimmed them down to size, and applied them to the board. With that, the project was done!
Actually, I skipped a step in process—naming it. I had been working on the piece while at the Blues & BarBQ Festival at St. Joseph’s Church in Pensacola. In fact, that was where I worked on making the bows, attaching them to the keys, and gluing down the shells. I showed one of them to a lady whom I had met at the show, and she purchased it on the spot. I was thrilled that she liked it, but I said, “I don’t know what to call it yet, or how much I want to ask for it.”
She replied, “Well, you’d better think about it. I’m going to walk around some more, and I’ll be back to get your answer.”
So I put up photos on Instagram with a plea for help in naming this piece. I like to give my works musical names whenever possible. I had been listening to Blues music for the past day and a half at the festival, and had come to realize how important that genre is to this region. It is in no way limited to Louisiana, but colors the cultures of southern Mississippi, southern Alabama, and western Florida as well. And so I thought, “Beach Blues…” to reflect the region for which this piece was made in the first place. When the lady returned, I had a name and a price. She was honored by the name, but she said my price was too low, so I raised it at her insistence.
")
")
")
")
")
A little while later I saw that I had received a response to my plea for help with the name. A friend from Virginia had suggested “Ocean Sounds,” and I liked that equally well. Reading the name brought to mind soothing piano music with an overture of crashing waves, and I knew it would do the same for my customers. I decided to use both names. The piece will be called “Beach Blues” when sold locally here in the Florida area, but it will be called “Ocean Sounds” when sold online or in Virginia. (Yes, I am going back to my beloved Virginia later this year to do two shows!)
In honor of my friend who gave me the name “Ocean Sounds,” I would like to share a video of piano music with ocean sounds. I hope you enjoy it.
The creation of “Ocean Sounds,” or “Beach Blues,” whatever you prefer to call it, is somewhat symbolic of my assimilation with the place in which God has put my family and me. It was not easy making the transition from Virginia to Florida. Yes, I was born here in this state, but Virginia is my family’s birthplace, and the place that I call home. Yet I have learned to be content here. This is where God brought us, and this is where God wants us. It’s a good place to be—in the center of God’s will. Today that place, the center of God’s will for my husband and me, is Florida. Someday He may move us somewhere else. But until then I will listen to the Beach Blues—not forsaking the memory of the Ocean Sounds, but choosing to live in the present with contentment.
May you, too, find contentment in the place, and with the people, where God has placed you. God bless!
Thank you for joining me on this tour of the studio. I look forward to seeing you on the next one. Until then, I invite you to check out photos of my other work in the gallery. Enjoy the rest of your day!
This week’s challenge comes from Citysonnet and is called May Colors and Letters, where for the month of May, each day is assigned a particular color or letter, and the sky is the limit as to our individual interpretation. Today, May 21st, the theme is Green Melody, so I have decided to share photos of some of the things I’ve made that happen to be green.

The hammers I find in the pianos come in a variety of colors: red, fuschia or pink, purple, royal blue, teal… and green… two different shades of green, in fact. To distinguish them, I simply call them green and aqua.
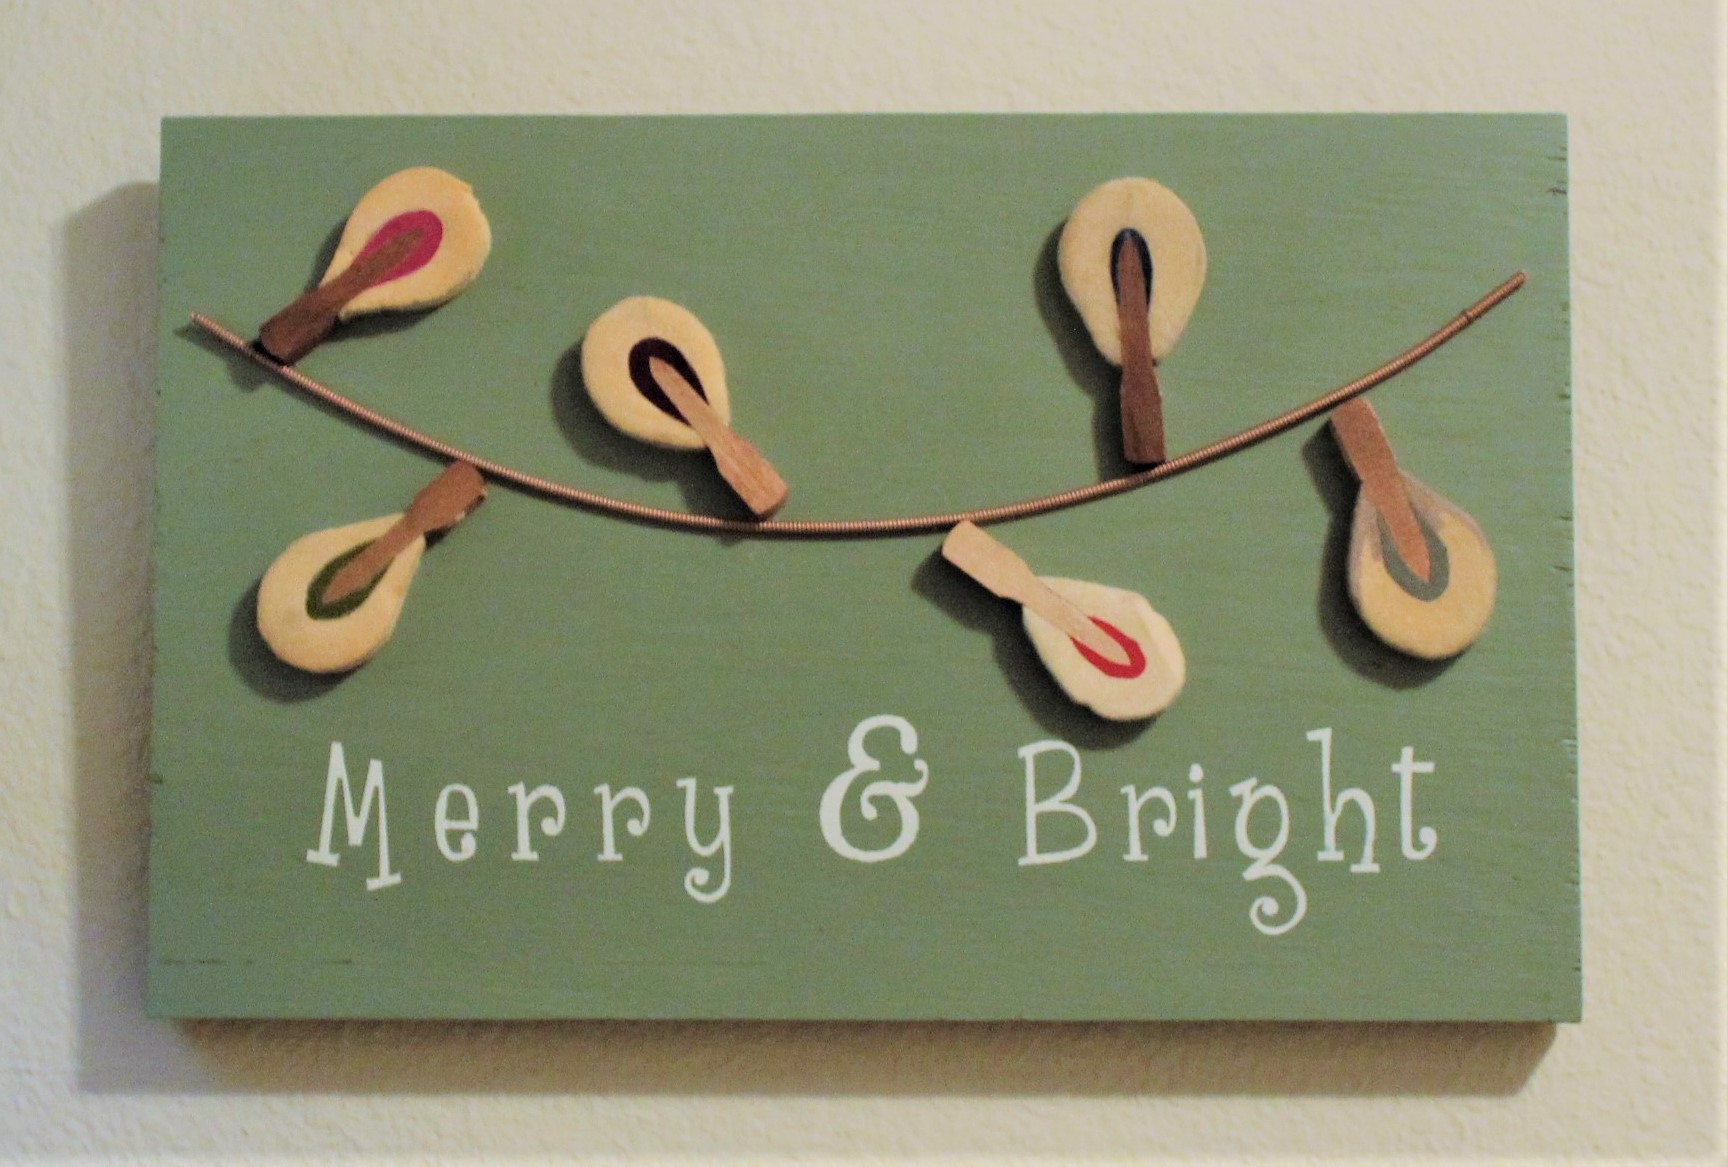
This one may be out of season, but it is the color for the day. 🙂 I got the idea for this sign while browsing the stencil section of the local craft store. When I saw a stencil of a string of Christmas lights, right away I knew I could make that with hammers and a section of piano wire. It’s mounted to a piece of wood that also came from an old piano. And yes, I did purchase a stencil to add the lettering. 🙂
Thanks again to Cee Neuner for her amazing directory, “For the Love of Challenges.” For the record, Cee’s directory lists not only photo challenges, but also writing and music challenges as well, and they are grouped by category. It’s very well organized.
With more and more customers asking for a clock, I knew it was time to build one. To be honest, I don’t remember where the idea for this design originated, or how I decided to incorporate plexiglass, but I will say that the end result has been worth the risks of stepping out of my comfort zone. And believe me, I stepped out with both feet on this one.
This first clock would be very large, and it would be for me, for two reasons. First of all, my kitchen needed a clock. We have a vaulted ceiling that extends high above the kitchen cabinets. When the house was staged for sale, there was a large clock in that space. I made up my mind that if the clock did not convey with the house, I wanted to replace it. Well, the clock did not convey, so I was going to replace it with a key clock.
This clock would have sentimental value, for I was building it with keys from a piano I used to play at my church. It had suffered smoke and water damage in a fire when our sanctuary burned down. In fact, when the piano first came to me, the sooty white keys were as black as the sharps, though with some TLC, I was able to get them white again. The piano from the sanctuary was reduced to charcoal, but this one was in a classroom. So while it was ruined as an instrument of music, I was overjoyed to discover that many of its pieces were redeemable for art.
So I measured the space on the wall where the clock would go, cleaned up twelve of the keys, laid them out in a spiral on the kitchen floor to the dimensions of the space on the wall, and took a picture of the arrangement. I studied the keys to determine how and where to attach them to the plexiglass so I would know what size circle I needed to purchase. Then I shopped around both locally and online to find the best source for the plexiglass. I found it on eBay, already cut into circles. I also found clock mechanisms on eBay that could be attached to the front of the plexiglass so that I would not have to take the entire clock down off the wall to change the time or the batteries. That was my favorite feature of the clock.
Before beginning to build the first clock, I prayed and asked God for wisdom to know how to do it right. Yes, the Lord cares about everything in our lives, no matter how great or small those things may seem. Then I watched several YouTube videos regarding how to drill holes into plexiglass without cracking or scratching the surface. When I believed I was armed with enough knowledge, I set out to make key clock number one. As recommended in one of the videos, I bought a titanium step drill bit to use for the task and prepared my worktable by laying down two pieces of scrap 2x4s so my drill bit could extend beyond the plexiglass without hitting the table. Using a 24″ ruler and a compass, I marked lines on the protective cover on one side of the plexiglass, to indicate where the keys would be positioned around the face of the clock. Next, I measured and marked where I would place the screws in the keys, and finally, where the holes would go in the plexiglass.
Now came the crucial moment, the moment when it was time to drill the first hole in the plexiglass. The tutorial had warned that plexiglass heats up fairly quickly, and that you have to use your drill on high speed to prevent cracking. So no going slowly because you’re scared. It’s all or nothing. He also recommended leaving the protective covering on both sides of the plexiglass. If there is none, then cover the area to be drilled with masking tape before drilling. This also helps to prevent scratches and cracks. Apply firm pressure and feel the steps as your drill bit sinks into the material until you reach the desired depth. One… two… three… That’s it. My first hole is done! Only 23 more to go! I tested them with the screws (also taken from out of the piano). Some of them didn’t quite sit right, so I had to widen the holes a bit, but before long all the holes were drilled, and it was time to remove the protective covering. No cracks! Praise the Lord!
The next step was to drill pilot holes in the keys to prevent the wood from splitting when the screws were added. I could not use the step bit for that, so I used my regular drill bits and went up three sizes, effectively drilling 24 holes three times, for a total of 72 holes. Then came the task of attaching the keys to the plexiglass. I was using both “ivory” (not genuine in this case) and ebony keys in a chromatic arrangement, but since I was working from the back of the clock, I had to think backwards, not easy for this brain of mine. I messed up a couple times and had to remove some keys and start over, but eventually I got them on correctly. Another victory—all the keys were attached, and still no cracks in the plexiglass! Again, I praised and thanked the Lord.
The mounting hardware went on with one of the screws that holds the key at the twelve o’clock position. With that done, the only thing left was to put the clock mechanism on. I had not thought to mark the center (something I do nowadays), so I assembled the clockworks and laid it down in the center of the assembled face, then watched the second hand go around, making minor adjustments to its position as needed until it was centered. I marked the place with a Sharpie, then set it aside while I attached the mounting foam. This particular model came with a foam shell that attached with adhesive to the surface, and the clock slid into it. A 4″ round black face hid the foam pouch nicely, and it looked beautiful in the center of the keys.
Oh, yes. I learned the hard way to wear latex gloves throughout the process to keep fingerprints off the plexiglass. Dust is another matter. I did my best, but it is inevitable that some dust will get on the plastic. I wiped it carefully with a lint-free cloth, then hung the clock on the wall. This was no small task, especially since I had to use an 8′ ladder, and I’m afraid of heights. But it’s up there, and it’s going to stay up there indefinitely.
")
")
")
")
The key clocks I make for sale are not nearly so large, although they are not small by any means either. For my customers, I cut the extensions off the keys to produce a clock that is 21″ in diameter. The assembly process is the same, but I make the clocks in a variety of designs, both chromatic and symmetrical. Among the symmetrical patterns, sometimes I place the black keys (ebonies or sharps, whatever you want to call them) at 12, 3, 6, and 9, and sometimes I place the white keys (or ivories) in those positions. As with all of my creations, no two clocks look exactly alike. The keys will vary, depending on which piano they came from. The clock parts will vary, depending on my supplier. And the design will vary, depending on the whim of the day. I have also made some to order. In fact, one of my favorites was a clock made for a beach house. For this one I used distressed keys, old ivories that were still somewhat whitish but broken, and painted black keys that had turned gray after a good soaking in the sink.
Most of my piano art creations have a name that has something to do with music. For a while, I simply called this one “Key Clock,” but it too begged for a musical name. So I stared at the movement as it went around the face of the clock one evening and thought for a while, waiting for a name to come to me—Andante, “moderately slow tempo.” If you look at the metronome, andante doesn’t appear to be all that slow. But then again, neither does time, especially when you’re having fun. And I have fun making art from old pianos. Even so, time is steady, andante, as it marches along, never going backward, always pressing forward.
To date I have made six Andante Key Clocks, with four more ready for assembly. And so far I have not cracked any plexiglass. I still thank the Lord for success every time I finish drilling 24 holes in a new sheet, and I’ll do it every time.
Thank you for joining me on this tour of the studio. I look forward to seeing you on the next one. Until then, I invite you to check out photos of my other work in the gallery. Enjoy the rest of your day!
This week’s challenge comes from Little Pieces of Me, where for the month of May the theme of her Go on a Photo Adventure challenge is CONNECTION.
I recently made a few new connections in Slidell, Louisiana, when my two sons and I drove out there to meet a retired piano tuner, his daughter, and her son. We also brought back with us three old pianos and as many boxes of old piano action parts as we could fit in the truck without making one of my sons walk back home again! 🙂

What a joy it was to spend the day with these beautiful people! Our lives are forever changed by this happy connection.
Thanks again to Cee Neuner for her amazing directory, “For the Love of Challenges.” For the record, Cee’s directory lists not only photo challenges, but also writing and music challenges as well, and they are grouped by category. It’s very well organized.


