


Most of my piano art creations have a music-themed name given to them. The key chains are one notable exception, for I have never called them anything but what they are. And that’s okay.
Welcome back to the Studio Tour. Today I’m going to share with you how to make key chains from piano hammers and ebony keys. The key chains are my most popular item, and I also use them as gifts for college graduates, personalizing them with their name and the year. In fact, personalization has become quite popular this year, with most online buyers requesting that a name or initials be written on the hammer. I have considered offering personalization at craft fairs. Perhaps this fall I will make it so.
The Process
The first set of key chains I made were constructed of piano hammers, an eyelet screw that also came out of the piano (technically called a letoff regulating screw), and a key ring. I bought a package of 100 key rings on eBay and set out to make 100 piano hammer key chains.
The process is tedious but fun, at least for me. I’ll share my process with you, and then you decide if you would also like to make piano hammer key chains.

")
")
")
")
")
")
")
")
")
- Remove the entire action from the piano.
- Unscrew the 264 screws that hold the pieces in place.
- Separate the pieces as necessary, releasing the bridle strap from the bridle wire. (These often show dry rot, depending on their age.)
- Scrub each hammer with a wire bristle brush to remove the dust and dirt that has accumulated over as many as 100 years. Be sure to wear a mask.
- Using a table saw with a jig saw blade, cut the hammer away from the hammer shank. While you’re at it, go ahead and separate the hammer shank from the hammer butt as well. Sort these pieces into their storage containers for later use in other projects.
- Scrub the letoff regulating screws while still attached to the letoff rail to remove dust and surface rust; trust me, it’s easier this way.
- Using a hook from a pick and hook set, turn out each of the letoff regulating screws from the rail. Allow the letoff buttons to fall off the end of the screw, then collect the buttons into a storage container for future use in another project.
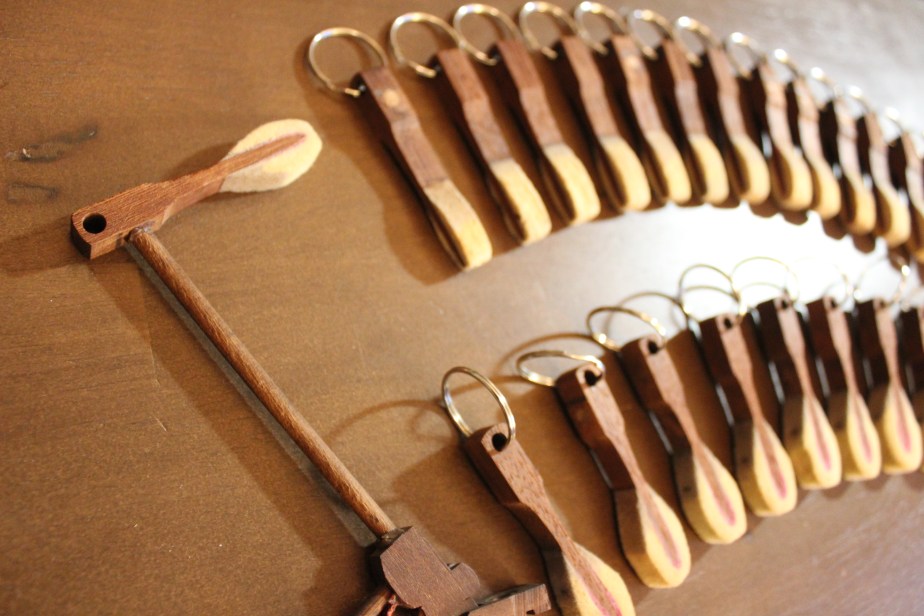
- Secure one of the hammers in a vice to hold it upright and steady; drill a pilot hole into the top of the hammer, then widen the hole with a size 2.0 drill bit.
- Screw one of the letoff regulating screws into the hole on the top of the hammer.
- Add a key ring to the regulating screw.
- Repeat steps 8-10 ninety-nine more times, and you’re done, unless the key chains will be personalized.
- To personalize a key chain, first apply a coat of sealer to both sides of the hammer; let dry.
- Write the name/word/initials down the wood part of the hammer with a fine-tip paint pen that will contrast well with the color of the wood.
- Apply a second coat of sealer over the ink to keep it from smudging; let dry.
So, what do you think? Are you ready to make a batch of piano hammer key chains? If not, feel free to shop in my store for one that I made for you.


")


No Screws
There is another design I created, one that does not use the regulating screw. Instead, I drilled a hole through the hammer near the top, using a step drill bit with long tapers. This design came about when I tried making my second batch of 100 key chains, but the first five regulating screws broke when I had them screwed almost all the way into the hammer. I concluded that those screws were too degraded with rust to be useful. They didn’t appear rusty, but they had obviously been weakened by time and the elements.
In one of the pianos, an 1866 Steinway upright, I discovered some 25 hammers that already had a hole drilled into them. It served no purpose that I could detect, but appeared to be part of the design. I took advantage of that pre-made hole to make more key chains. The hole goes from front to back rather than from side to side. This is inconvenient for the purpose of displaying the key chains on the peg hooks; but the design does enable the hammer to lie flat against your keys when you add actual keys to the ring.
However, I do prefer to use the regulating screw in the construction of my key chains, so I went back to eBay and purchased some brand new ones. That way I would know for sure that they were strong enough for the task. It increases my cost a little, but it also improves the quality of my product.
Ebony
")
")
Next came ebony key chains. To date, I have not used regulating screws to make the ebony key chains, but only drill holes through the ebony and add the key ring. It sounds simple, but though there are fewer steps involved in making key chains from the ebonies, these steps can require more effort.
The ebonies are attached to key extensions, long pieces of wood (usually 12″-14″), by means of a special glue used specifically in the construction of pianos. The glue does degrade over time, and sometimes the ebonies pop off easily. Other times I soak them in a warm soapy sink bath, and am able to twist them apart. And sometimes I am powerless to separate them from the extension. Those ebonies are set aside for a different purpose.
I decided not to paint and buff the ebonies that show age, for the natural wear and tear of use has its own charm. I simply wash them, dry them, and polish them with a lint-free cloth and a touch of linseed oil.
Drilling the hole in the ebonies also takes more effort than drilling a hole in the hammer because ebony is a very hard wood. Yes, I have come across a few pianos that did not use genuine ebony for the sharps, but painted a softer, cheaper wood. Another technique is to cover the wood with black plastic. These are also cheaper and hold up better to use when the piano is being played. I save these sharps for other projects, and only use genuine ebony sharps to make my key chains.
Genuine ebony does not need to be painted because it is naturally brown-black in color. I have found some that were painted, and have removed the paint to allow the natural beauty of the wood to show through. They are quite stunning when they have been polished with the linseed oil, and the grains of the wood are visible!
Local Series
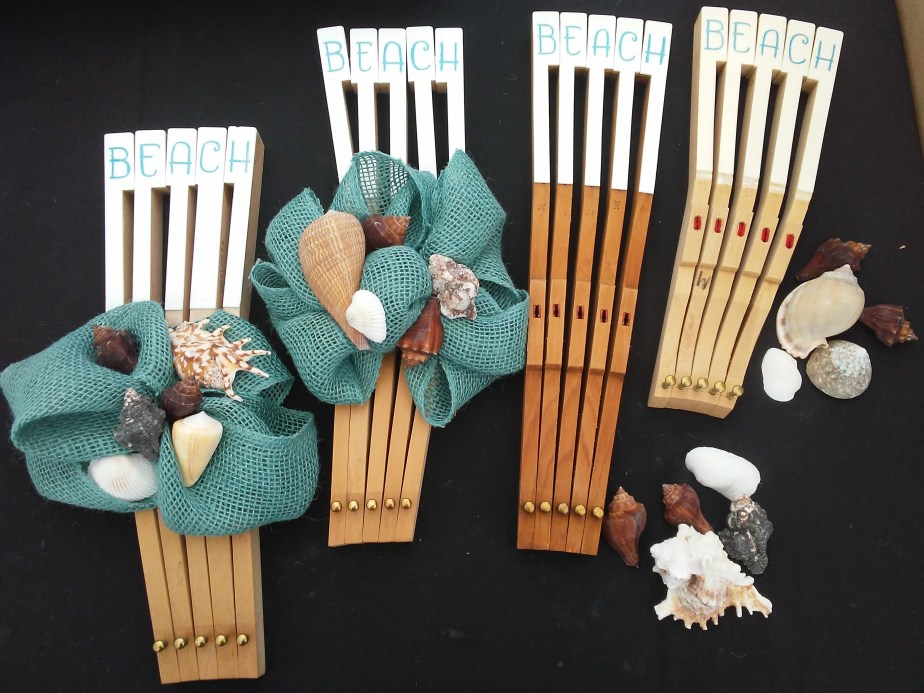
Recently I made a new batch of key chains to sell at the Sand Dollar Cottage, a gift shop/art gallery in Navarre that carries some of my piano art. This was the first time I ventured to write on the felt parts of the hammers, and it turned out successfully. Again, I sealed the surface before writing, and most of the pen colors came out nice and crisp. I made some “ebony” key chains for this purpose as well. These are not genuine ebony, but are actually made of plastic, as they came off an old electronic organ rather than a piano. These key chains will be available very soon at the Sand Dollar Cottage.
")
")
")
")
If you happen to be in the area, do stop in and take a look around. The Sand Dollar Cottage is a co-op of about 50 local artists. Here you can find beautiful art, home décor, and souvenirs to take home to friends and family. Christmas ornaments are also sold year-round because folks tell me that they collect Christmas ornaments everywhere they go. The Sand Dollar Cottage is conveniently located in the Sand Dollar Plaza on Highway 87, northbound, just off Highway 98.
Thank you for joining me on this tour of the studio. I look forward to seeing you on the next one. Until then, I invite you to check out photos of my other work in the gallery. Enjoy the rest of your day!

")
")
")
")
")
")
")
")
")
")
")
