
I will praise the LORD according to His righteousness, and will sing praise to the name of the Lord most high.
Psalm 7:17

Photo taken at Lake View Park in Chesapeake, Virginia, 2011
Encore! Old Pianos with a New Song
Giving new purpose to old pianos

I will praise the LORD according to His righteousness, and will sing praise to the name of the Lord most high.
Psalm 7:17
Photo taken at Lake View Park in Chesapeake, Virginia, 2011
I will bless the LORD at all times: His praise shall continually be in my mouth. My soul shall make her boast in the LORD: the humble shall hear thereof, and be glad. O magnify the LORD with me, and let us exalt His name together.
Psalm 34:1-3
As a church musician I know it’s hard to find time to practice a song for a special or offertory. And when you make it a group number, the more people involved, the harder it is to get together for practice.
For that reason, a lot of us prefer to perform solo. It’s easier to prepare, true—but it’s also tempting to get up and “wing it.” Your turn has come, and you’re not ready, so you open the hymnal and sing something, or you pull out a song you’ve done fifteen times already, and you do it again simply because you know it and feel comfortable with it.
But I ask, is that worship? Yes, there are plenty of songs worthy of repeating, but may I challenge you to repeat them because of the message they bear, and not because you were too lazy to learn something new.
May I also challenge you to put together more duets, trios, quartets, and ensembles—both vocal and instrumental. When looking for your next piano offertory, pick a duet, and then pick a partner. Not only does the preparation time unite you with your fellow musicians, forming a special bond of friendship, but it also pleases the Lord when we put forth the effort to strive for excellence in our worship. And it blesses the hearers too.
Just as there’s a time for repeating familiar songs, there’s also a time for solo performances. But group performances should be the rule rather than the exception. I believe this is scriptural. After all, in the Old Testament in particular, where worship music is spoken of quite frequently, it is almost always in the context of choirs and instrumental ensembles.
Are you working on a special for August? Talk with your fellow musicians, and ask them to join you, saying, “O magnify the Lord with me, and let us exalt His name together!”
Sing unto him a new song; play skillfully with a loud noise.
Psalm 33:3
It’s hard to hide the music of an instrument. Even when I play my digital piano with headphones on, the others in the room can hear the tap-tap-tapping as I depress the keys.
As a pianist, I love to listen to piano music, and I’m thrilled when I get to hear someone play the difficult pieces with great skill. In fact, I’m awed by it.
I’ve never been able to play a song perfectly, not with consistency anyway. For that reason, I’ve had to learn to hide my mistakes. Some cannot be hidden, at least not from all ears, but most can. I taught my students this same technique. . . .
Practice, practice, practice.
Practice with hands separate.
Practice with hands together.
Pay attention to your fingering. Repeat it measure by measure, line by line, until muscle memory takes over.
Practice with the metronome. Start with a slow and steady tempo, then gradually work up to the indicated tempo. Learn what the proper tempo feels and sounds like.
Turn off the metronome and work on coloring your piece with variations in dynamics and speed. Pull back now and then, but always add back what you take away.
Let it rest, then practice some more.
And when you’ve done all you can do to perfect it, if errors persist, then just keep going.
Don’t stumble.
Don’t fumble.
And whatever you do, when performing, don’t go back and try again to get it right.
Just keep pressing forward with a relaxed expression on your face, and most folks will not even notice. Some may think it was written that way. And those who do hear the mistake will easily forgive it if you don’t call attention to it.
. . .
Some folks are gifted musically, and their fingers, eyes, ears, indeed their entire body flows with the notes on the page. Even they have to work, but their work yields excellent results.
Then there are those of us whose greatest skill is in making the mistake sound as though it belonged there.
Image by Free-Photos from Pixabay
I’m sorry I cannot give credit to the artist. I found this years ago and pinned it onto the bulletin board in the music room at church. Just now I found it again in my photo folder and decided to share a smile with you.
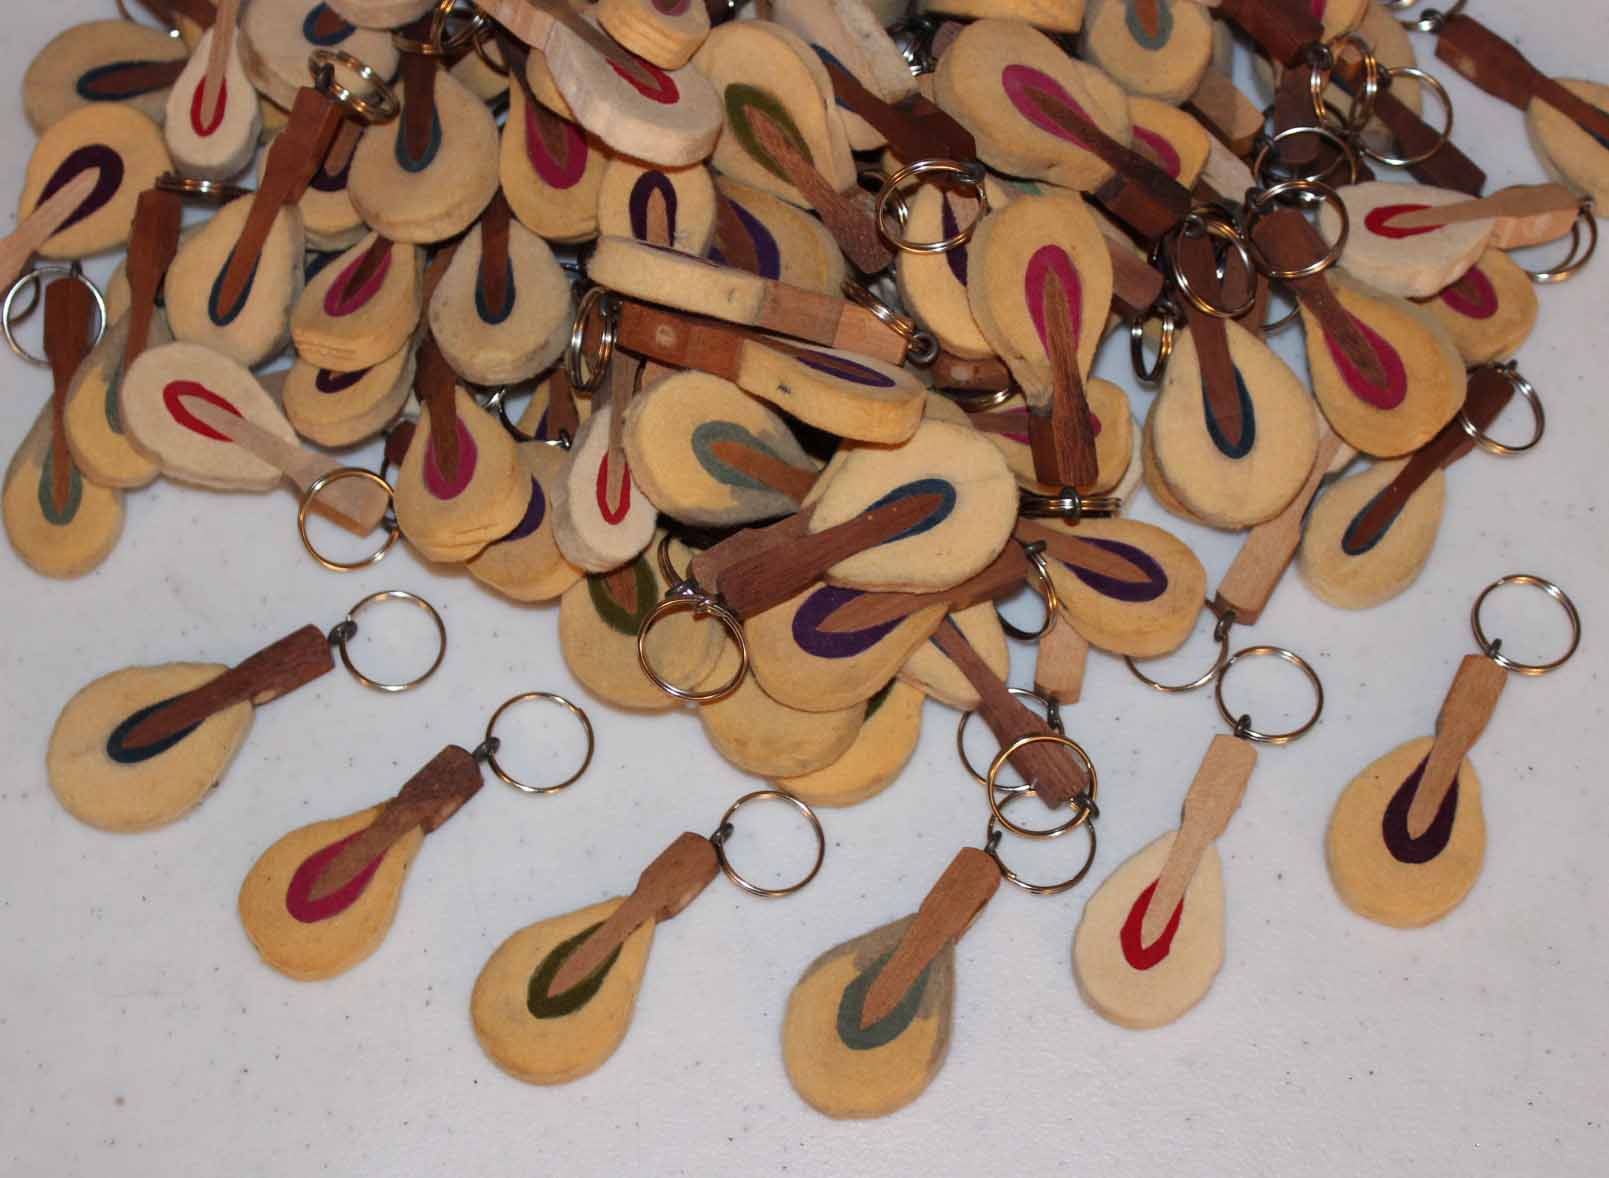
Most of my piano art creations have a music-themed name given to them. The key chains are one notable exception, for I have never called them anything but what they are. And that’s okay.
Welcome back to the Studio Tour. Today I’m going to share with you how to make key chains from piano hammers and ebony keys. The key chains are my most popular item, and I also use them as gifts for college graduates, personalizing them with their name and the year. In fact, personalization has become quite popular this year, with most online buyers requesting that a name or initials be written on the hammer. I have considered offering personalization at craft fairs. Perhaps this fall I will make it so.
The first set of key chains I made were constructed of piano hammers, an eyelet screw that also came out of the piano (technically called a letoff regulating screw), and a key ring. I bought a package of 100 key rings on eBay and set out to make 100 piano hammer key chains.
The process is tedious but fun, at least for me. I’ll share my process with you, and then you decide if you would also like to make piano hammer key chains.

")
")
")
")
")
")
")
")
")
So, what do you think? Are you ready to make a batch of piano hammer key chains? If not, feel free to shop in my store for one that I made for you.


")


There is another design I created, one that does not use the regulating screw. Instead, I drilled a hole through the hammer near the top, using a step drill bit with long tapers. This design came about when I tried making my second batch of 100 key chains, but the first five regulating screws broke when I had them screwed almost all the way into the hammer. I concluded that those screws were too degraded with rust to be useful. They didn’t appear rusty, but they had obviously been weakened by time and the elements.
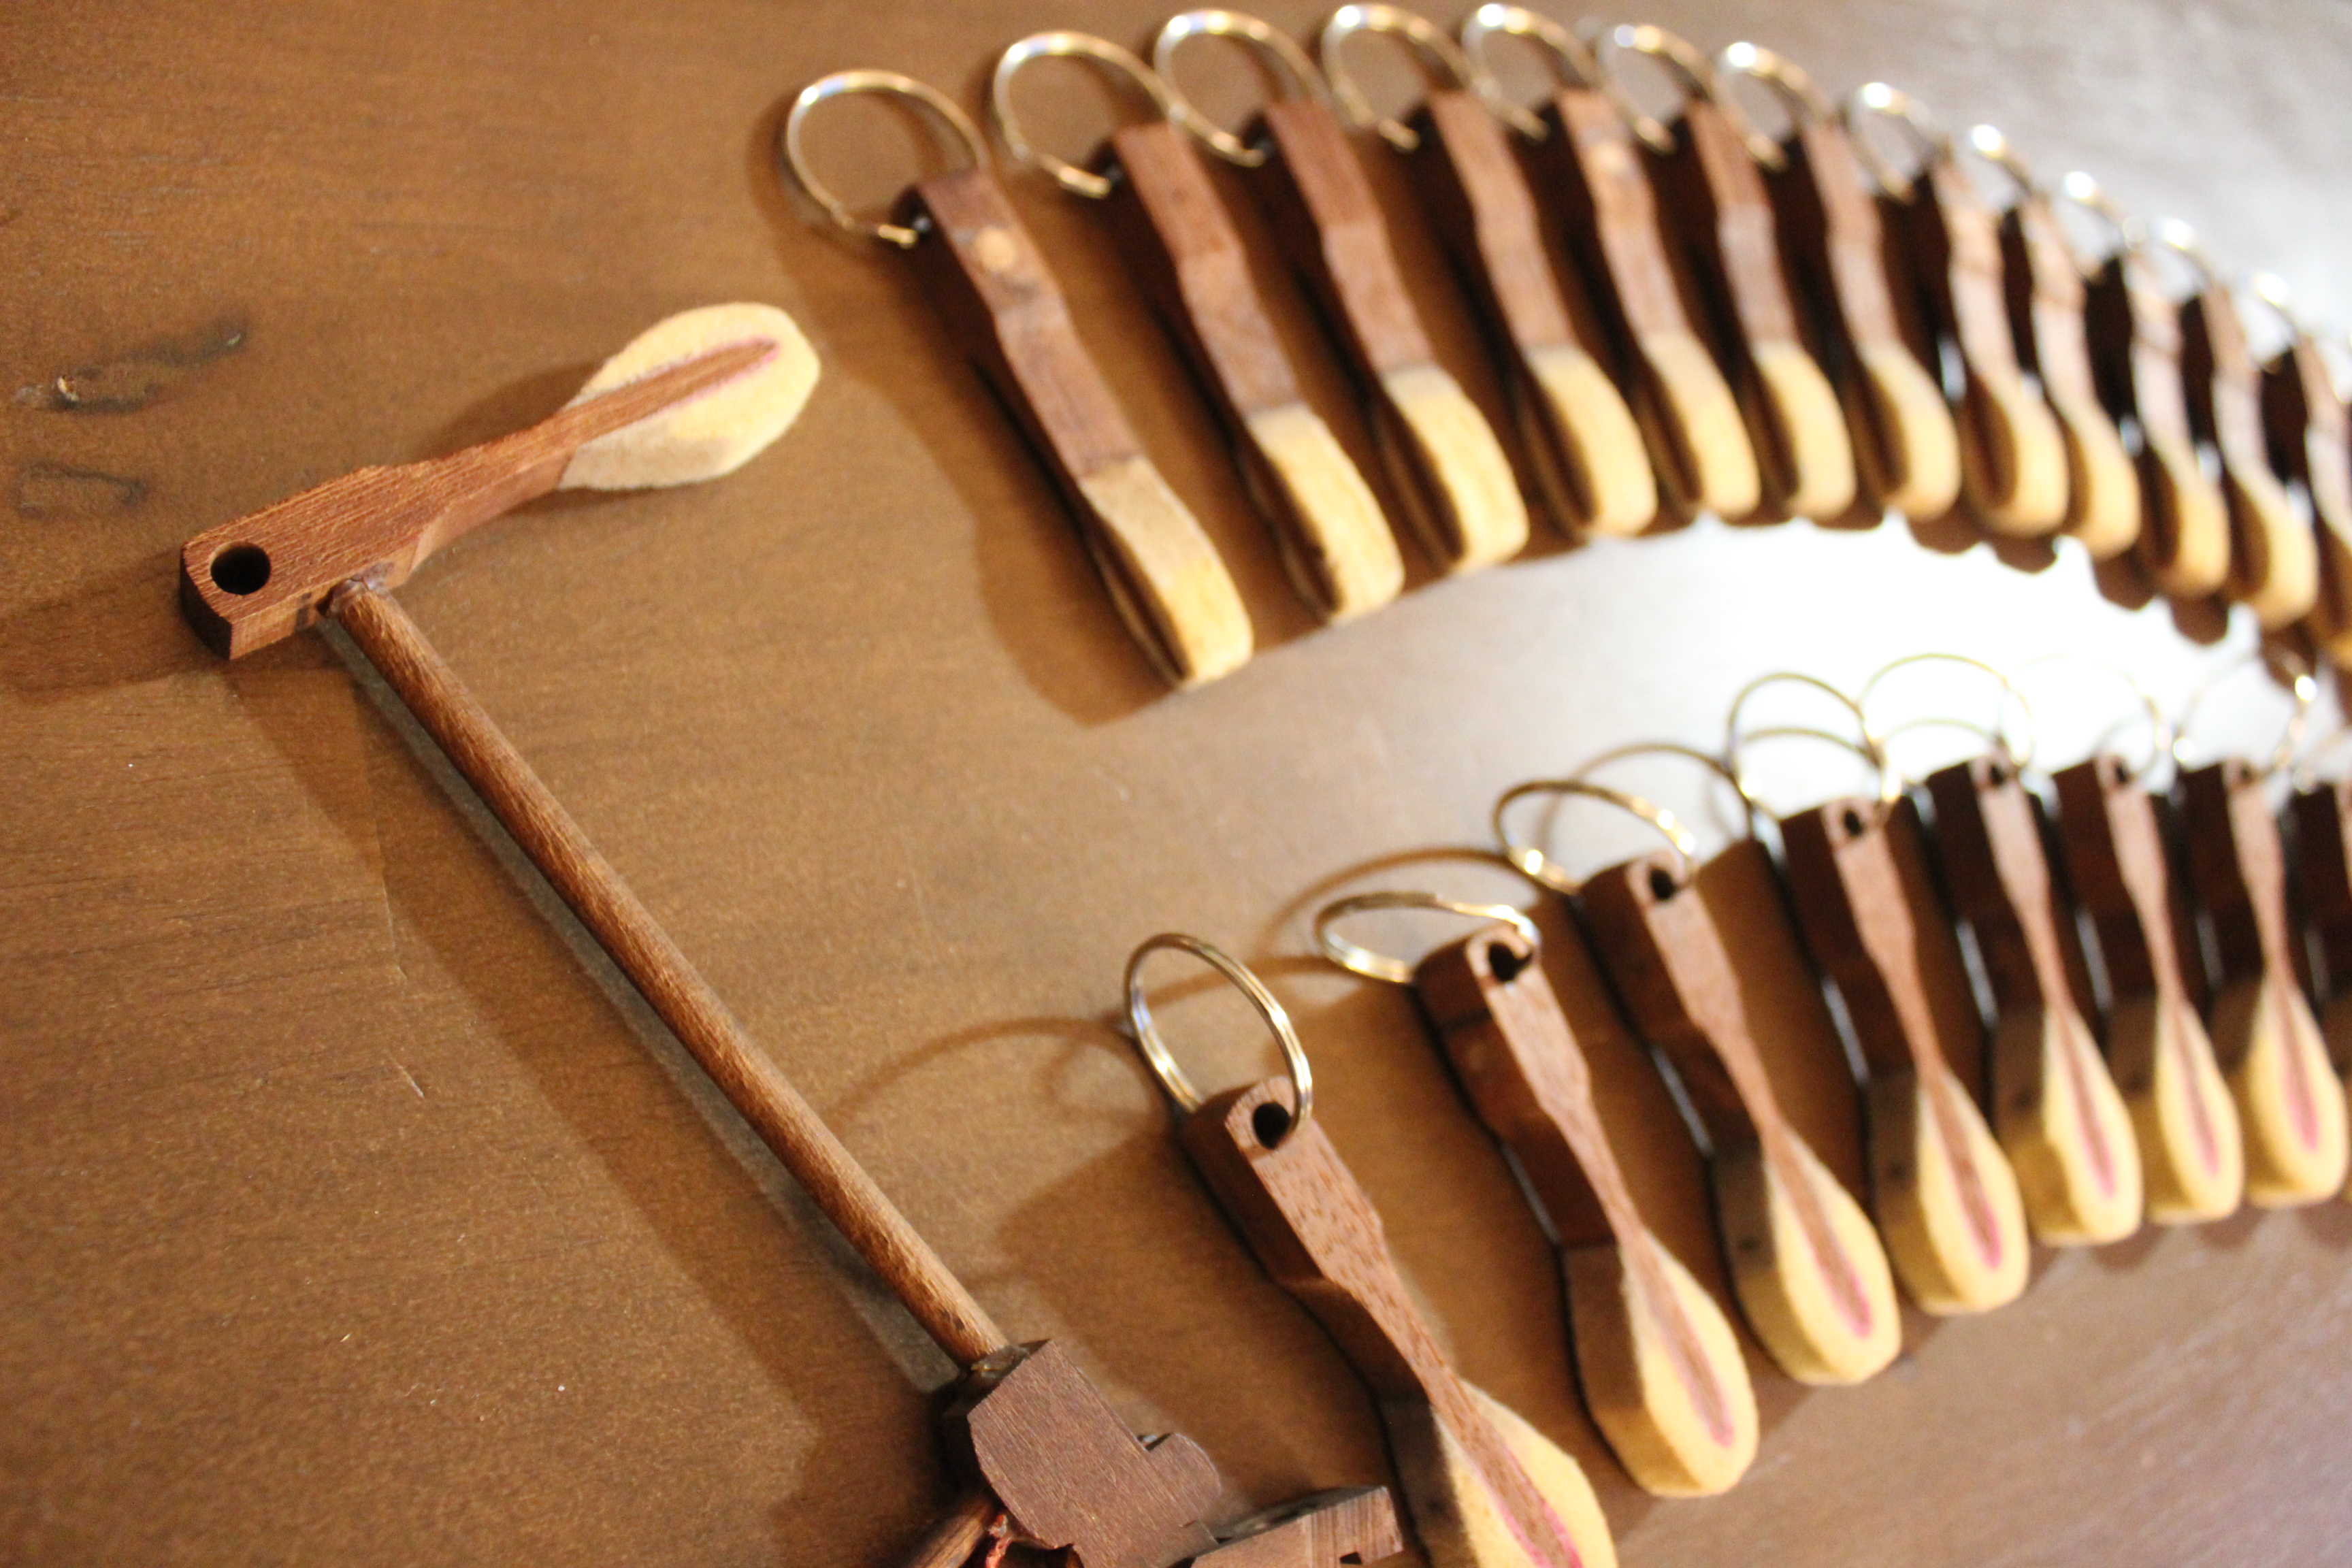
In one of the pianos, an 1866 Steinway upright, I discovered some 25 hammers that already had a hole drilled into them. It served no purpose that I could detect, but appeared to be part of the design. I took advantage of that pre-made hole to make more key chains. The hole goes from front to back rather than from side to side. This is inconvenient for the purpose of displaying the key chains on the peg hooks; but the design does enable the hammer to lie flat against your keys when you add actual keys to the ring.
However, I do prefer to use the regulating screw in the construction of my key chains, so I went back to eBay and purchased some brand new ones. That way I would know for sure that they were strong enough for the task. It increases my cost a little, but it also improves the quality of my product.
")
")
Next came ebony key chains. To date, I have not used regulating screws to make the ebony key chains, but only drill holes through the ebony and add the key ring. It sounds simple, but though there are fewer steps involved in making key chains from the ebonies, these steps can require more effort.
The ebonies are attached to key extensions, long pieces of wood (usually 12″-14″), by means of a special glue used specifically in the construction of pianos. The glue does degrade over time, and sometimes the ebonies pop off easily. Other times I soak them in a warm soapy sink bath, and am able to twist them apart. And sometimes I am powerless to separate them from the extension. Those ebonies are set aside for a different purpose.
I decided not to paint and buff the ebonies that show age, for the natural wear and tear of use has its own charm. I simply wash them, dry them, and polish them with a lint-free cloth and a touch of linseed oil.
Drilling the hole in the ebonies also takes more effort than drilling a hole in the hammer because ebony is a very hard wood. Yes, I have come across a few pianos that did not use genuine ebony for the sharps, but painted a softer, cheaper wood. Another technique is to cover the wood with black plastic. These are also cheaper and hold up better to use when the piano is being played. I save these sharps for other projects, and only use genuine ebony sharps to make my key chains.
Genuine ebony does not need to be painted because it is naturally brown-black in color. I have found some that were painted, and have removed the paint to allow the natural beauty of the wood to show through. They are quite stunning when they have been polished with the linseed oil, and the grains of the wood are visible!
Recently I made a new batch of key chains to sell at the Sand Dollar Cottage, a gift shop/art gallery in Navarre that carries some of my piano art. This was the first time I ventured to write on the felt parts of the hammers, and it turned out successfully. Again, I sealed the surface before writing, and most of the pen colors came out nice and crisp. I made some “ebony” key chains for this purpose as well. These are not genuine ebony, but are actually made of plastic, as they came off an old electronic organ rather than a piano. These key chains will be available very soon at the Sand Dollar Cottage.
")
")
")
")
If you happen to be in the area, do stop in and take a look around. The Sand Dollar Cottage is a co-op of about 50 local artists. Here you can find beautiful art, home décor, and souvenirs to take home to friends and family. Christmas ornaments are also sold year-round because folks tell me that they collect Christmas ornaments everywhere they go. The Sand Dollar Cottage is conveniently located in the Sand Dollar Plaza on Highway 87, northbound, just off Highway 98.
Thank you for joining me on this tour of the studio. I look forward to seeing you on the next one. Until then, I invite you to check out photos of my other work in the gallery. Enjoy the rest of your day!
This week’s challenge comes from LifeLessons – a blog by Judy Dykstra-Brown, and is called All Lined Up. The challenge was posted on Monday, May 27. I don’t know how long it will run, but feel free to jump in with your own contribution whenever, for all you have to do is share a link to your post in the comments section of her post, at the link above.
Click the photos to enlarge and read the captions.
")

")

")

")
")
 (5)")

Some of this week’s photos are of completed projects, while others are of “raw materials,” but in every case, they are All Lined Up.
Thanks again to Cee Neuner for her amazing directory, “For the Love of Challenges.” For the record, Cee’s directory lists not only photo challenges, but also writing and music challenges as well, and they are grouped by category. It’s very well organized.


