

When I was younger, the Lord, art, and nature were my great passions. Not much has changed except that awkward 20-year phase where men snuck into that mix. I love my family now, adore my children, but more rare-for-this-season moments of passion still center around the Lord, art, nature and music. I love playing the […]
Author: Angela Umphers Rueger
Hello. I am a joyful wife and mother of three, just turned loose the last of my little chicks, and getting ready to spread my own writing wings. Thirty-something years ago I earned a B.A. in English because my heart's desire was to write. Since that time I've worked as a teacher, musician, cleaning lady, tax professional, and artist, but never as a writer. In recent years, several friends have encouraged me to pick up the baton and run with it. By creating this blog, I took the first baby step toward becoming a published author. The journey will likely be longer than I can imagine, but it has finally begun, and that's all that matters.

From the Studio: Piano Headboard
 It’s always exciting when someone asks for a custom order. Such was the case with the headboard. I had made a mirrored coat rack from the music shelf of the Lyon & Healy piano and took it with me to a craft fair. A lady saw it, and it gave her an idea for something special she could do for her mother, who was a retired piano teacher. Her mother lived with her in her home, and she slept in a hospital bed to aid in her comfort. But the bed did not have a headboard. So the lady visiting my craft fair booth wondered if I could make a headboard from a piano music shelf. I told her I would try.
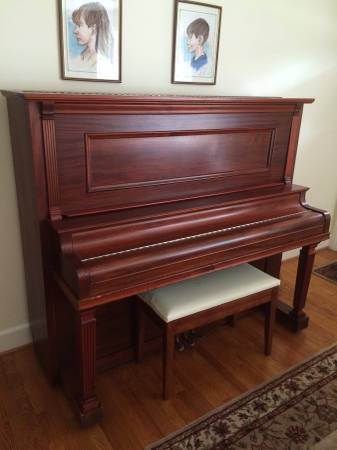
At home I looked at the other pieces I had from other pianos. Most of them were in poor condition, and I was inexperienced at that sort of restoration. So I began to shop around, mostly looking at the local listings on Craigslist. Pretty soon I found a piano near me at a price that I could afford, and I purchased it. So it was that I came across this beautiful Royal Cabinet Grand. Incidentally, this is also when I learned that the tallest of the upri ght pianos are actually grand pianos built vertically—hence the term “upright grand.” I call this one a cabinet grand because that is the name so designated on the piano.
My sons helped me get it home, and I went to work right away to build the headboard.
The first question to determine was how long the headboard should be. It was going to be longer than the bed was wide, no question about it. I removed the music shelf and the side pedestals from the piano, laid them out on the floor of my studio, then took pictures of them to send to my customer to show her what I had found. I also wanted her opinion as to whether to include the pedestals as part of the headboard. They would add visual interest, but they would also add width to an already too-wide headboard. She liked the look, however, so the pedestals stayed.

As with the coat rack I had built from the other piano, I flipped the music shelf upside down so the actual shelf would be up top.
On the piano, the music shelf had been hinged near the center, and the pedestal had been attached to the cabinet. In order to attach the pedestals to the shelf, I used key extensions on the back, which were secured with screws (from the piano action) and wood glue.
The headboard was not going to be attached to the bed, but was only going to lean against the wall behind it. Since the headboard had a gorgeous red mahogany finish, I went to the local hardware store to purchase a length of mahogany 2×4 wood to make the legs. They would be hidden by the bed, but just the same, I wanted them to suit the headboard. With a coat of stain for the legs and the key extensions on the back, everything was beginning to look quite nice. I attached the legs with antiqued brackets, and moved on to the finishing touches.
The next step was to conceal all the minor scratches and flaws. Then taking some green felt that I had removed from the piano and cleaned, I applied it to the places where the headboard would rest against the wall, to prevent any marks on the same. We bought a set of sliders to go under the legs, and the headboard was finished and ready for delivery.
It was a happy day when I got to meet the lady who would enjoy this piano headboard. I put it in her room, and listened with delight to some of her stories of her glory days as a pianist and teacher. My friends, that’s what piano art is all about.

Weekly Photo Challenge: Pull Up a Seat
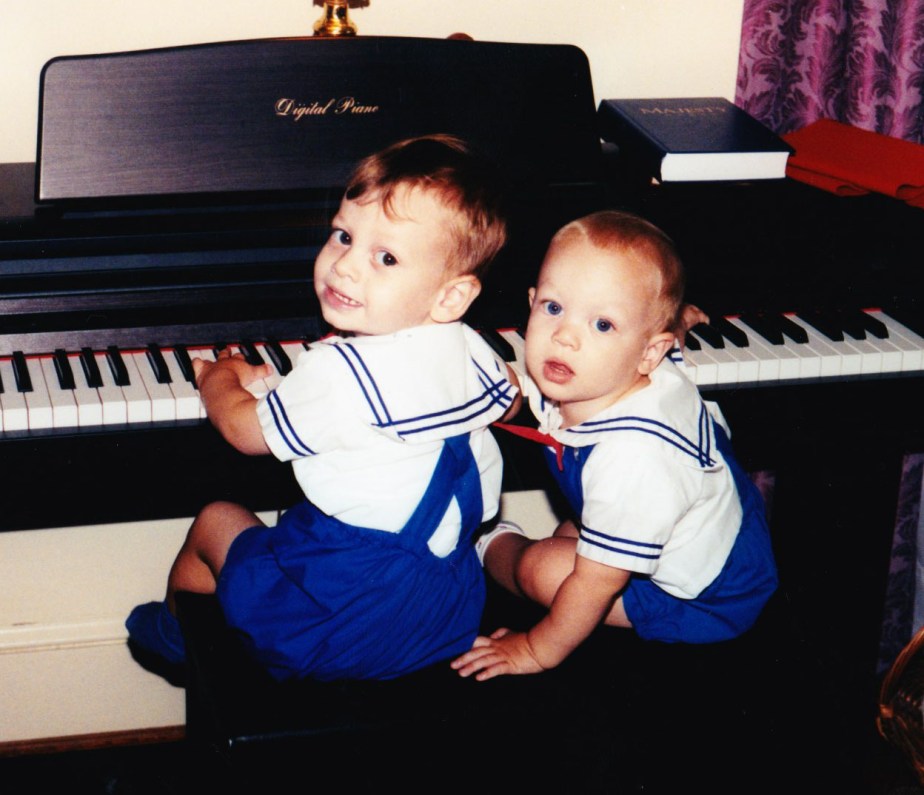
This week’s challenge is “Pull Up a Seat, Week 14” hosted by XingfuMama. I just “happen” to have a few photos of people—and a fur baby—seated at the piano. What a coincidence! 🙂
These two handsome prodigies are soon to be 21 and 22 years old. And yes, they are none other than my piano movers, whom you’ve seen featured in other stories.
The cat looks like I feel sometimes: “That’s too hard. I think I’ll go sip a cup of tea and enjoy a good book instead.”

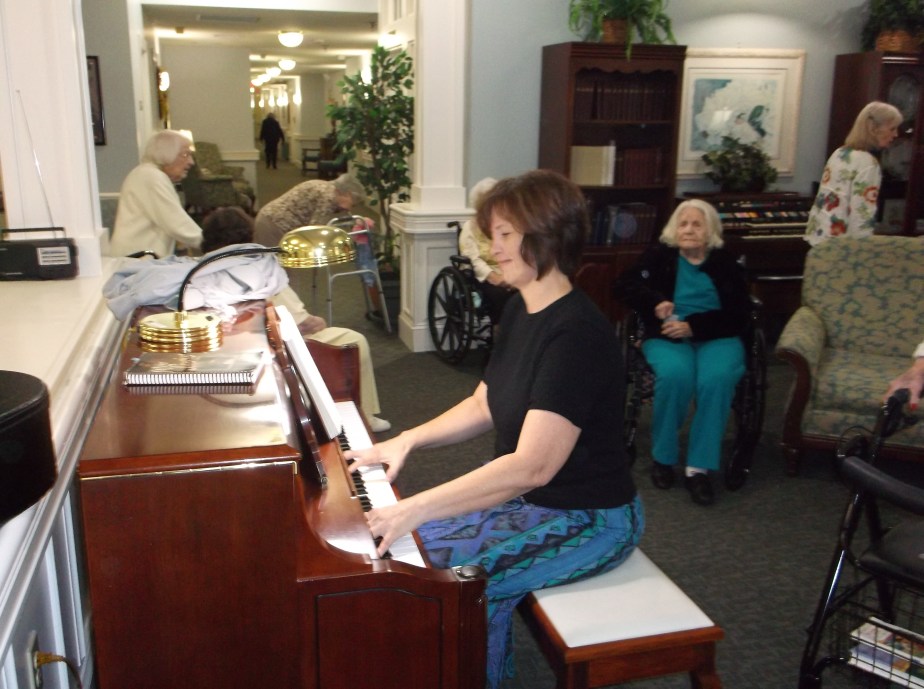
In this third photo is yours truly, back when I had the privilege of playing the piano at a nursing home in Virginia.
Thanks again to Cee Neuner for her amazing directory, “For the Love of Challenges.” For the record, Cee’s directory lists not only photo challenges, but also writing and music challenges as well, and they are grouped by category. It’s very well organized.
A Brief Reign for the Royal Piano Company
The Royal Piano Company did not exist a long time, and information regarding their organization and operation is hard to find. But in their short span on the industrial scene, they produced some of the finest musical instruments America has ever seen. Royal was established around 1895 and manufactured fine quality pianos for about half a century, producing a full line of uprights, player pianos, and baby grands. They also built pump organs in the early years of the company’s existence.
Royal was originally a division of the Krell Piano Company, and it was bought out by Werner Industries of Cincinnati shortly before 1920. The Starr Piano Company purchased the Royal brand in 1927, and thus kept the Royal name alive during the Great Depression.
The last Royal piano was built in 1949. Today they are rare, but if you happen upon one, you will find it to be an example of quality workmanship.
The One I Acquired
The Royal Cabinet Grand that came into my possession was not a gift, but was actually the only piano to date for which I have put down money (apart from moving expenses). I had been commissioned to make a headboard for a retired piano teacher who was confined to a hospital bed in her room. The former teacher’s daughter saw a coat rack that I had made from the music shelf of the Lyon & Healy, and she thought a headboard would be perfect for her mother, who had devoted her life to teaching others how to play the piano. How could I say no? I had several large pieces at hand, but none worthy of such an assignment. So I searched eBay, Craigslist, and other local listings until I found the perfect piano. It wasn’t free, but it was affordable.
Since I purchased the piano with a particular project in mind—the headboard, the majority of my photos of this piano are focused on the music shelf. Evidently, I didn’t even think to take a photo of the serial number, which is something I ordinarily do with every piano. Or if I did, I didn’t file the photo correctly. Unfortunately, that number is long gone by now, so I’ll never be able to determine exactly when this piano was made.
But there is a silver lining, for maybe someday, in a bin in the garage, I’ll find the cast iron plate that bears the Royal name. For I noticed in one of the photos that I removed the plate before letting Bobby haul the frame to the scrap yard. And in my search for information about the Royal Piano Company, I found a similar plate on a estate sale website that sold for over $200. Wouldn’t that be nice…. ☺
")
")
It has been noted that Royal pianos are known for their fine craftsmanship. I can definitely attest to this. At this point, I don’t remember which hammers, whippens, or stickers in my bins came out of the Royal Cabinet Grand, but I do remember the wood case, that it was both beautiful and solid. When we were preparing to move, some of my pieces got rained on, and I was horrified to learn (when the pieces swelled) that two of the pianos were partially built with press board! I was shocked! Most of them were not, however, and the Royal is most certainly made of solid wood. I don’t know for sure what kind of wood it is, but it is a hardwood. My saw and drill can attest to that (and my tired arm). Yet the most impressive thing to me—especially after taking apart thirteen pianos thus far—is not the fact that the cabinet is solid, or that it is made of hardwood, but the thickness of the wood, especially on the sides of the cabinet. On every piano, the side arm (the part that often resembles a grand piano in its shape) is nearly two inches thick, but the side board (the board that covers the length of the piano) is usually less than one inch thick, though it may have some trim along the edge to give the appearance of extra thickness. On the Royal Cabinet Grand, the entire side board was as thick as the side arm—just under two inches. And the cabinet’s finish was a gorgeous red mahogany.
")
Piano Duet
")
The wood of the side board was too thick to use in large pieces, but too nice not to use at all. So I cut the wood into blocks measuring 6″ x 7.5″ and made game boards out of them, using tuning pins as the playing pieces. The concept was fairly easy to devise, but the implementation turned out to be difficult with hand tools. I made five games last year. They were imperfect at best, but my husband was impressed enough to purchase a drill press and power sander for me so that my next batch of board games will come out a lot nicer. Isn’t he sweet! 
Of the thirteen pianos I’ve disassembled so far, the Royal Cabinet Grand is the only one to give me good quality wood that I can use to make these board games. Hopefully I’ll come across more pianos built with this level of quality in the near future.
If you happen to have a Royal piano, by all means keep it and treasure it. Tune it. Play it. Enjoy it. Pass it down to your children and their children after them. Don’t let it go the Piano Lady to be cut up and made into headboards, games, and art—not unless it absolutely must be thrown away. In that case, do call me first (if you live within 200 miles of Pensacola, FL). But please know that I no longer purchase pianos. I will, however, thank you for your donation by making you a souvenir piece of art from your piano.
Bibliography
Pierce, W. Robert. Pierce Piano Atlas. 12th Edition. Larry E. Ashley Publishing: Albuquerque, NM, 2008
The Premier Estate Sale Marketplace
Recycled Piano Becomes Upcycled Workbench — Hackaday

Pianos are free, in case you’re not hip to the exciting world of musical instrument salvage. Yes, the home piano, once the pinnacle of upper middle class appreciation of the arts, is no longer. The piano your great aunt bought in 1963 is just taking up space, and it’s not …read more
Weekly Photo Challenge: Vertical
What I like most about things vertical is that they remind me to look up.
Luke 21:28b Look up, and lift up your heads, for your redemption draws near.
This week’s challenge is hosted by Travel with Intent, and the theme is VERTICAL. This is another no-brainer in the realm of old pianos, as an alternate way to describe upright pianos is to call them verticals.
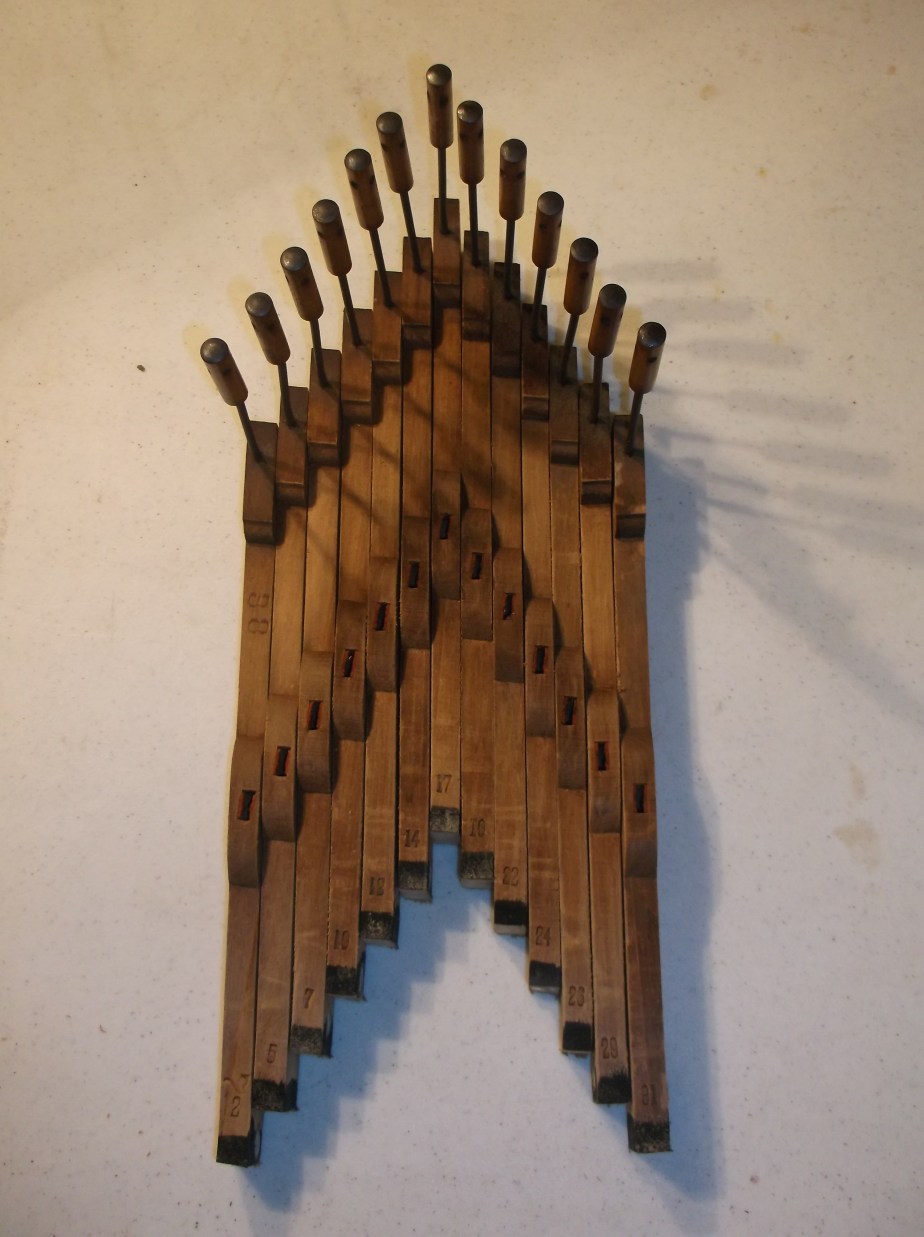
However, since I’ve used a good many photos of my pianos already, I decided this week to show other examples of “vertical,” such as the arrangement of key extensions above. It’s been given a name, “Fermata,” although it only slightly bears a resemblance to the musical symbol. The only trouble with this piece is that it has yet to be finished. It’s only in the planning stage. Maybe someday…. One day I arranged the pieces on the table and took a picture of them, trying to decide if I actually wanted to create a work with this design. What do you think? Feel free to leave your comments or suggestions below.
This next photo is my piano moving team: Matthew, Bobby, and Dolly. Dolly does most of the heavy lifting, but she and I couldn’t do anything without Matthew and Bobby.

Thanks again to Cee Neuner for her amazing directory, “For the Love of Challenges.” For the record, Cee’s directory lists not only photo challenges, but also writing and music challenges as well, and they are grouped by category. It’s very well organized.

PIANO — Moda-Creative Thinking
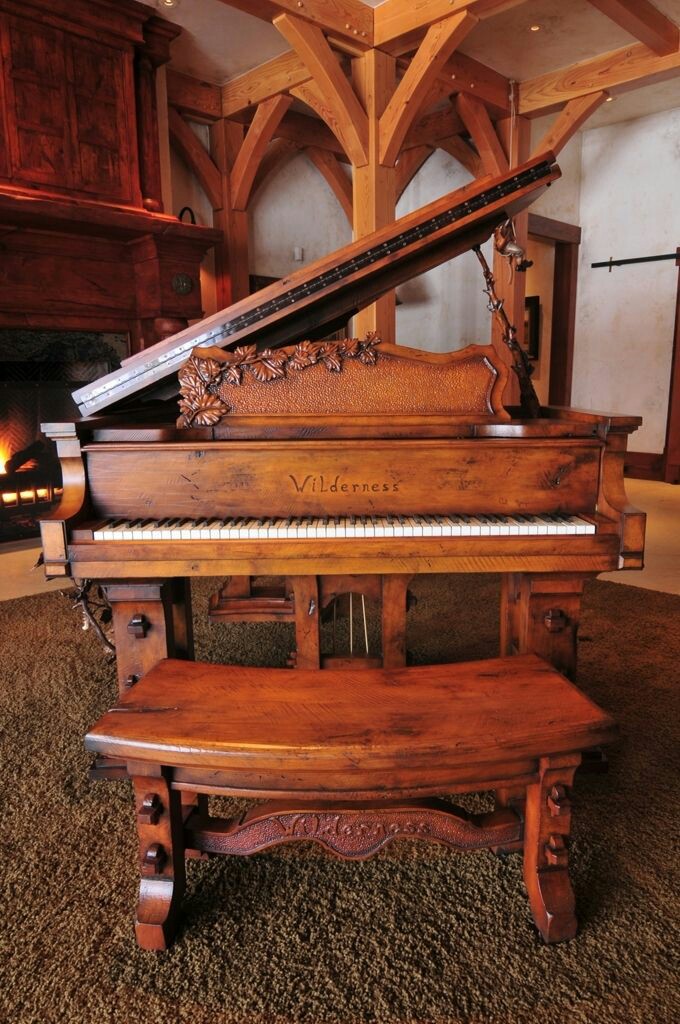
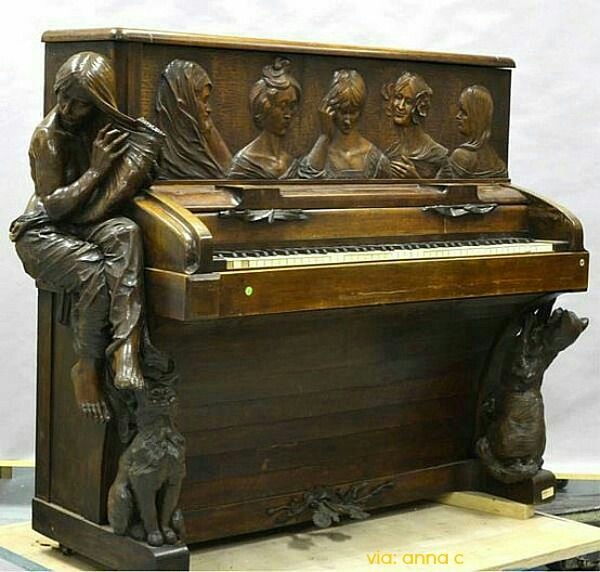
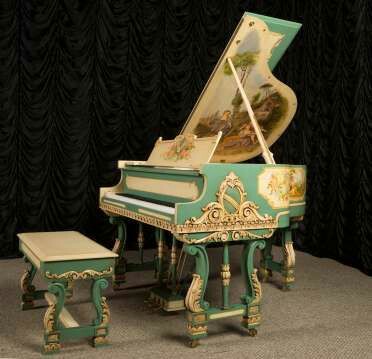
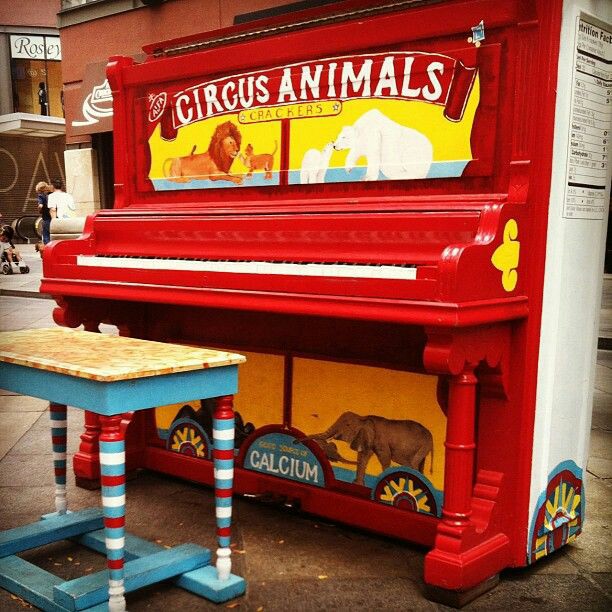
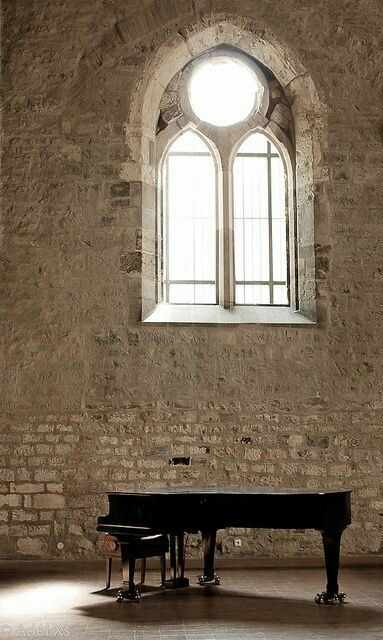
Here is a collection of stunning photographs of some of the most unusual pianos you have ever seen.


From the Studio: Bach Yard Chickens
Raising backyard chickens has really taken wing in the US. Sorry. Was that a bad pun? Okay. I’ll stick to piano art and leave the comedy for the comedians. 😉
But I wasn’t trying to jump on the bandwagon when I created “Bach Yard Chickens.” I simply saw the hammer butts and thought they looked like chickens. Period. End of story. The little girl, as hard as she was for me to paint, seemed a little easier than painting a barn. Not only that, but for each of my creations, I try to come up with a music-themed title. So… “Bach Yard Chickens” or “Old MacDonald”? Which one would you have chosen? I thought so. Me too!

The painting above was my first ever “Bach Yard Chickens,” completed in 2015. It was done on a 16×20 stretched canvas, unframed. I used uncooked quinoa for the “seed,” and all five “chickens” came from the same piano. In fact, they came from the 1906 Lyon & Healy, my first piano. (At the time, it was my only piano.)
Spreading My Wings
I had been really nervous about creating this particular piece because I had never painted a person before. I was working off a photograph, and the girl didn’t turn out exactly like the image in the photo. But I figured it was okay; she was good enough. And I guess she was, for this painting was the first item to sell in the craft fair that year, which was very encouraging to me. In fact, it sold within fifteen minutes of the show’s opening.
So why did it take me another four years to work up enough courage to make Bach Yard Chickens #2? I honestly couldn’t tell you. But the second one is done, and it’s pictured here.

This one has some obvious differences. One variation you may not notice in the photos is the size, for this one is an 11×14. I decided to try a smaller size because the piano parts themselves are so small by comparison to the canvas. I also have two more 11×14 paintings nearly finished. However, I do prefer the larger size, and will make the future paintings in the original 16×20 format.
Another difference is that the “chickens” now come from different upright pianos, to represent the reality that in a brood of backyard chickens, they will not all look exactly alike.
The Process

Here are some representatives of the hammers I’ve taken off the pianos. When I remove them, they are dirty. I have to scrub them clean with a wire brush, then separate the various parts. Each individual piece has a name, but for the sake of simplicity, I’ll call the entire “chicken” part the hammer butt. It has a flange attached at the chicken’s “eye,” made of either wood or metal. I have a special tool that helps me to quickly and safely remove the flange, which I save for later use in another project.
You may also notice a string coming off some of the chickens. That’s called the bridle strap. Sometimes I can pull it off, but other times I have to cut it off with a box cutter.
For the next step, I take the hammer to the garage, where my power tools are set up. One of my table saws is equipped with jig saw blades. I use this one to remove the hammer shank (long stick) from the hammer (where the felt is) and hammer butt (a.k.a. chicken). The hammer shank goes into a storage container for some future use which I haven’t figured out yet. The hammer is set aside to be used as a key chain or as a head for a Conductor or Instrumentalist.
Finally, with a little sanding, the butt is ready to be used as a chicken. This process takes about 45 minutes to an hour for 5 chickens, not counting the time it takes to remove the hammer from the piano. That stage can vary greatly, I’ve come to learn, depending on the manufacture of the piano. The new flange removal tool has shortened the time by a good 15 minutes. Before I got that tool, I used any sharp tool I could find, such as an ice pick, to push the pin partway through, then I would pull out the rest of the way with pliers. This was tedious and made my hands hurt after a while. I’m very thankful for the new tool!
Art for Arts’ Sake
One of my favorite things about Bach Yard Chickens is getting to paint the background. I love what I do with old pianos, but above all, I love that God gave me the ability to paint. I don’t have much training in that area, but I do long to develop what talent is there by practicing. I want my work to be more than a craft—I want it to be an art.
Thank you for joining me on this tour of the studio. I look forward to seeing you on the next one. Until then, I invite you to check out photos of my other work in the gallery. Enjoy the rest of your day!
Lens-Artists Photo Challenge #38: Weathered and Worn
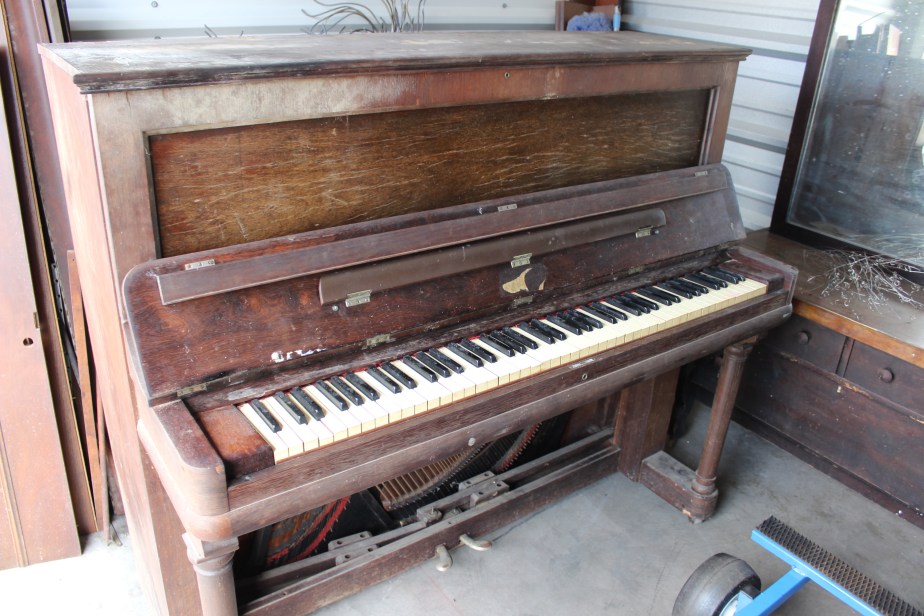
This week’s challenge was easy, as nearly every piano I’ve ever brought into the family has fit the description of “weathered and worn.”

While I love my mission of helping old pianos sing a new song, sometimes it can be quite a challenge due to the conditions from which they have been rescued. People “retire” their pianos to the garage or to a non-climate-controlled storage unit when they no longer have a use for them. Sometimes they move out of the family home, or pass away, and the piano, too heavy to move, is abandoned in the home. If the home sits vacant for any length of time, then both weather and critters take their toll on this once beautiful and fine instrument. It doesn’t matter how much time and effort was put into creating a piano. The highest quality piano ever produced is humbled to the level of the most affordable instrument fashioned for the humblest of homes when it is neglected for decades on end. But even these have a certain charm, you’ll have to admit.

This week I am responding to the Lens-Artists Photo Challenge #38 — Weathered or Worn, hosted by Ann-Christine a.k.a Leya of lagottocattleya.wordpress.com. I found this challenge on Cee Neuner’s website.
Thanks, Cee, for this wonderful directory you’ve created: “For the Love of Challenges.” For the record, Cee’s directory lists not only photo challenges, but also writing and music challenges as well, and they are grouped by category. It’s very well organized.
Polaroids of Light and Sound / The Piano Sketches E.P. — JamesRadcliffe.com

I purchased his album and have already listened to the first track. It’s time to go move a couple pianos into my new, larger workshop. But when I return, I look forward to enjoying the rest.
Won’t you join me in sponsoring this fellow artist by reading and responding to his post, following him, purchasing his new album, or all of the above.
It is one of life’s ironies that, if you want freedom, you have to impose limits. Nowhere is this truer for me than in my work. Unlimited options often lead to paralysis, whereas the right limits, artfully imposed, allow creativity to flourish. It was with this in mind that, at the end of November last […]
via Polaroids of Light and Sound / The Piano Sketches E.P. — JamesRadcliffe.com
