


Welcome back to my piano art studio. Please allow me to share with you the latest creation from the Encore studio and the thought that went into it.
One of my favorite things about creating piano art is getting to participate in local craft fairs and art shows. While not an extrovert by nature, I do love meeting new people, hearing their stories, sharing mine, and seeing the sparks that fly when we connect. Often I’ll meet someone who plays another instrument besides the piano, and several of them have asked me to come up with art that represents their instrument in particular, rather than music in general. That is a worthy need, and I’ve been brainstorming for more than a year now to figure out how to create art that appeals to other instrumentalists. (Forgive me. I’m slow.)
Granted, I have made a Hornist, and have plans to make other instrumentalists “holding” and “playing” their instruments. But those are difficult and extremely fragile. Frankly, they scare me.

My first Instrumentalist
The “Hornist” was made on commission, and someday there will be others, including a trumpeter, flutist, violinist, and guitarrist.
As an alternative to the instrumentalist, I wanted to come up with an idea to showcase only the instrument itself. My original idea was to use the piano pieces to form assemblage art, essentially “building” a two-dimensional instrument on canvas, using only piano pieces. The trouble with this is that most of the pieces are straight and angular, and most instruments have curves. How could I get the curves without a lot of cutting and sanding? And if I did cut and sand, would the pieces be recognizable as piano action when I was finished? I decided to ditch that idea and think of something else.
YouTube has become a sort of classroom for me, as I spend a fair amount of time watching other artists demonstrate their skills and then trying it for myself. I gather ideas for how to complete the various projects stored in my mind, including the hoped-for Instrument Series. It was while watching an abstract artist at SurajFineArts that I thought of an idea that might work. He drew several curved and overlapping lines on the canvas, then filled in each area with varying values of the same color. By the time he was done, we saw an image of a woman seated there. I thought I could do the same thing, but with musical instruments instead of a woman, and incorporate piano action pieces onto the canvas to make it a mixed media piece with some extra dimension. The video that inspired me is here:
More time went by, during which I practiced making line drawings of various musical instruments in my sketchbook. But before I had a chance to test that idea with paint on canvas, another one came to mind.
Much practice has made me adept at bending piano strings into various shapes, often with nothing but my two hands. That’s when I decided to think outside the box—or in this case, outside the instrument.
So, combining the original idea to create assemblage art with the second one to create line art, I shaped the instrument with a piano string and made the action pieces an integral part of the visual representation of music. With a 24″ ruler, I made sure all the non-round pieces lay along imaginary lines that all merged at the lower left-hand corner of the canvas. I wanted them to appear as though they were proceeding from out of the instrument.
Brainstorming a new idea
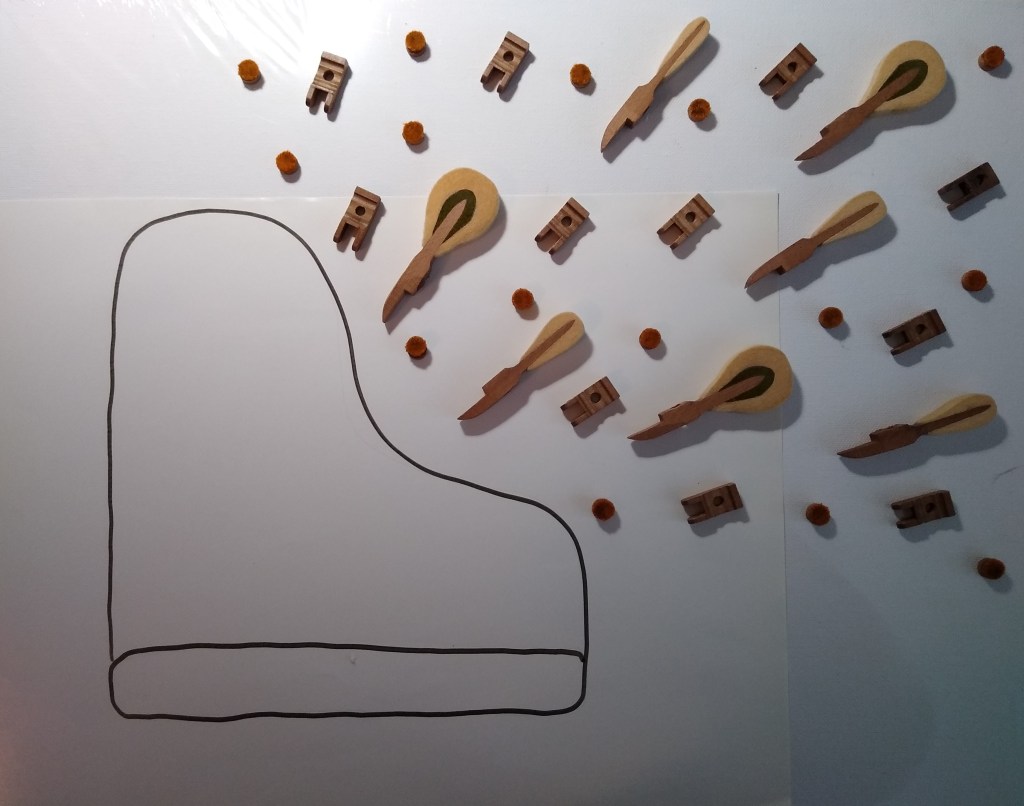
First I drew a rough sketch of a piano on a sheet of paper, then placed it where I wanted it on the canvas.
Next, I selected a variety of action pieces and arranged them randomly, though not haphazardly, on the canvas.
The next step in the process was to decide how to paint the background. Lately I’ve been watching quite a few fluid art demonstrations, and I considered using one of those methods for this one. However, my most recent attempt was pathetic, so I decided to stick with a tool I’m familiar with, the brush, but to use it more abstractly than what is usual for me.
Another YouTuber I’m particularly fond of is Molly of Molly’s Artistry. She usually does fluid art, and particularly Dutch pours, but once in a while she’ll show us an abstract brushed painting, often combining the brush with fluid art techniques. She did just that in one particular video, and I loved it! However, I thought the balloon kisses that she added toward the end would be too much for what I wanted to do, so I watched her paint the canvas several times, slowed it down and watched again, then paused the video at 1:28 and on a scrap canvas attempted to duplicate what she had done up to that point. Here’s the video I modeled:
When I was happy with the result and had gotten plenty of feedback from my family members, I watched Molly again, then painted a fresh canvas.
Another decision was whether or not to paint the action pieces. I liked them unpainted, but ultimately (obviously) decided not to leave them that way.
To add emphasis to the piano, I filled it in by applying heavy body black and white paint with a palette knife. I wanted this to also be textured and rough. When the paint was dry, I applied two coats of gloss varnish, then glued the action pieces in place, and finally “sewed” on the piano string using lengths of wire for “thread,” reinforced on the back side of the canvas with buttons and hot glue.

Oh, yes. . .the name? “Fortissimo,” because my mind hears the music loud and clear when I look at this canvas. Future pieces in this series will likely be named after their featured instrument, but for this one, “Piano” would never have sufficed. Don’t you agree?
♬ ♬ ♬ ♬ ♬ ♬
Thank you for joining me on this tour of the studio. I look forward to seeing you on the next one. Until then, I invite you to check out photos of my other work in the gallery. Enjoy the rest of your day!
