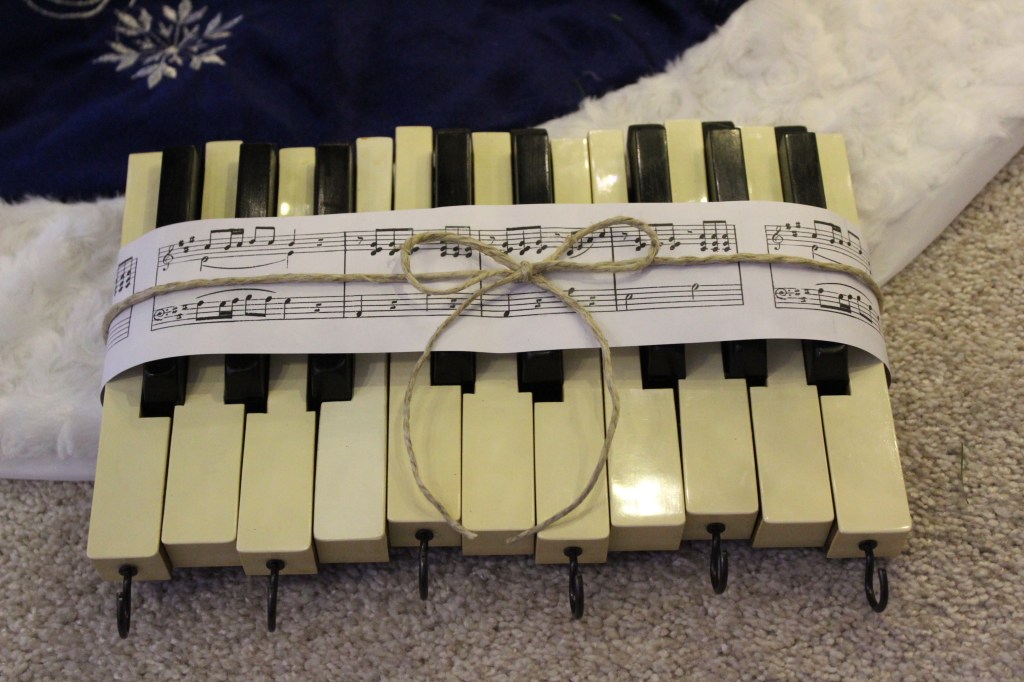
Welcome back to my piano art studio. Today’s tour features a piece known as “Keyed Up,” one of the longest-standing and most popular items in my inventory.
The first thing I ever made with piano keys was what I now call the small “Keyed Up,” a set of keys with their extensions cut off, leaving only the black and white parts we all recognize as piano keys. They were glued together in a staggered formation, rather than straight in a row, and I installed cup hooks on every other key. The first one utilized two full octaves, but I immediately reduced the length to 1½ octaves, not only to help me better meet the demand for this item, but also to make it more stable.

Making a “Keyed Up”
Preparation
First, the keys have to come off the piano. This is usually easy, but not always. It depends on how the piano is assembled. I can generally figure out fairly quickly how to remove the music shelf, action, fallboard, and any other strips of wood that stand in my way of getting to the keys. However, one manufacturer in particular (Knabe) has me stumped on a rather old piano. I never was able to get the fallboard off because I couldn’t figure out how to access the screws upon which it pivots. But I needed the keys to fill an order, so I carefully maneuvered them up and off their pins then slid them out from under the fallboard.
As I remove the keys from the piano, and throughout the preparation process, I try to keep them in order. That is helpful, not only for creating the “Keyed Up,” but also other pieces in which I use keys together. They are always filthy dirty, so they get a bath in the sink with warm water and a special cleaning solution. I learned not to let them soak because soaking tends to loosen the glue that holds the ivories (whether genuine or not) and ebonies onto the extensions. Instead, I place them a few at a time into the water bath, scrub them on all surfaces with a grout/tile brush, then place them on wire racks to air dry. Drying time takes at least 24 hours, and preferably 2-3 days. Another hard lesson learned was that the “Keyed Up” can warp if there’s any moisture in the keys when it’s assembled. That happened to the set I made for myself. I haven’t received any negative feedback from others, so hopefully mine was the only one that messed up.

Saved from the fire 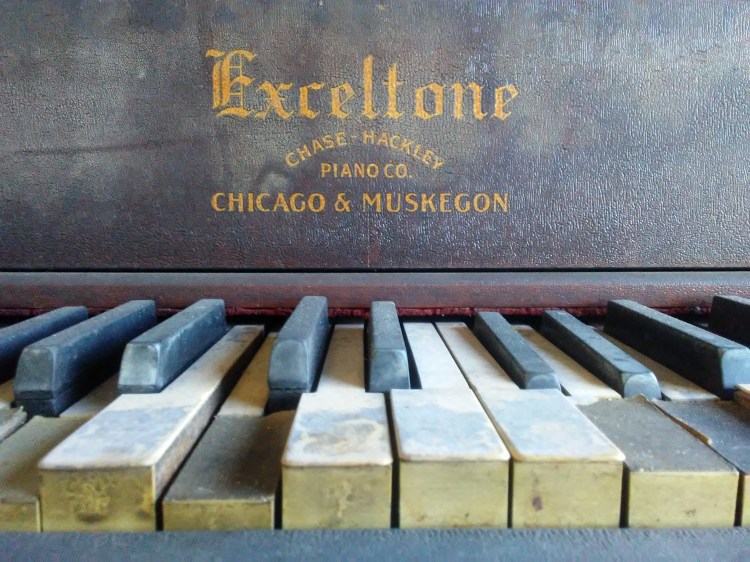
Missing their ivories 
The fall board is stuck 
Almost ready to lift them out 
All clean and left to dry
Once the pieces are thoroughly dry, if I’m making a small “Keyed Up,” I take the keys to my table saw and cut the extensions off. The extensions go into a bin for use in another project, and the cut ends of the keys get a careful sanding on the belt sander.
Assembly
Using wood glue, I mount the keys to a piece of 1/4-in. lauan plywood. I purchase the plywood in 2′ x 4′ sheets and cut it down to roughly 6″ x 10″ and sand all edges. When the glue is applied and all the keys are in place, I then clamp it down very securely and leave it to set up for a few hours or overnight. Old extensions cut from other keys help me apply equal pressure to all the keys.

Finishing Touches
When the clamps come off, I drill pilot holes into every other key, then screw in the cup hooks. On the back I place a half-sheet story behind the art, including details about this particular piece, then add two sawtooth hangers across the top and two felt bumpers (felts from the piano) in each of the bottom corners.


From the beginning, I designed the “Keyed Up,” both large and small, as a place to hang your car/house keys—keys for keys, if you will. Then one day a lady purchased a “Keyed Up” at a craft fair and told me, “I’m going to use this to hang up my necklaces.” What a brilliant idea! Now I’ve done the same, as have several others.

A Fresh Idea
The large “Keyed Up” includes the keys in their entirety—extensions and all. The term extension may be my own word, and it refers to the bare wood portion of the key that extends into the body of the piano and interacts with the action. On diagrams, I’ve never seen any other designation than simply key to represent the whole.
It didn’t take long for me to realize that not all keys are the same. For the most part, the dimensions of the visible portions of the keys (the ebonies and ivories) are standard, but the lengths and styles of the extensions vary greatly, depending upon not only the size of the piano but also on the manufacturer. When I used shorter keys, I had no trouble leaving the bare wood portion “blank.” But when I began creating large “Keyed Ups” using the longer keys of upright grands, I received feedback suggesting that I come up with a way to fill in the negative space.


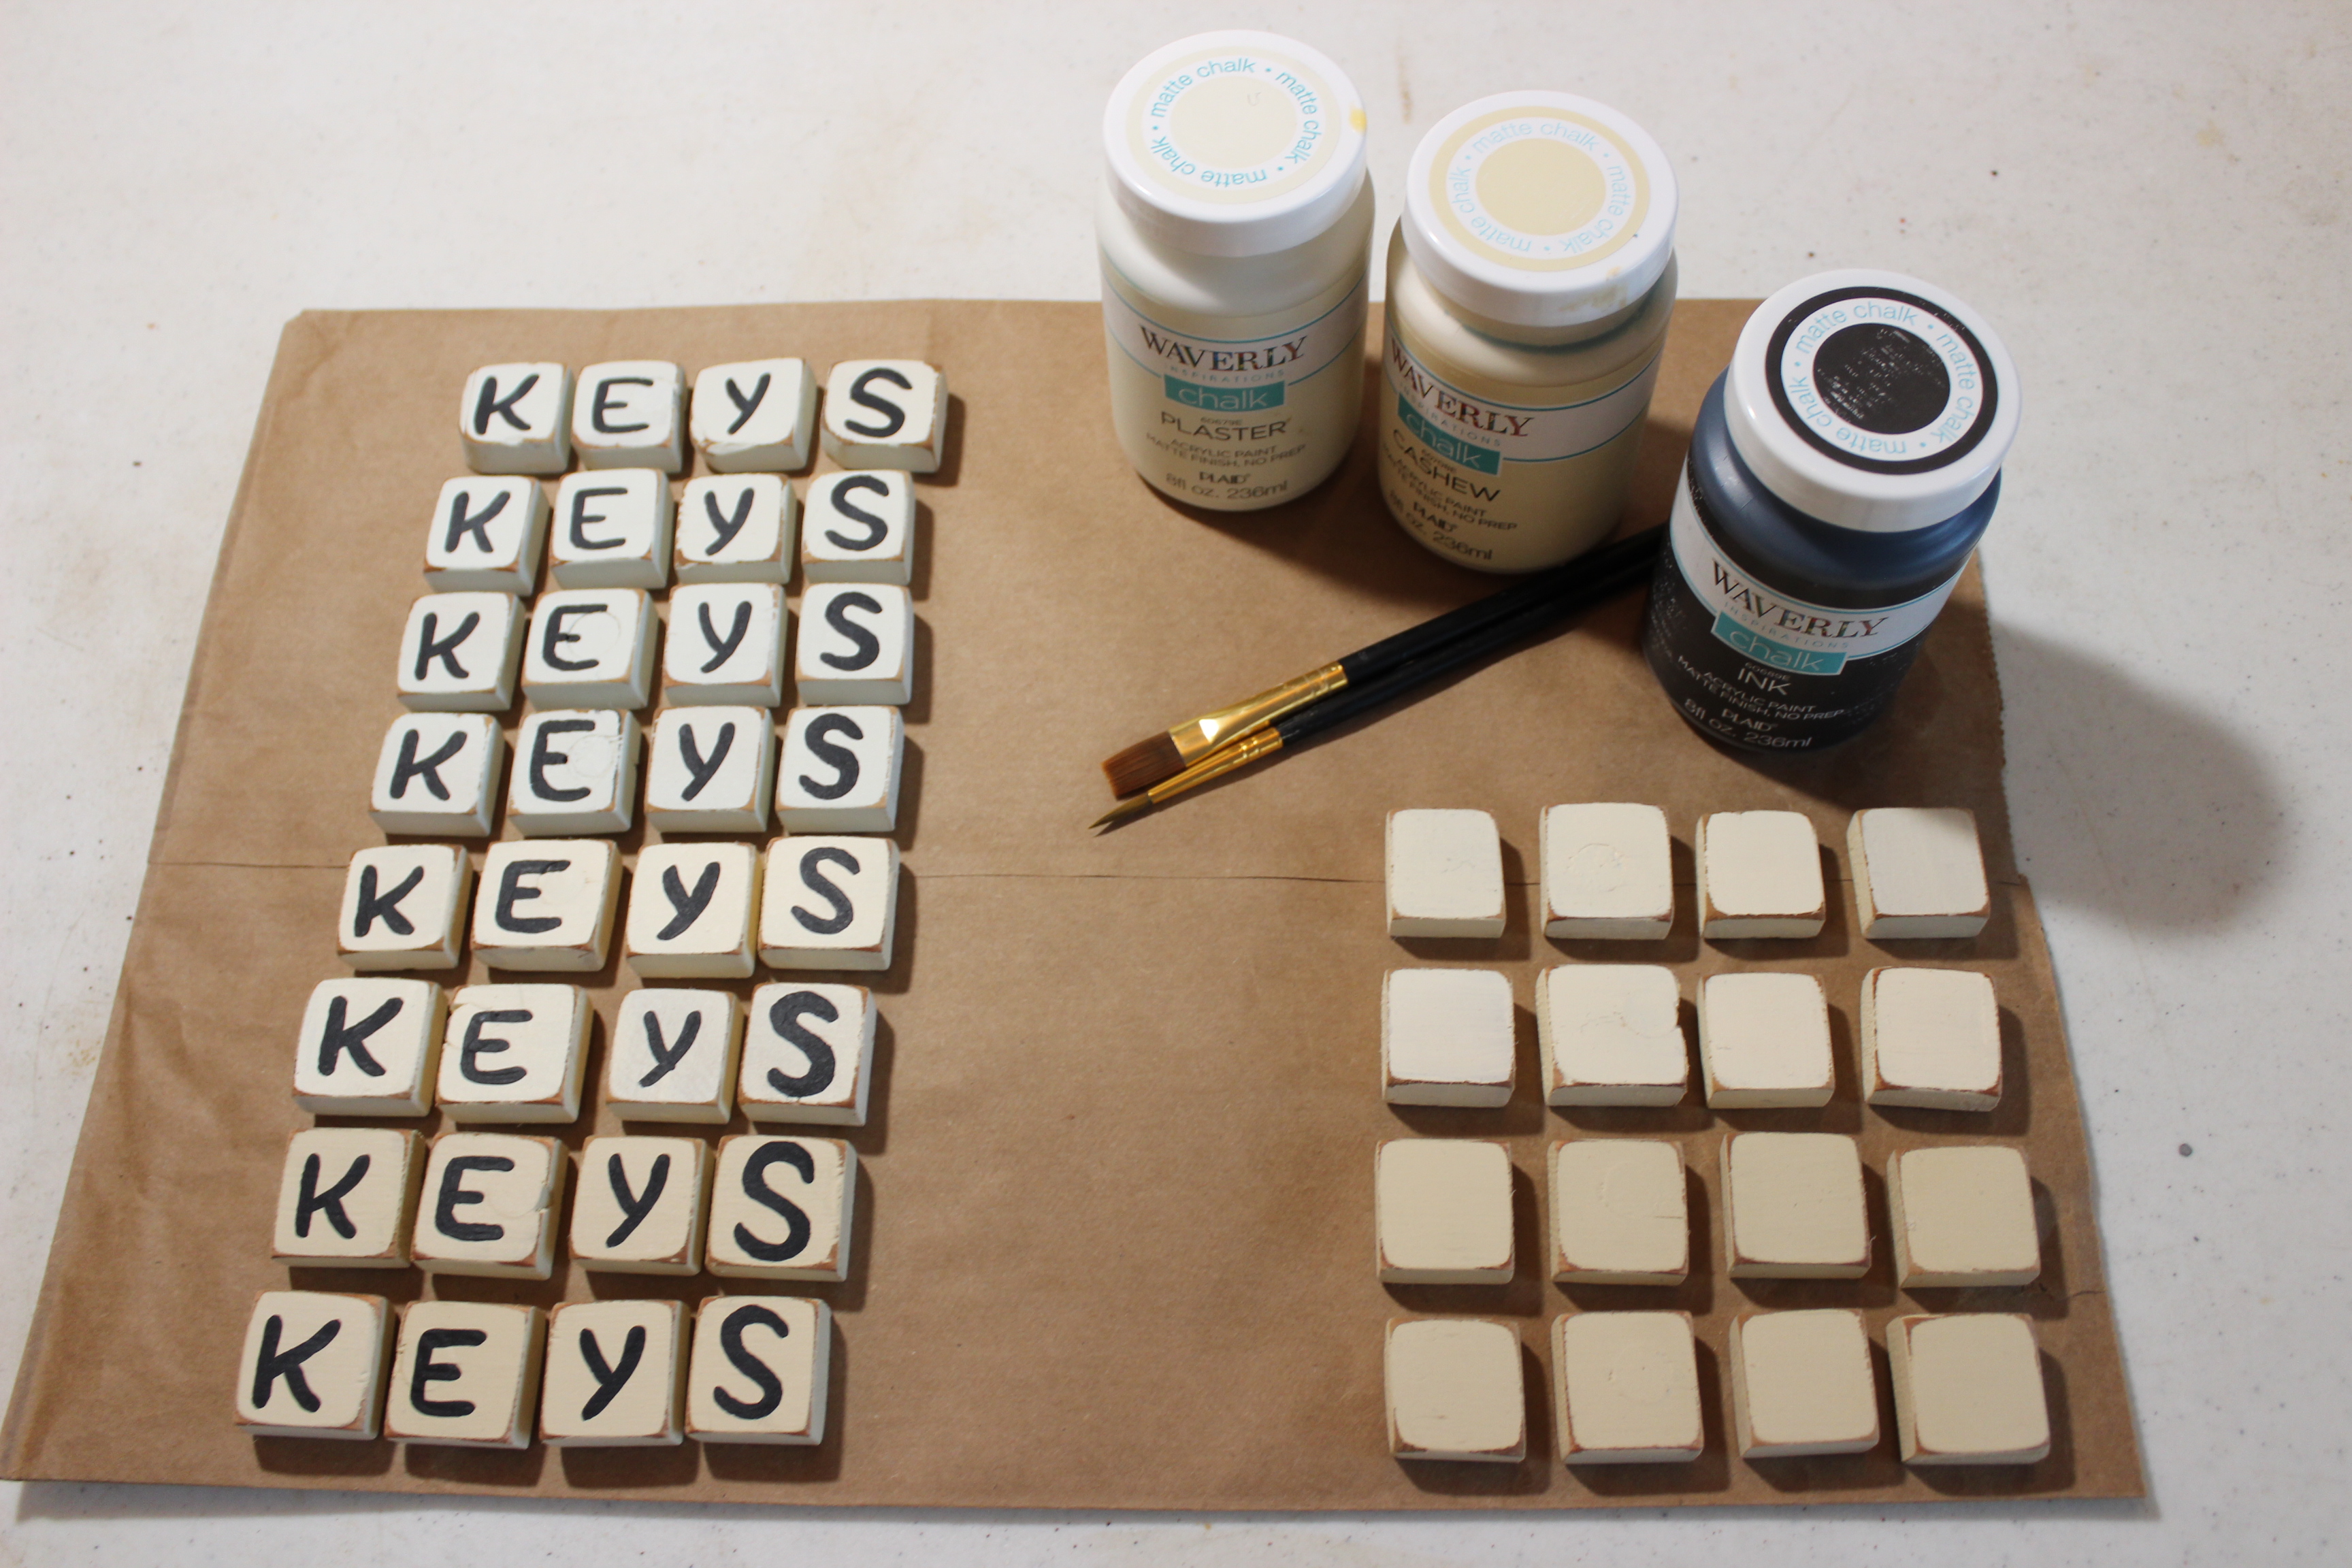


So I came up with an idea to fill in the space using a hammer from the piano and some hand-crafted lettered tiles (made from key extensions). I like it, but this isn’t for everyone. What if the buyer wants to hang something other than keys? Granted, “KEYS” could refer to the part of piano represented here, but maybe there’s something better—or at least different—that I can do.
Perhaps I could write a message across the key extensions. This seems like a good idea, but it’s been hard trying to decide exactly what to write on them. Should they all be different from one another? All the same? And if the same, what in the world do I choose?
Will you help me decide? If so, please complete the survey below. And if you like, you can go a step further by leaving me a comment with your own suggestion or feedback.
Thank you for joining me on this tour of the studio. I look forward to seeing you on the next one. Until then, I invite you to check out photos of my other work in the gallery. Enjoy the rest of your day!